
About This Article
This article will show you how to properly care for the pump heads on your GHL Doser 2.2 Maxi. Following the information provided below will help you get the most usage out of your dosing pump.
Assembly and Lubrication of Pump Head
Follow the steps below for proper assembly instructions.
STEP 1: Prepare the roller unit
For testing purposes, you must first assemble the roller unit outside of the pump head without lubrication. This is done to ensure that the rollers can spin without obstruction before any lubricant is applied.
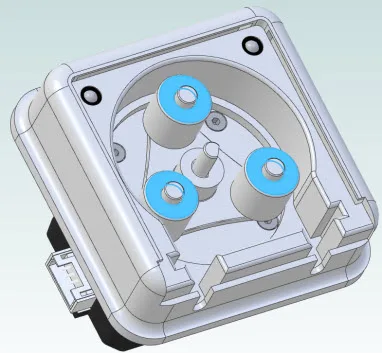
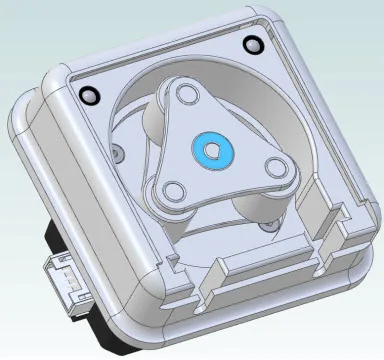
1. Install the 3 rollers on one axle as shown in the photo, then place the upper rotor on top.
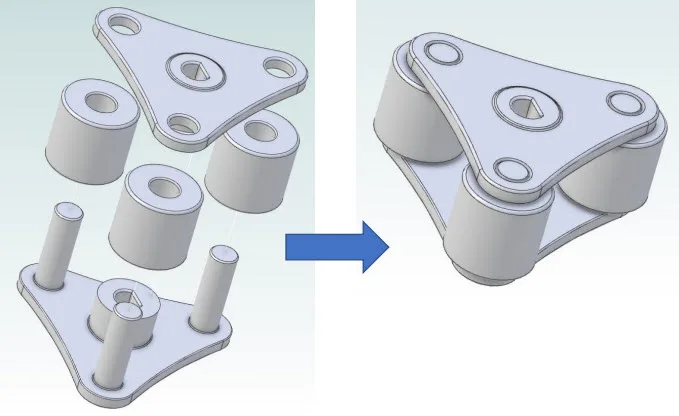
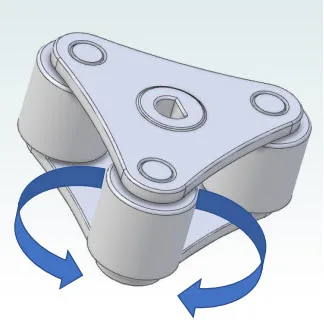
2. Test each roller by manually spinning it around the respective axis. All rollers should turn easily and not get stuck in any position. Run this test in both directions for at least one complete rotation.
Here are some examples of what may cause this to occur:
- Incorrect positioning of roller on axle.
- SOLUTION: Due to the manufacturing process, the rollers and axles are minimally conical (so-called draft). This means that it may be enough to simply put the roller(s) on the other end first, in order for the roller to rotate better.
- Particles (dust and/or plastic) trapped between the roller and axle
- SOLUTION: Remove particles inside and outside of roller and on axle.
- Irregularities, burrs and/or non-smooth surface on axle
- SOLUTION: Carefully smoothen with a suitable tool (i.e. small fine file, fine sandpaper, abrasive pads, steel wool, etc.) without damaging the axle (do not create grooves or notches). Remove any loose particles that may have formed.
Proceed with final assembly and lubrication ONLY AFTER you’ve tested and confirmed that all rollers can spin smoothly.
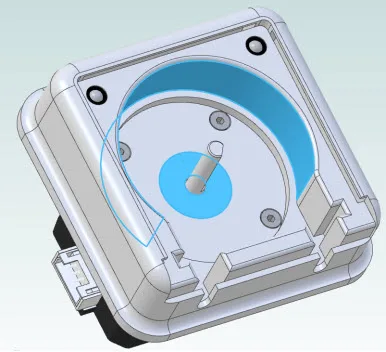
STEP 2: Installation and Lubrication
For optimal performance, we recommend using food-grade silicone paste that is temperature resistant. We do not recommend Vaseline as it may cause friction between the rollers and head.
1. Apply a thin, full coat to the areas marked in turquoise below. Make sure to apply not too much or not too little. Lubricate the contact surface for the lower rotor and tube.
2. Install the lower rotor as shown, lubricate axles and contact surface for the rollers.
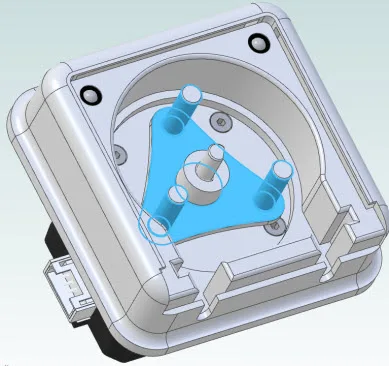
3. Install the rollers, lubricate the upper surfaces of the rollers.
4. Install the upper rotor and lubricate the surface in the direction towards the sliding cover.
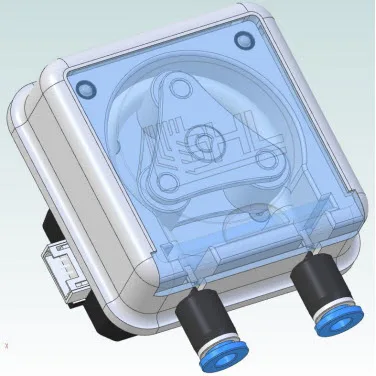
5. Install the tube with fittings by turning the roller unit by hand, then insert the tube retainer. Lubricate the tube in accessible places on the inside (towards the rollers), lubricant will later be distributed on the tube and rollers during operation.

Too short; tube will be too tight.
Too long; tube may move away from its intended position on the rollers during operation and cause damage.
NOTE: During use, the tube will become slightly longer. This is normal and has already been accounted for in the original length.
6. Insert the sliding cover, connect external tubes and resume usage.
- The lubricant must first be distributed
- The tube is not yet flexible enough; break-in period
Afterwards, the pump will run more smoothly as long as there are no blockages and unusual noises.