In this article, you will find general information about the GHL Connect app along with info on how to access your GHL device through the app.
The details of this article apply to modern GHL devices such as ProfiLux Controllers (4 / Mini Wi-Fi / Light), GHL Standalone Dosers (2.2 / 2.2 Maxi) and Mitras LX7 fixtures.
- Via your Wi-Fi network (mobile device & GHL device must be connected to your Wi-Fi)
- Via GHL device hotspot (mobile device must be connected to your GHL device’s hotspot)
- Via myGHL cloud
If this is your first time setting up your device, we recommend following the instructions provided in the “Initial Setup” article in the Knowledge Base. This will be the quickest option for getting your device onto your Wi-Fi network and connected via the GHL Connect app.
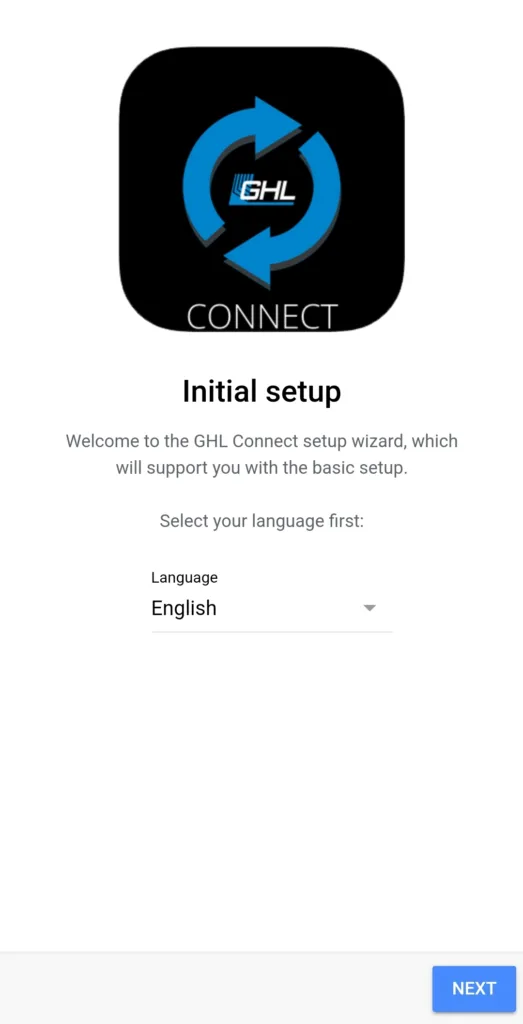
Initial Setup
Download the GHL Connect app on your smartphone or tablet. The app is available for download in the Play Store or App Store.
Simply follow the instructions of the wizard.
During the process you’ll be asked if you also want to register for the myGHL® cloud service. You can do that now or come back to it later in the settings menu.
If you are trying to setup multiple Mitras LX7 fixtures where one is the master and others are slaves, you only need to power ON the fixture which will be used as the MASTER LX7 at this time.
How to manually add your device to GHL Connect
With the GHL Connect app, you have the option to manually add any GHL primary device, even after the initial setup is completed. This comes in handy for users who wish to create a dedication connection profile.
A connection profile is what you use to connect to your GHL device. This is simply a profile which tells the app what device you wish to connect to and how (via Wi-Fi or hotspot). First time users will notice that they have no profiles to choose from…this is normal.
Connection profiles are automatically made for you after completing the “Initial Setup” steps for your GHL device.
New profiles can be added at any time. Continue reading for more information.
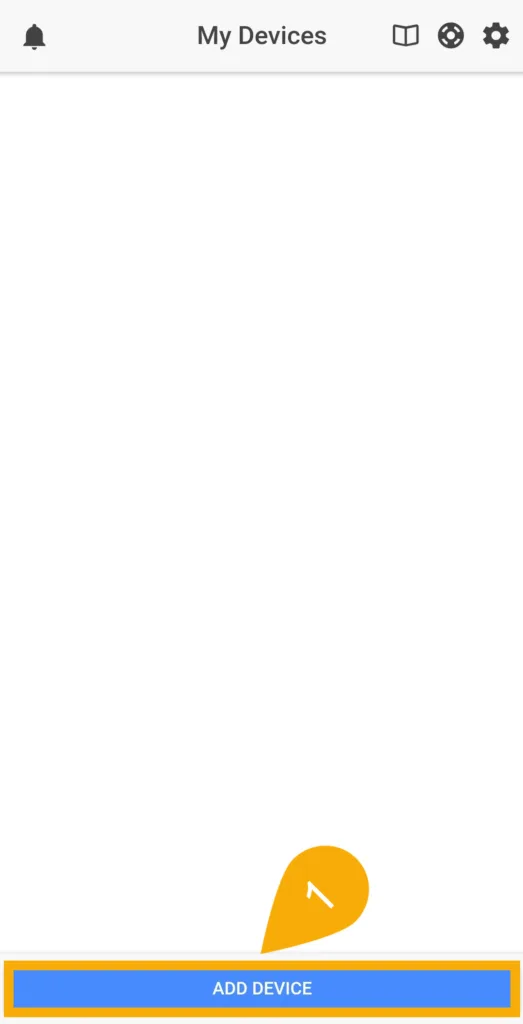
- Add your device to the app by pressing Add device.
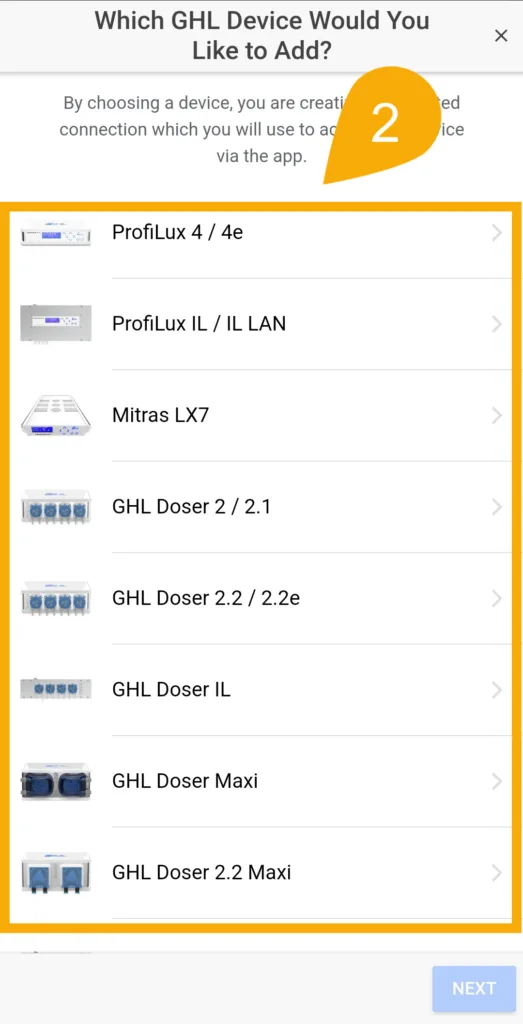
- Select the GHL device you have.
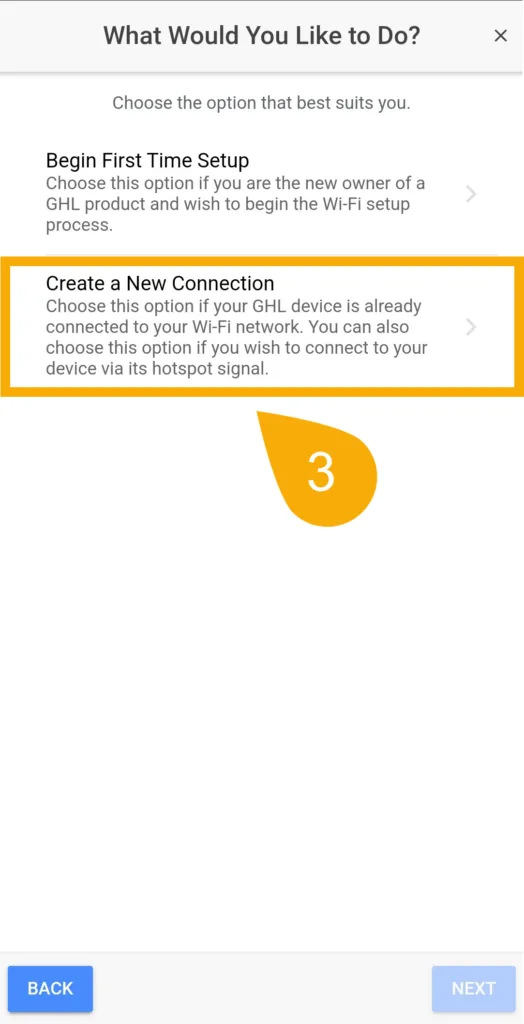
- Choose Create a New Connection.
We have provided instructions for both options below.
— Creating a profile for Wi-Fi connection
If your GHL device is already connected to your Wi-Fi network, follow these steps:
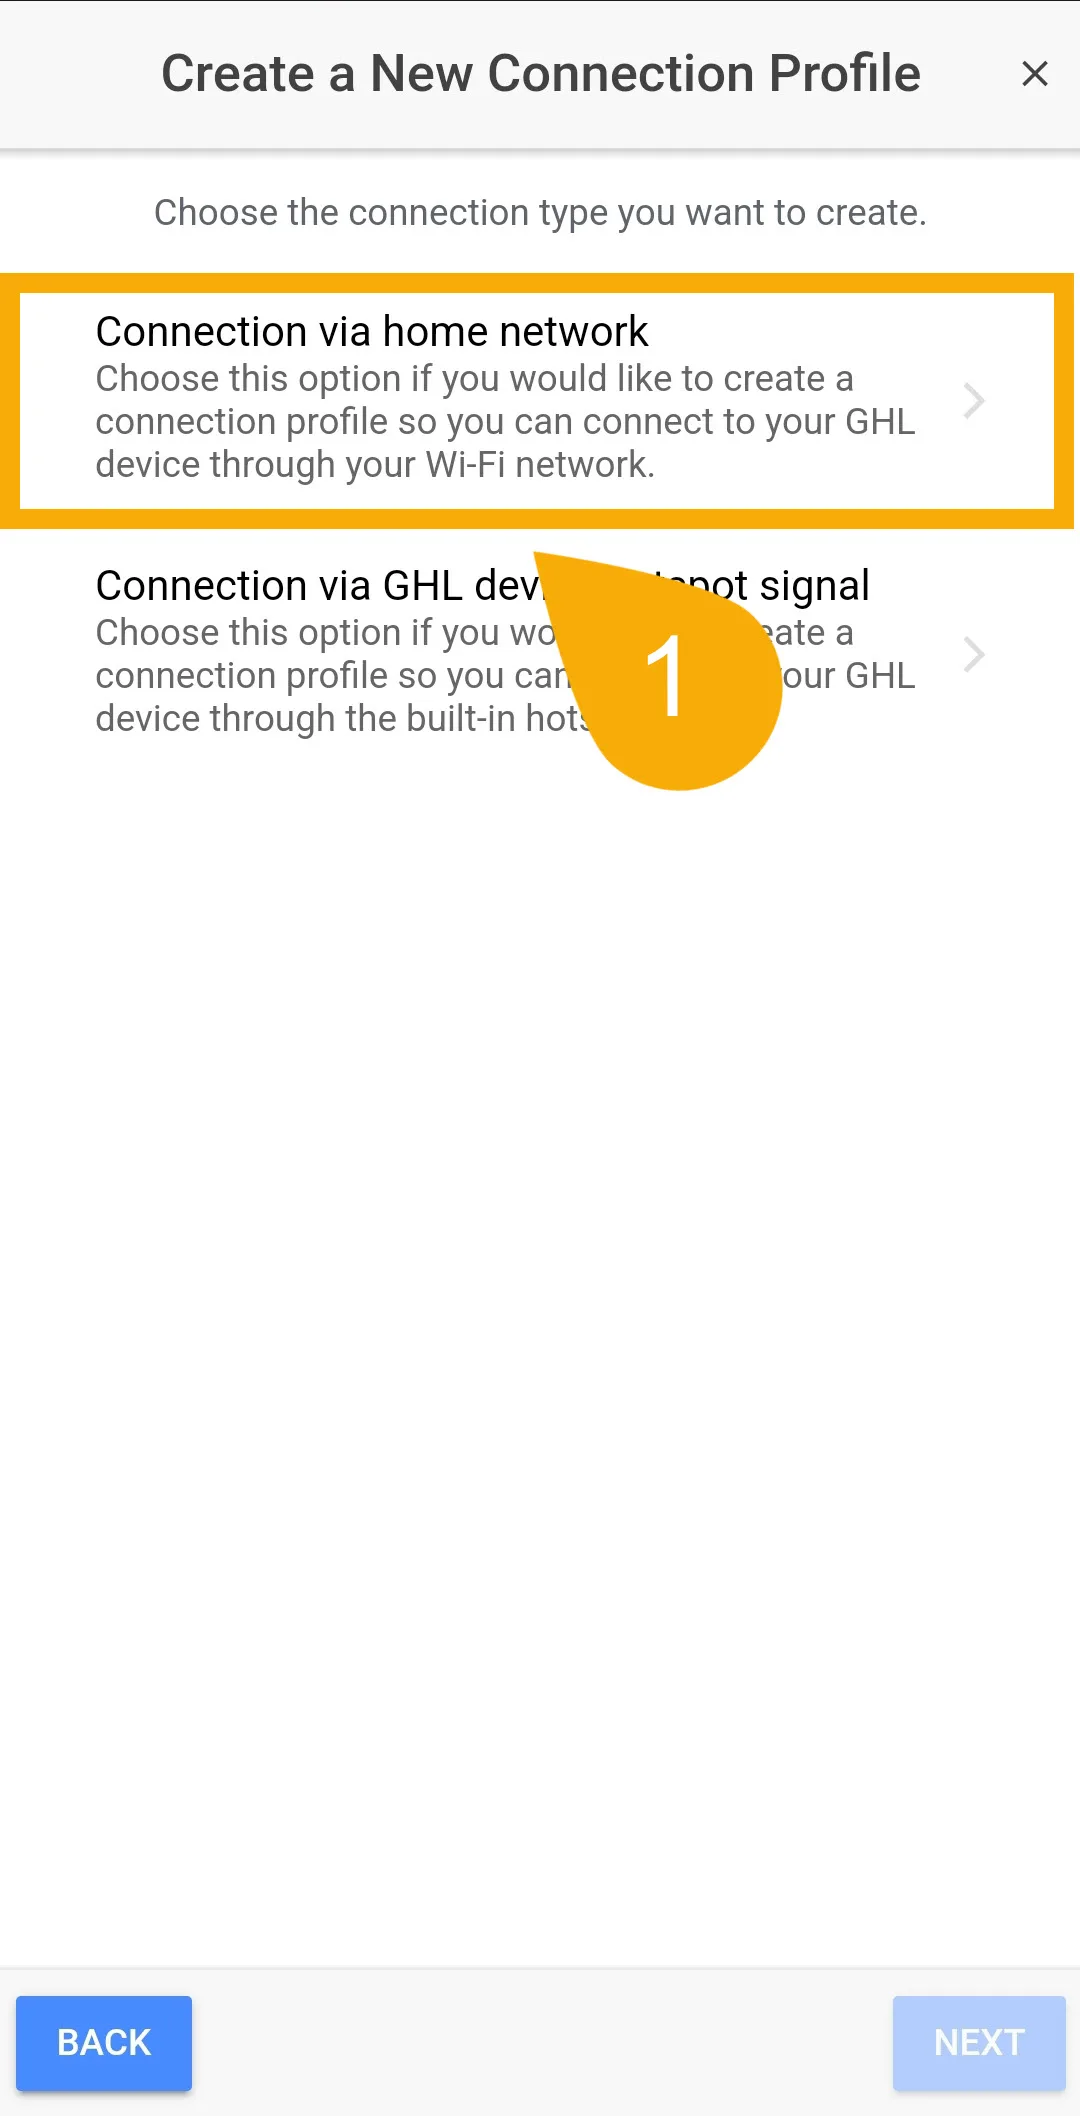
- Select Connection via home network
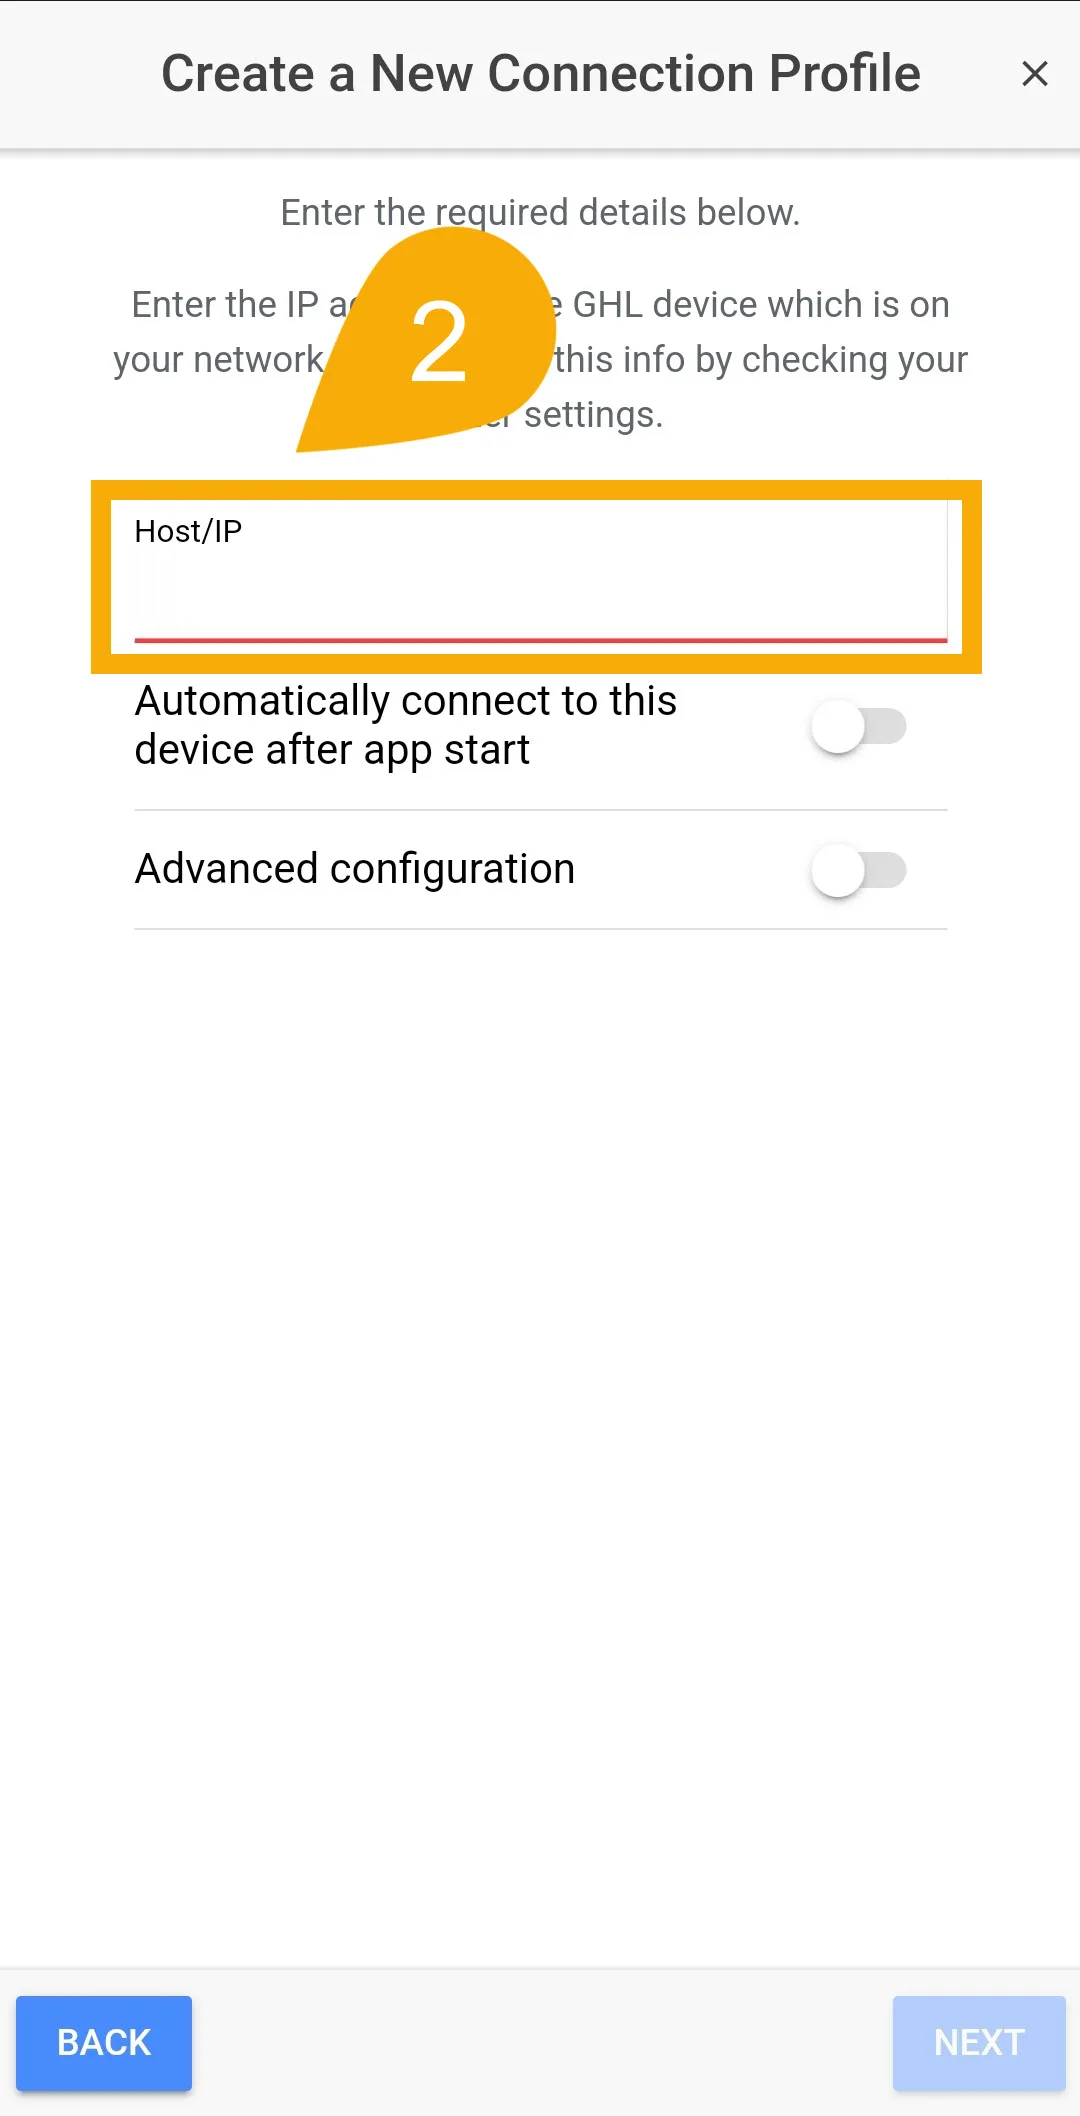
- In the Host/IP field, enter the IP address of the GHL device which is already connected to your Wi-Fi network. You may leave everything else on the page as-is and press NEXT.
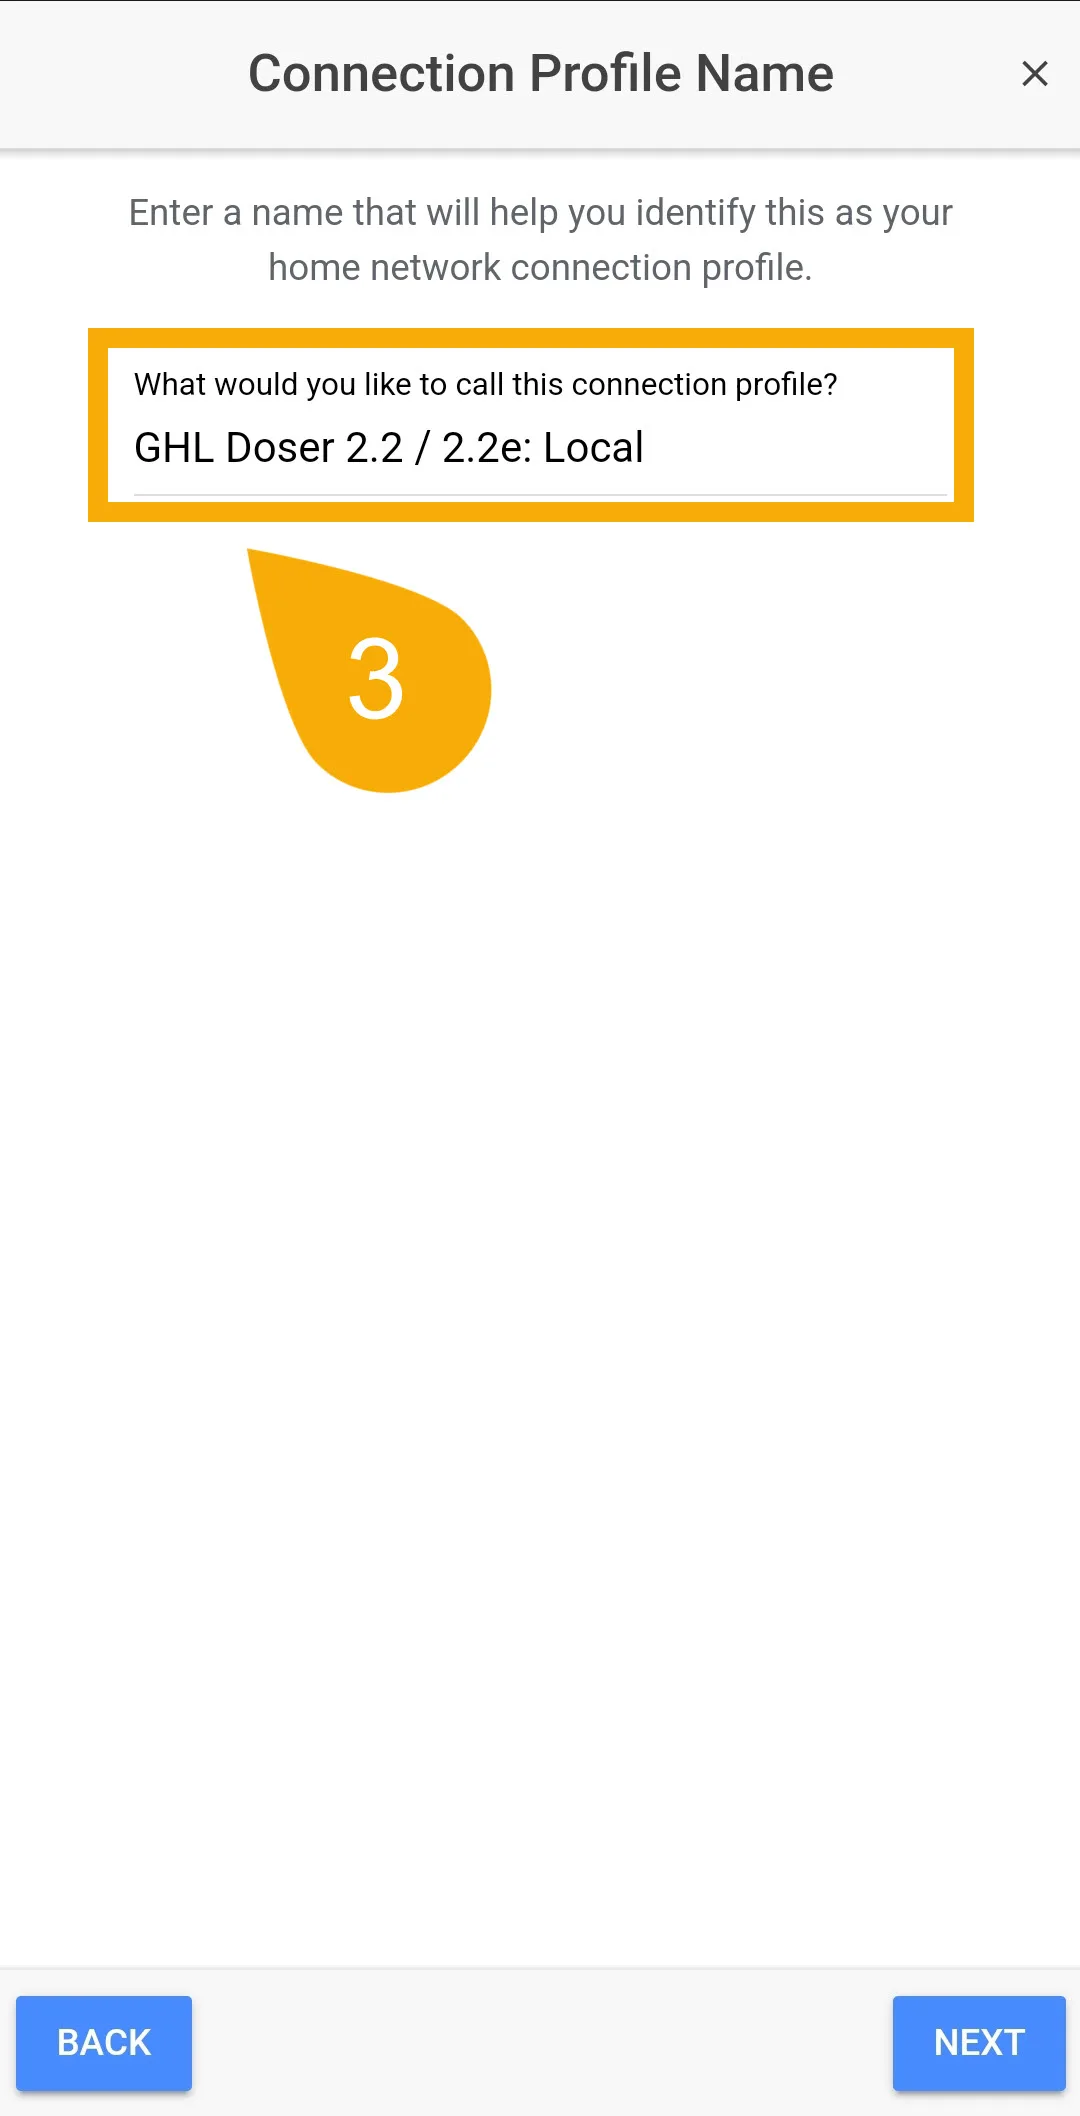
- Give this connection profile a name; this is how you will identify it as your dedicated profile for connecting over Wi-Fi.
- Press DONE and the profile will be listed on the “My Devices” page.

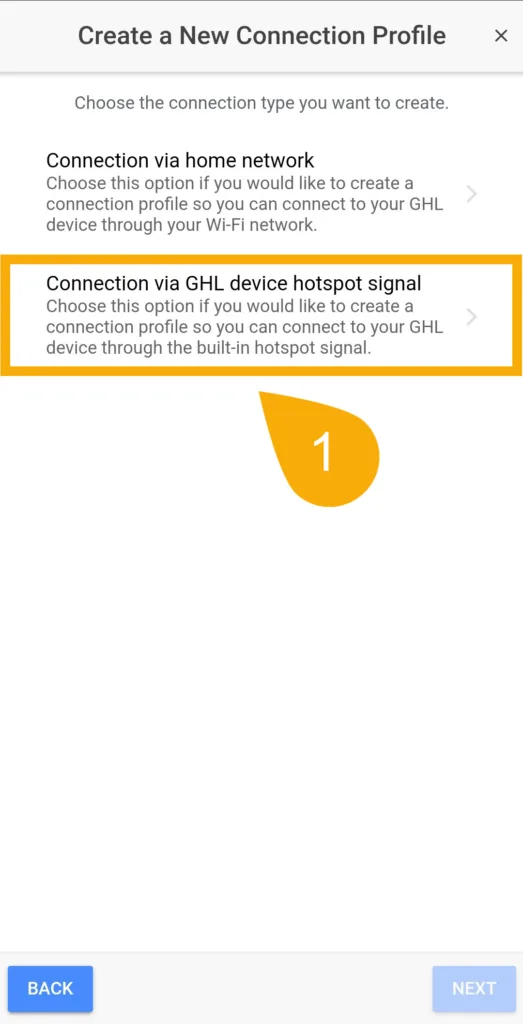
— Creating a profile for Hotspot connection
If you wish to connect to your GHL device via the Hotspot connection, follow these steps:
- Select Connection via GHL device hotspot signal
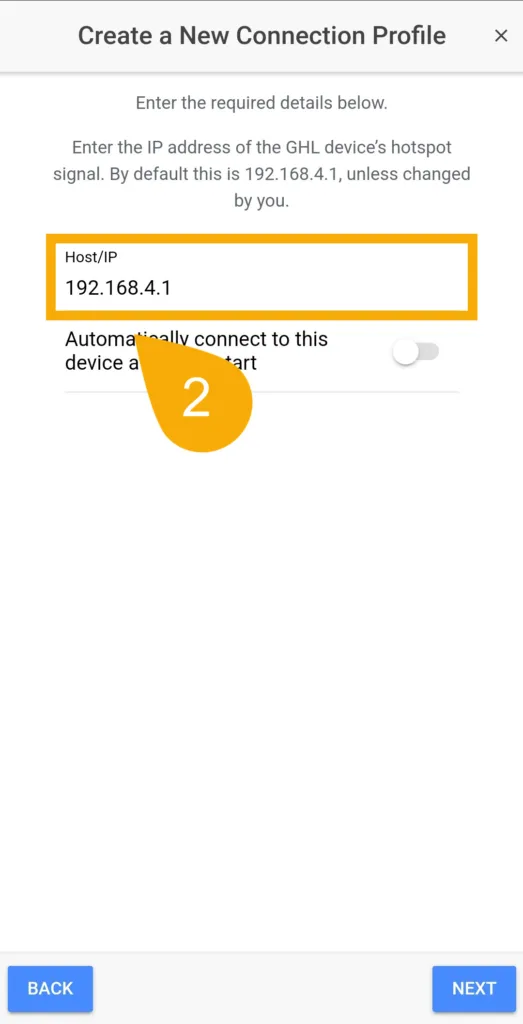
- In the Host/IP field, leave the IP address as-is. When done, press NEXT.
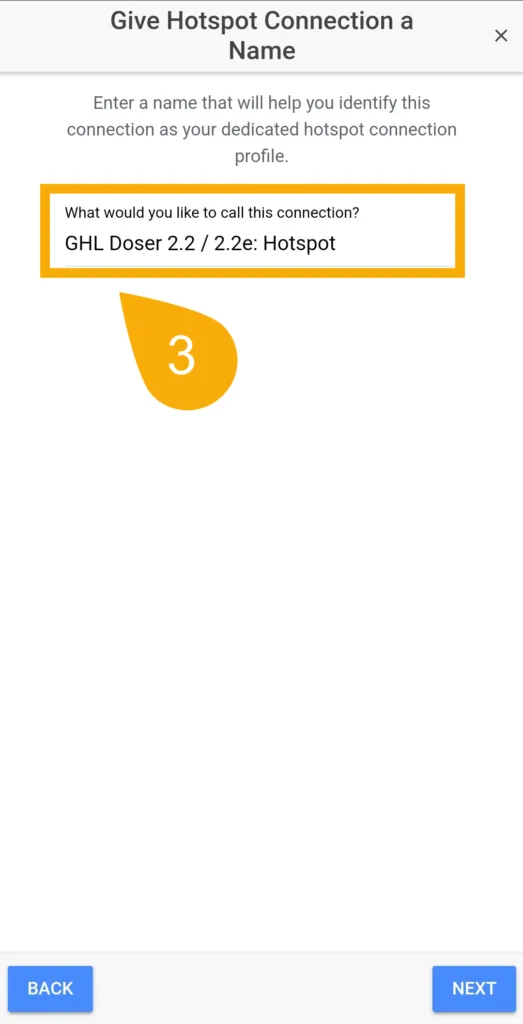
- Give this connection profile a name; this is how you will identify it as your dedicated profile for connecting via Hotspot.
- Press DONE and the profile will be listed on the “My Devices” page.
If you ever need to connect via the hotspot connection, do the following:
- Use your phone or tablet and search for nearby Wi-Fi networks.
- Select the GHL hotspot network (GHLDEV-XXX (XXX is a placeholder for a device-specific code) or hotspot name as set by you).
- Enter password Starfish if prompted (Starfish is the default password).
- Once connected, go to the GHL Connect app and choose the Hotspot connection profile.
— Creating a profile for myGHL cloud
Follow these steps if you would like to have access to your GHL via the cloud on the GHL Connect app. Please note that your GHL device must already be connected to your Wi-Fi network for this to work.
Troubleshooting: Updating your connection profile
Follow these steps only if the IP address of your GHL device was changed by your router.
The IP address of any device on your network (not limited to GHL devices) which was setup with an AUTO IP address can be changed at any time by your router. The most common reasons are:
- Router power outage
- Router power cycle due to undergoing a firmware update
- Changes made to network, etc.
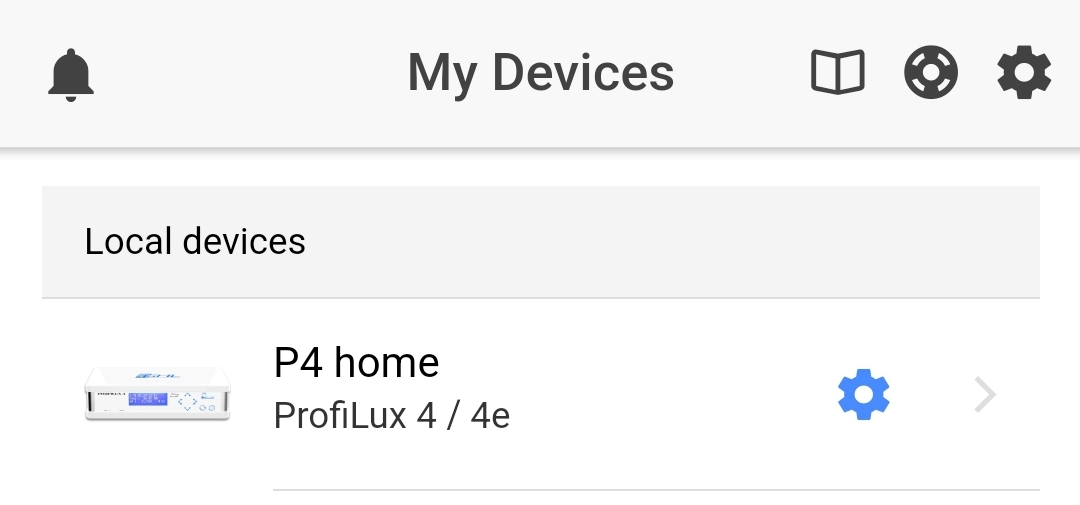
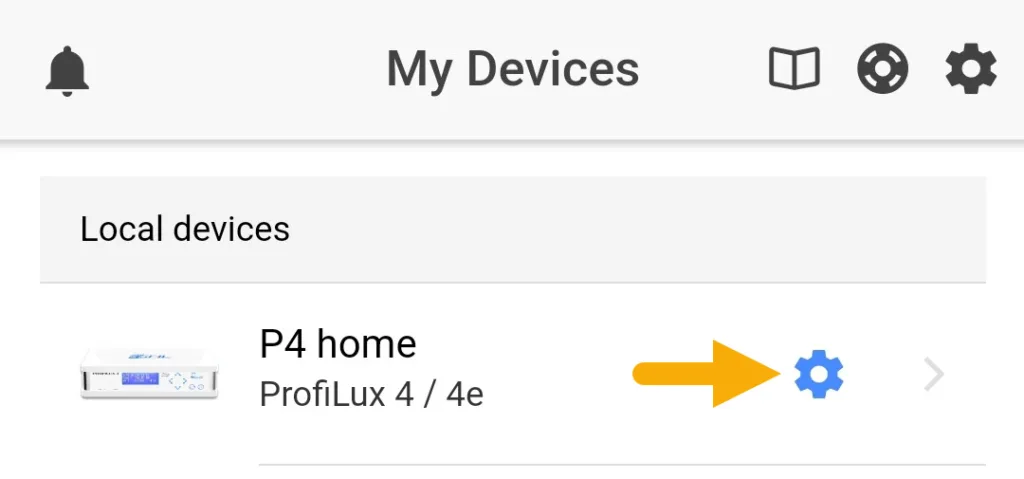
- Open the app and in the “My Devices” page, tap the gear icon that belongs to the profile you wish to edit.
- In the Host/IP field, enter the NEW IP Address of your GHL device
- Press SAVE.
Troubleshooting: Cloud connection profile has disappeared
If you have already added your device to myGHL cloud, but noticed the connection profile has disappeared, follow these steps to recover your cloud connection in the app.