About Propeller Breeze control via ProfiLux
ProfiLux controllers have the ability to control any 1-10V device such as flow pumps, return pumps and cooling fans.
With the proper accessory, you can have the ProfiLux control the fan speed of the PropellerBreeze based on the live temperature values of your aquarium. If your aquarium temperature climbs beyond a certain threshold, the ProfiLux will automatically turn ON the fans at a low speed. If the temperature continues climbing, the ProfiLux will increase the fan speed to increase cooling efforts.
As the temperature drops back down to your desired value, the fan speeds will automatically decrease until they are turned OFF when the desired temperature value is met.
You will need…
Before you proceed, make sure you have the following:
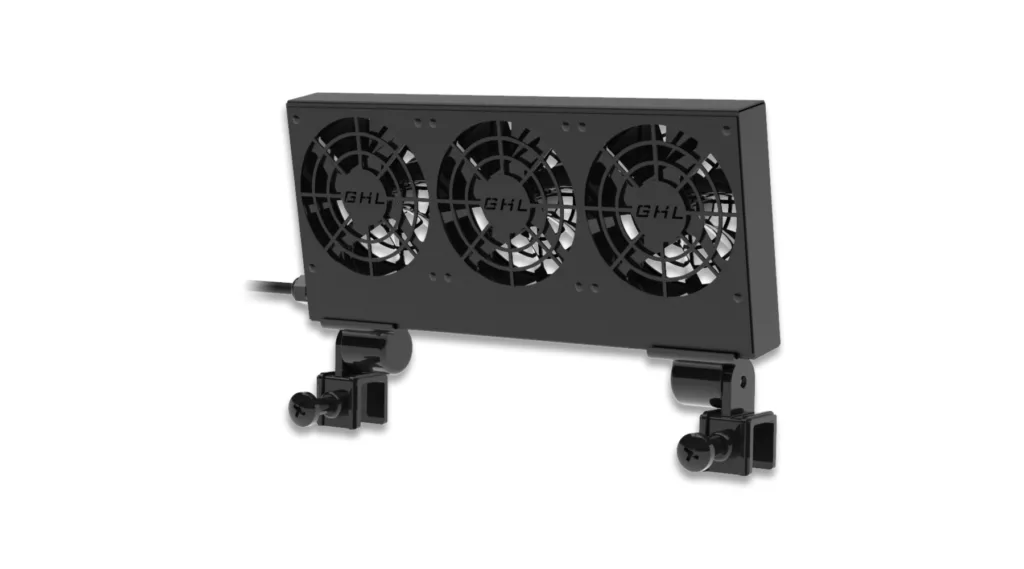
PropellerBreeze fan
Used for cooling your aquarium.
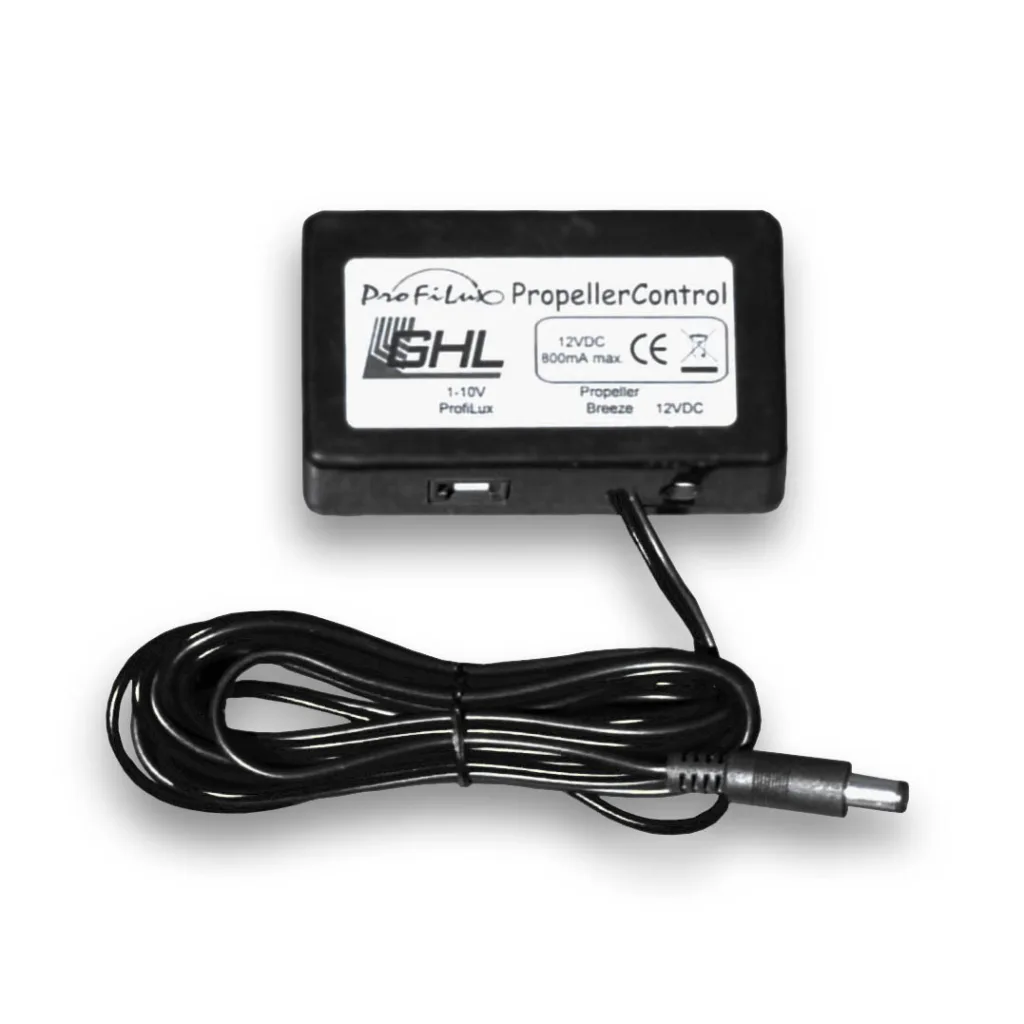
PropellerControl-2.1 accessory
This accessory allows the ProfiLux to control the fan speed of the PropellerBreeze fans via the 1-10V port.
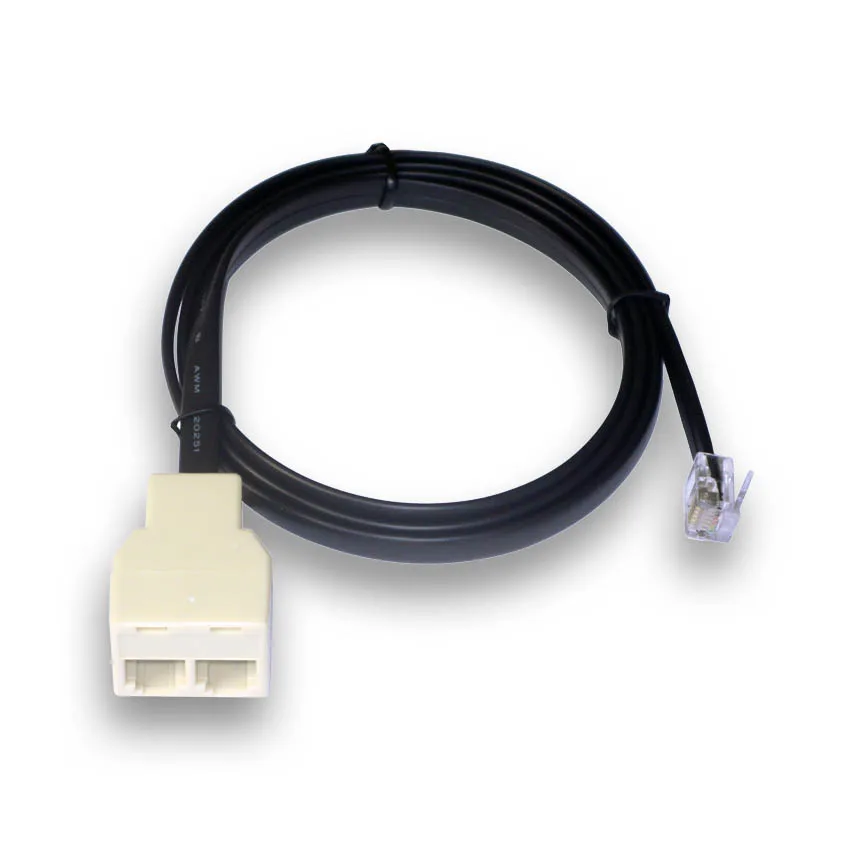
A single 1-10v port can control 2 independent 1-10V channels
Each 1-10V (Yellow) L-channel port on the ProfiLux, expansion cards and expansion box are capable of controlling 2 separate 1-10V channels. You can access both channels by using our YL2 splitter cable accessory; available in 1m, 2.5m and 5m lengths.
Important: Read this first!
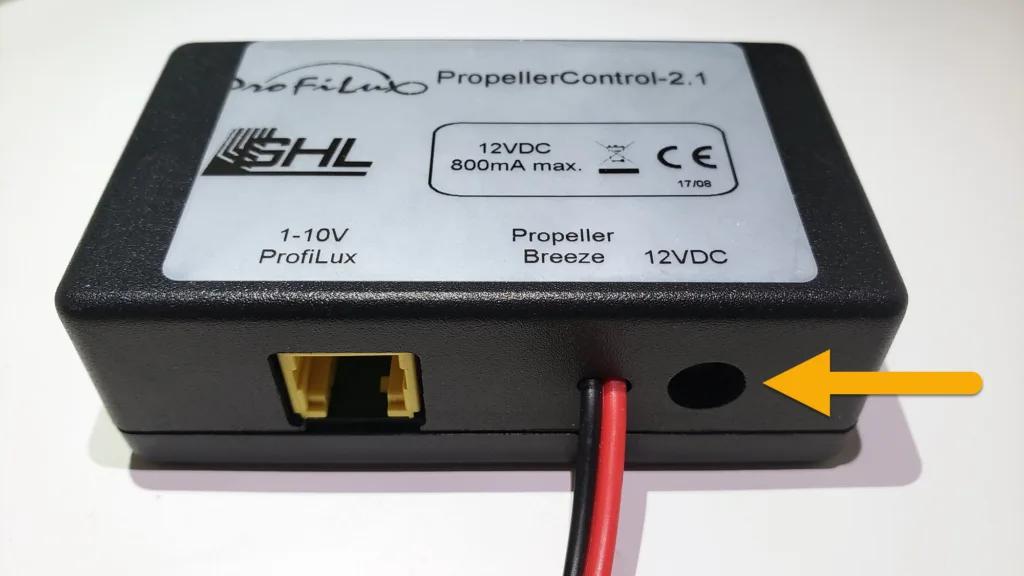
By default, the PropellerControl accessory is set to react to Odd-numbered 1-10V channels. This means that the accessory will only react to odd-numbered channels such as L1, L3, L5, etc.
If you plan to connect this accessory directly to the 1-10V (Yellow) port, no changes need to be made to the PropellerControl accessory.
Using a YL2-splitter cable?
If you are using a YL2 splitter cable and already have another 1-10V device assigned to the first channel (odd-channel) of that port, this PropellerBreeze accessory must be set to react to even-numbered 1-10V channels.
OPTIONAL: Change jumper settings inside PropellerControl
NOTE: Follow these steps ONLY if you are going to assign the PropellerControl to an even-numbered channel (L2, L4, L6, etc).
If you are going to assign this accessory to an odd-numbered channel (L1, L3, L5, etc)…skip this section!
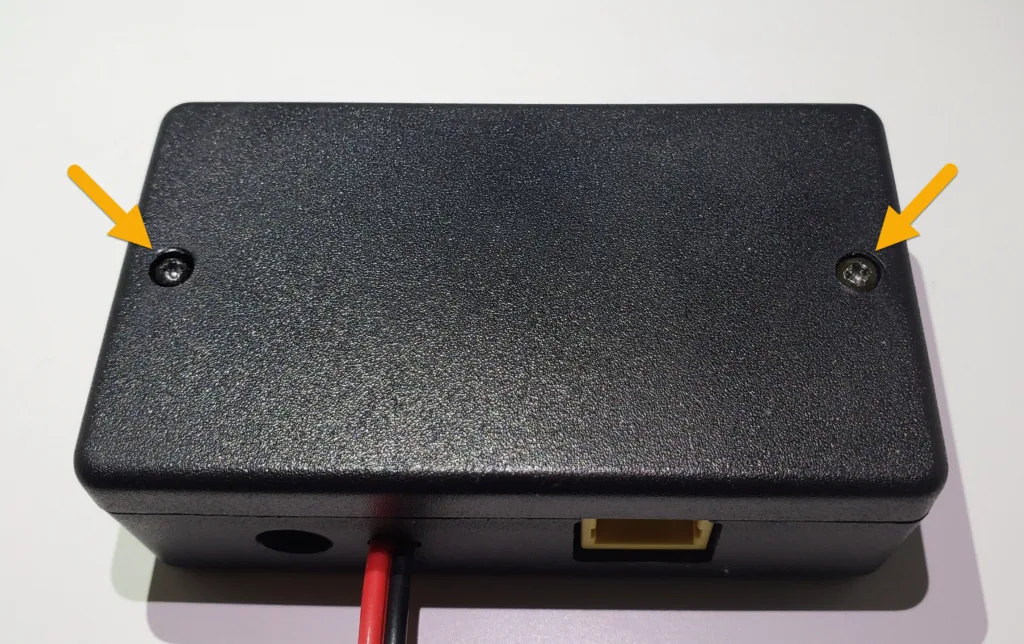
- Using a Phillips head screwdriver, remove the two screws on the back of the PropellerControl accessory
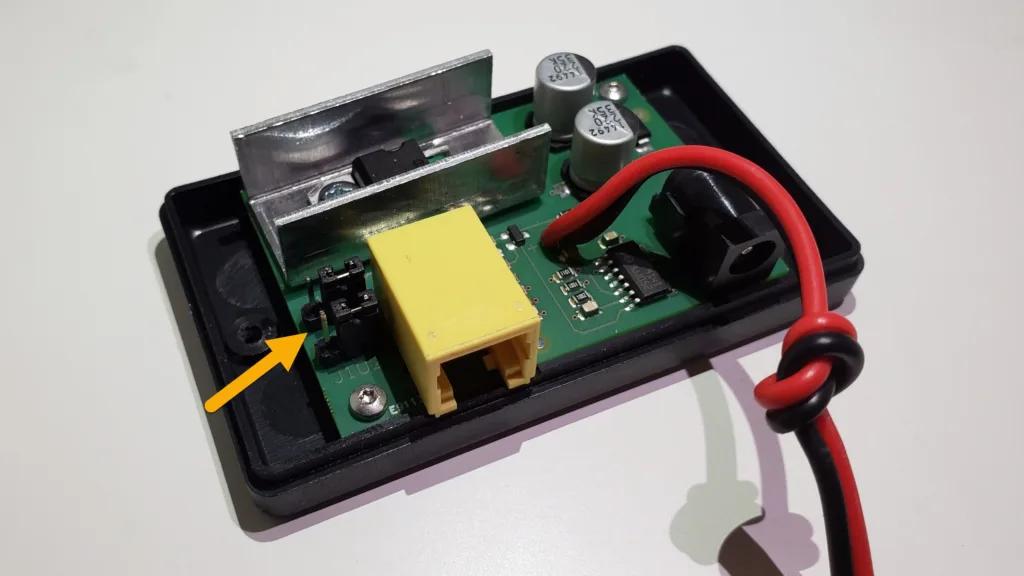
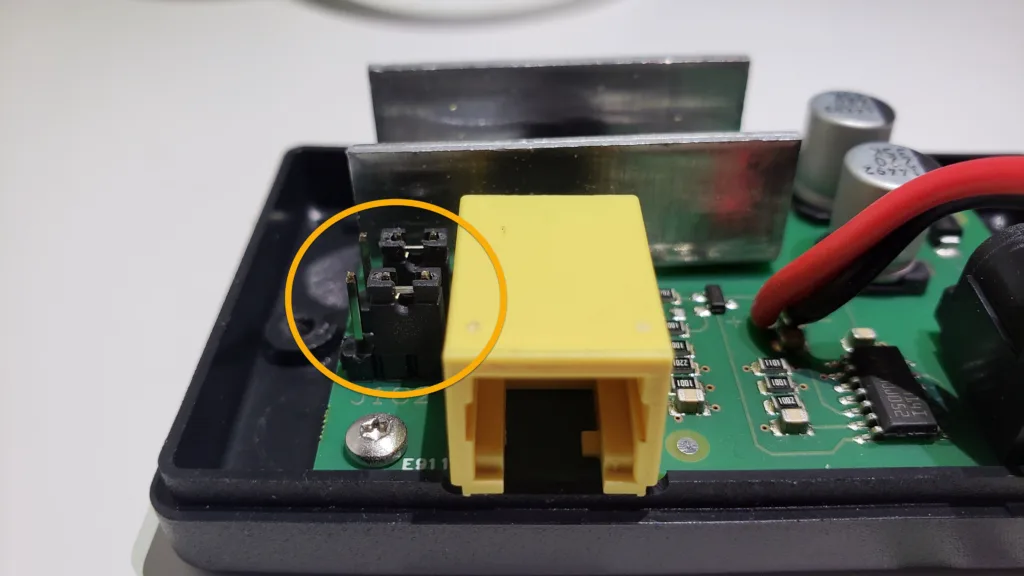
2. Carefully lift the top cover and move the two jumpers to pin 2 and 3 as shown below
3. Close the housing and proceed to the next section
Connect PropellerControl accessory to fan
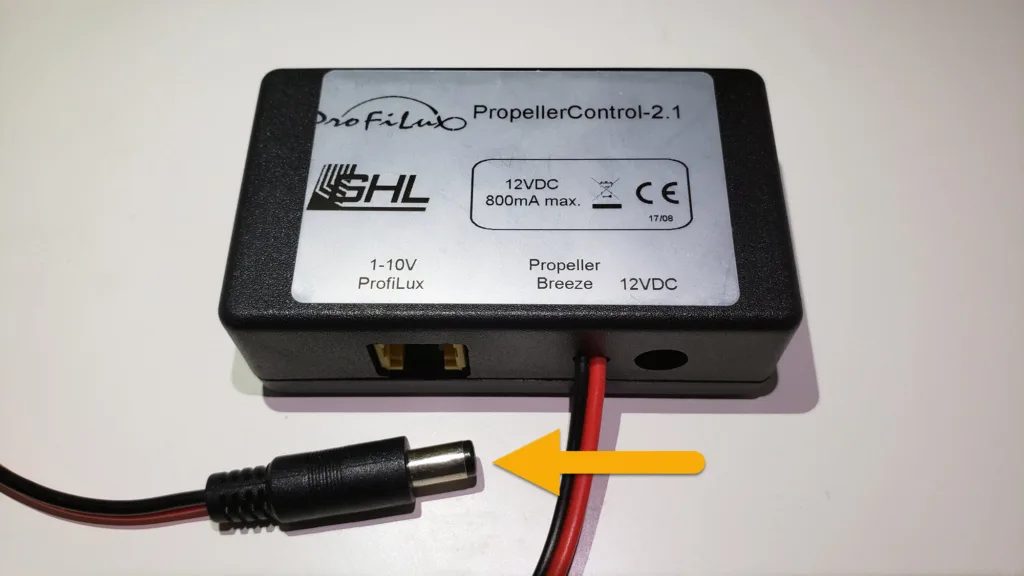
- Take the power cable from the PropellerBreeze fan and connect it to RED/BLACK cable coming from the PropellerControl accessory
Connect 1-10V cable to PropellerControl and ProfiLux
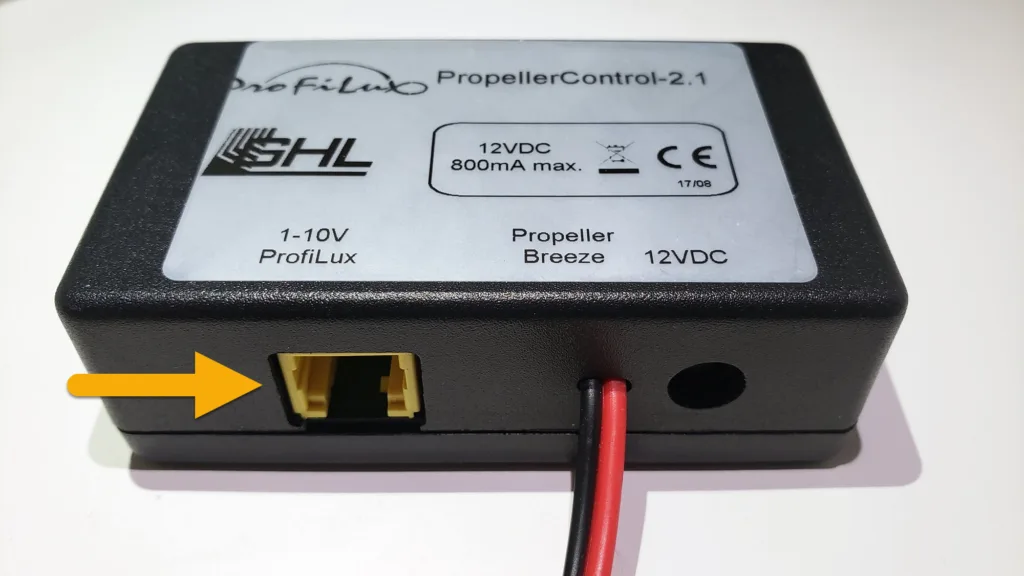
- Take the 1-10V control cable that was included in the PropellerControl box and connect one-end to the port labeled 1-10V ProfiLux on the PropellerControl accessory
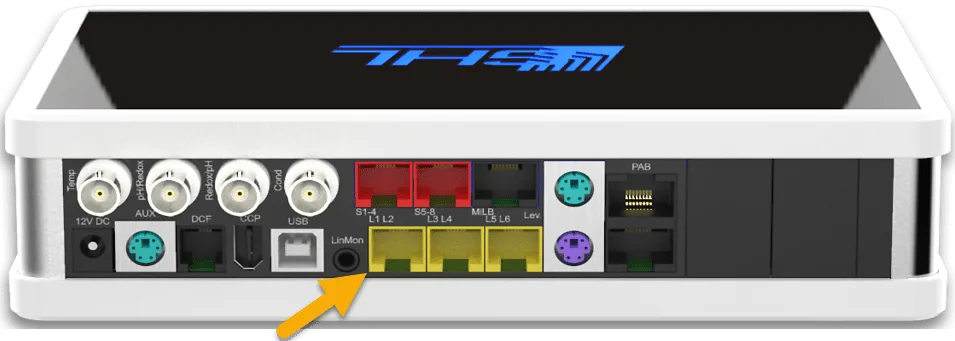
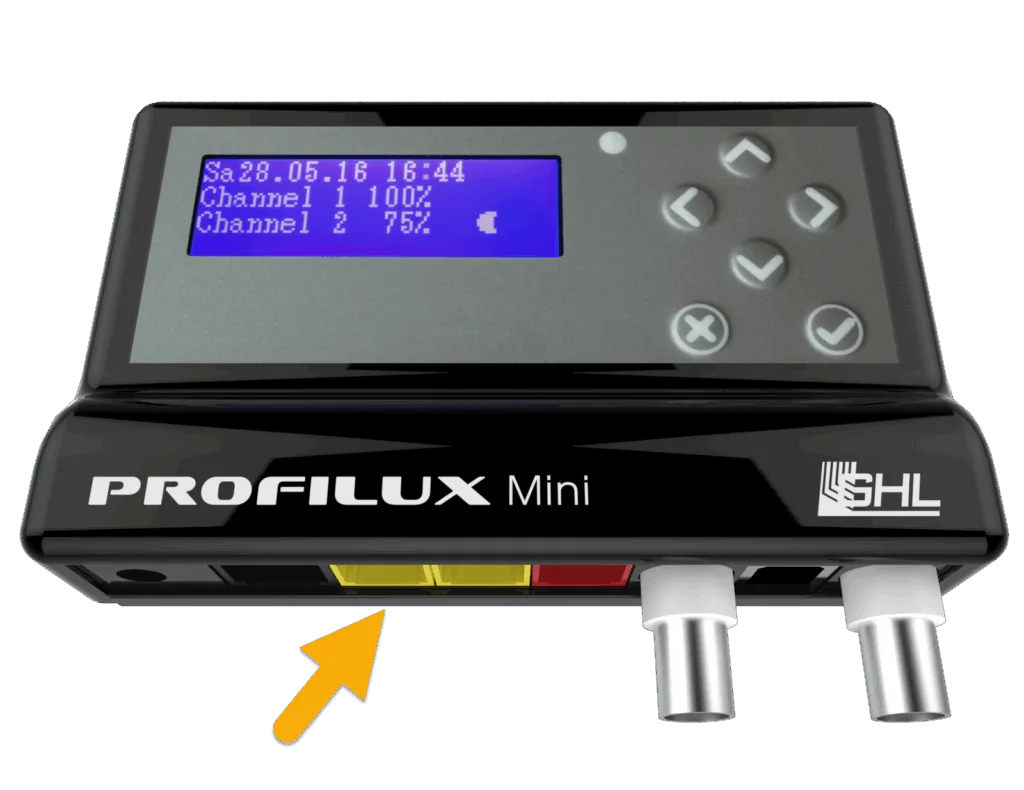
2. Take the other-end of the control cable and connect it to an available YELLOW 1-10V port on the ProfiLux. Take note of the port (L1/L2, L3/4, etc.) you are connecting it to as you will need to know this for the next section.
Assign PropellerControl to a 1-10V interface
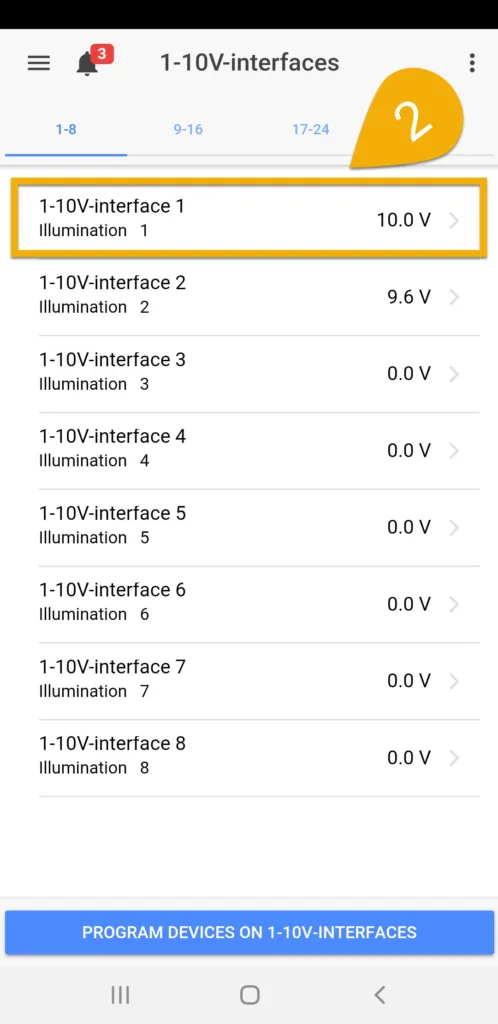
- Press the Menu icon and select 1-10V interfaces
2. Select the L-channel interface where you have the PropellerControl connected.
NOTE: If you have not moved any jumpers inside the PropellerControl, select the ODD-NUMBERED channel. If the jumpers were moved to pins 2 and 3, select the EVEN-NUMBERED channel.
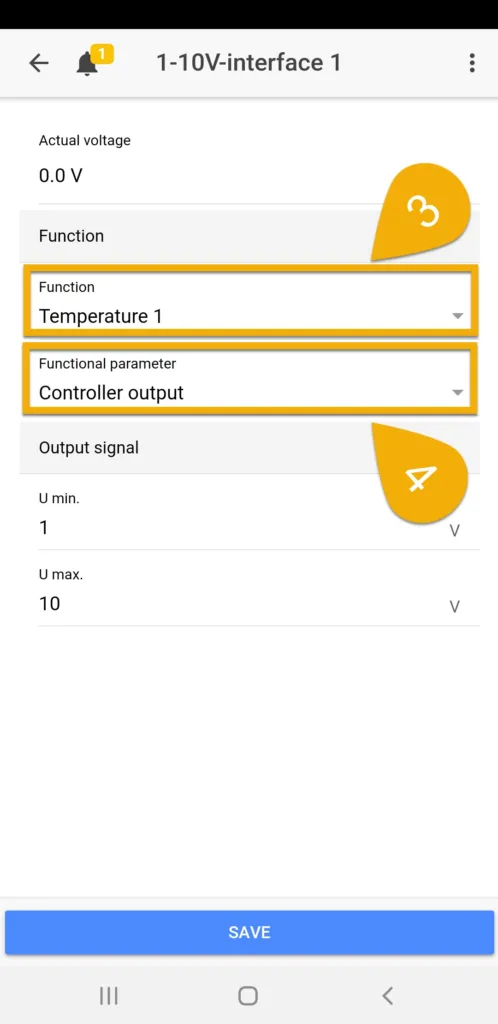
3. Set the function to Temperature 1 or select the temperature probe which will control the fan
4. Set the Functional parameter to Controller output
5. Press SAVE
Configure fan speed behavior
Now that you’ve assigned the PropellerControl accessory to a 1-10V channel, the next step will be to go to the temperature probe settings page so you can specify when the fan will react to rising temperatures.
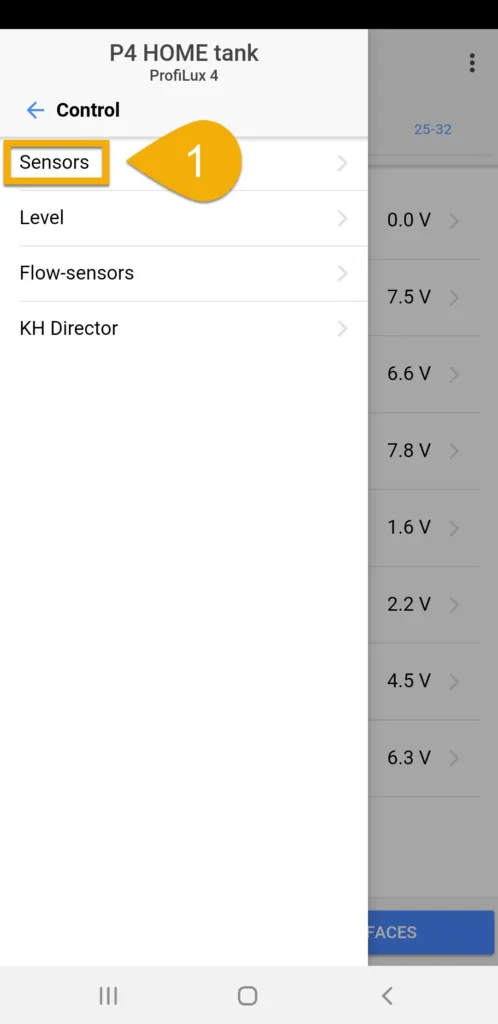
- Press the Menu icon, select Control, select Sensors
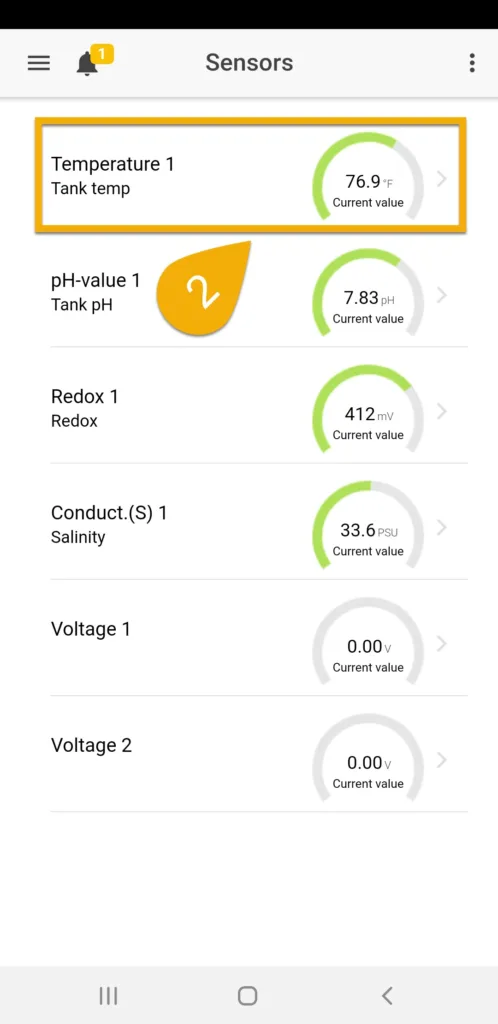
- Select the temperature probe which will be controlling the Breeze fan
3. In the 1-10V is max. at deviation of field, specify the upper temperature limit for when the fan should run at 100% speed
Example: If your max deviation is set to 4°F and your desired temperature is 77°F, the fan will run at full speed if the temperature reaches 81°.3F (77.3 + 4 = 81.3). A more detailed explanation can be found at the bottom of this article.
4. Press SAVE
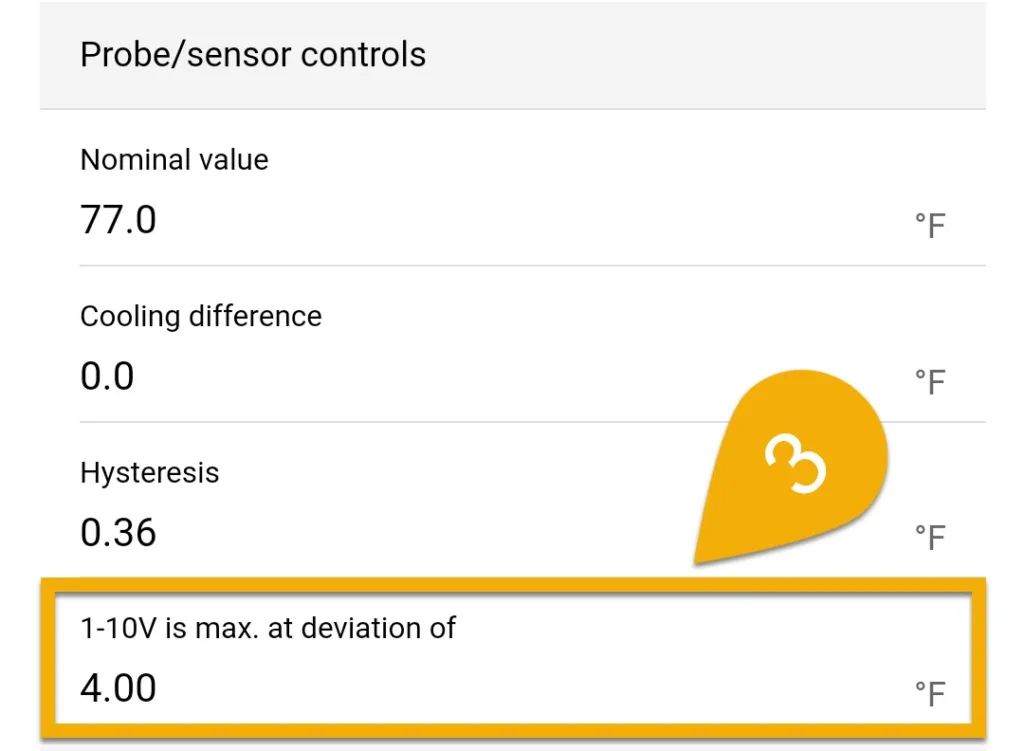
After you have specified the max temp limit for the fans (1-10V is max at deviation…), the ProfiLux will automatically determine when the fan will turn ON. This action is determined by the Nominal value, Hysteresis and Cooling difference you entered into the temperature probe settings page.
Here is the formula used to calculate the point for when the fans will turn ON:
T = Nominal value + (Hysteresis * 0.83) + Cooling difference
For example, if the desired temperature is set to 77°F with a hysteresis of 0.36°F and a cooling difference of 0°F, the PropellerBreeze fan will turn ON when the temperature reaches 77.3°F.
Nominal value = 77° F
Hysteresis = 0.36° F
Cooling difference = 0° F
Applying the formula:
Nominal value + (Hysteresis * 0.83) + Cooling difference
77 + (0.36 x 0.83) + 0 = 77.3° F
If the temperature continues climbing, the ProfiLux will automatically increase the fan speeds accordingly. At 81.3°F (77.3° + 4° limit), the fans will run at 100%.
