About switchable Conductivity port
ProfiLux controllers and certain expansion cards come with the capability to switch between freshwater and saltwater measurement ranges for conductivity probes. For example, if you need to measure conductivity within FW range, you can easily switch the default SW state to FW mode.
For those with expansion cards that include a switchable conductivity input, the steps shown here will also apply to you.
Before you begin
- If you are not familiar yet with the operating concept of the ProfiLux Controller, we highly recommend to first read the Knowledgebase Article ” How the ProfiLux Controller works “. It gives you an understanding of the basics and the operational concept of the controller
If you have an EXB2 and want to switch the on-board conductivity port on this device, skip the first section and follow the steps shown in “Expansion Box owners: Read this!”
Converting conductivity to FW mode or vice versa
- Press the Menu icon, select Control, select Sensors
- Select the conductivity probe that you want to convert


3. Type-in a new description for this probe, scroll to the bottom of the page and select Change measurement range

4. Specify what the desired measurement range of this conductivity probe, then press SAVE
Reconnect to your ProfiLux and navigate to the Sensors page to see the new port listed.


Alternate method via ProfiLux touch keys
If you wish to bypass GHL Connect, you can also do the above by following these steps:
- Press the up or down arrow key
- Select Sensor settings
- Select the conductivity probe
- Select Measurement range
- Select the measurement range to apply to the conductivity probe
- Select YES to save
Expansion Box owners: Read this!
If you wish to change the measurement range of the built-in conductivity probe on an expansion box, follow the steps below.
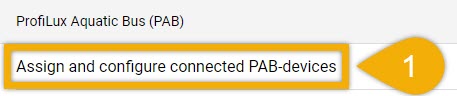
1. Press the Menu icon, select System, select Assign and configure connected PAB-devices
2. Press the blue gear icon belonging to the EXB2

3. Select the conductivity probe and specify what range you want to use, then press SAVE

In order for the EXB2 to properly display the newly switched port, you must now un-assign and re-assign this same EXB2.
4. Press ASSIGN DEVICES and un-assign the EXB2 (remove check-mark), then press SAVE

5. Go back to the PAB devices page (in SYSTEM), press ASSIGN DEVICES, select the EXB2 and press SAVE.
The EXB2 will now display the newly switched port.