About dosing pump schedules
The steps provided in this article can be applied to both ProfiLux owners and Standalone GHL Doser owners.
ProfiLux 4 / 4e controllers can be setup to control various kinds of dosing pumps such as GHL dosers and traditional ON/OFF dosers. Depending on the kind of dosing pump you plan to use, the initial setup steps will vary.
ProfiLux owners: Dosing with a GHL Doser?
If you have a ProfiLux controller and will be dosing with a GHL Doser, you must first assign the doser to the ProfiLux. To do this, follow the PAB-device assignment steps before proceeding any further.
ProfiLux owners: Using a traditional doser?
If you have a traditional ON/OFF doser such as ones sold by BulkReefSupply, please note this device must be connected to a controllable Powerbar outlet. This will allow the ProfiLux to turn that outlet during a scheduled dose.
Setup general dosing pump settings
- Press the Menu icon, select Dosing pumps, select a dosing pump
- Type-in a description for this pump
- Select Container is Emptied
“Emptied” means the dosing container will be emptied with each dose
“Filled” means the dosing container will be filled with waste water
4. If you wish to have your dosages recorded, Enable Record dosages as shown below


5. Type-in the Capacity of your dosing container, then press REFILL CONTAINER and type-in how many ml are now in your container, then press SAVE
If you would like the ProfiLux or Standalone Doser to notify you when the container is at or below the minimum threshold, enable the option “Alarm if below minimum” and specify the min.point.

Set GHL Doser pump speed
If you are using a GHL Doser, you have the option to change the speed of the pump. The speed you choose depends on the amount you want to dose each time. Skip this step if you are using a non-GHL dosing pump.
- In the Pump settings section, choose your desired Max.speed
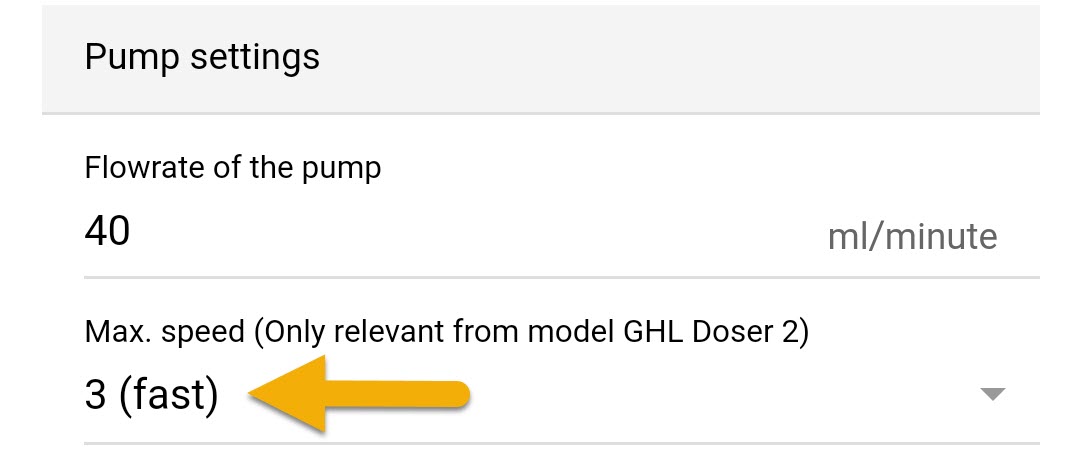
The speed you choose to run your GHL pump at will depend on the amount you wish to dose in a single cycle and the accuracy required. Here are some recommendations on choosing the correct speed:
Speed (0): Choose this if you want to do single doses smaller than 0.5ml
Speed (0) or (1): Choose this if you require 0.1ml dosing increments; 4.7ml or 15.3ml
Speed (2) or (3): Choose this if your single dose amounts will be 1ml or greater
2. Press SAVE to set the new pump speed.
Calibrate the dosing pump head
In order for the dosing pump to provide accurate dose amounts, it must first be calibrated.
Do the following before proceeding any further:
- Prepare a cup of tank water so the pump can have something to pull water from during calibration
- Cut and install dosing lines, then prime both IN/OUT ends of the tube
- Have a graduated cylinder, measuring cup or digital scale for measuring water sample
If you have a traditional ON/OFF dosing pump, power ON this doser for 1 minute and write down the ml amount dispensed. You will need this info later.
1. Press CALIBRATE PUMP
![]()
Pump will now run for 1 minute
2. Take a look at how many ml was dispensed and enter this amount into the Flow rate of the pump field
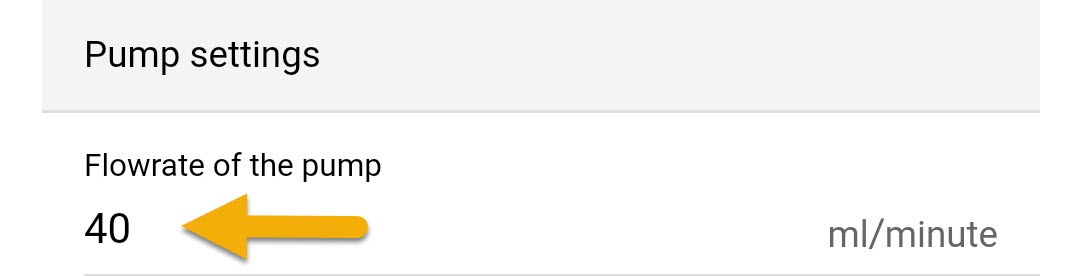
3. Press SAVE
If you have any additional pumps that need calibrating, repeat these steps.
Create a dosing schedule
- Press the Dosing schedule tab
- Select a dosing mode and create your dosing schedule

The dosing mode you select will depend on how you want to set your dosing schedule
Automatically: Allows you to specify the number of doses per day, amount per dose and time of the first dose.
For example, if you want to dose 50ml you can set the pump to 5 doses per day and 10ml per dose; 5 x 10ml = 50ml total dose per day. Each dose will be evenly split throughout a 24hr window.
Individually: Allows you to specify the exact time to dose and amount to dose at that time
3. Select a day mode, then press SAVE

The day mode you select will depend on how often you want to dose
Special weekdays: Allows you to choose specific days of the week to run the dose schedule
Day-intervals: Allows you to specify how often to dose and set a dosing delay
For example, Repeat every 3 days = Dose schedule will run every 3 days
Starting in is a delay. If you want to delay the dose, specify by how many days
- Connect your ON/OFF doser to an available outlet on your Powerbar.
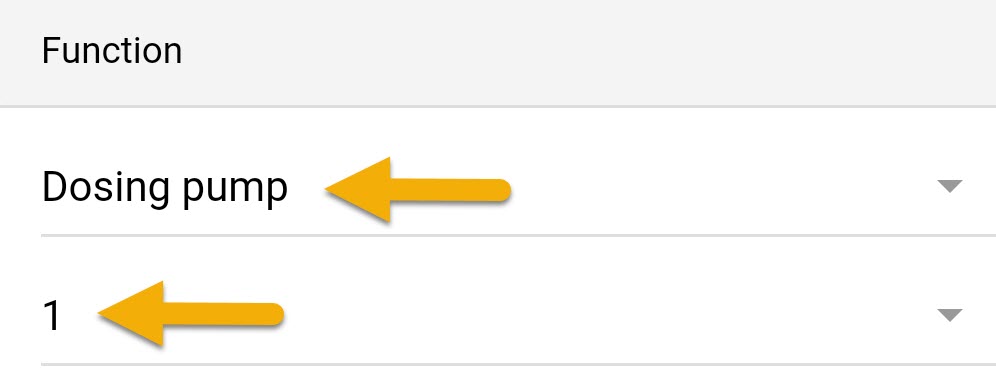
- Press the back-arrow, press the Menu icon, select Switch channels
- Select the outlet that has the pump connected to it
- Set the function to Dosing pump and select the pump number you used to create the schedule, then press SAVE