
About Standard (ON / OFF) Timer function
The timer function within the ProfiLux is a very versatile feature which can be used for performing different types of timer tasks. In this article, we will focus on the standard timer function which involves a simple ON / OFF command.
Timer functions come in handy because they can run equipment like skimmers or media reactors during certain times of the day and/or on certain days. You can also use timer functions to automatically activate a Feed Pause.
Setting up a non-dimmable light?
If you are on this page because you want to setup a non-dimmable light, we have a better option for you!
Click here for steps on setting up a light schedule.
Want to run a timer only for a few seconds?
This article shows you how to setup a standard timer function which requires you to specify the timing in minutes. If you are looking to setup a timer that should only run for a few seconds, we recommend setting up a timer function using SHORT mode.
Before you begin
- If you are not familiar yet with the operating concept of the ProfiLux Controller, we highly recommend to first read the Knowledgebase Article “How the ProfiLux Controller works“. It gives you an understanding of the basics and the operational concept of the controller.
Create the Timer function
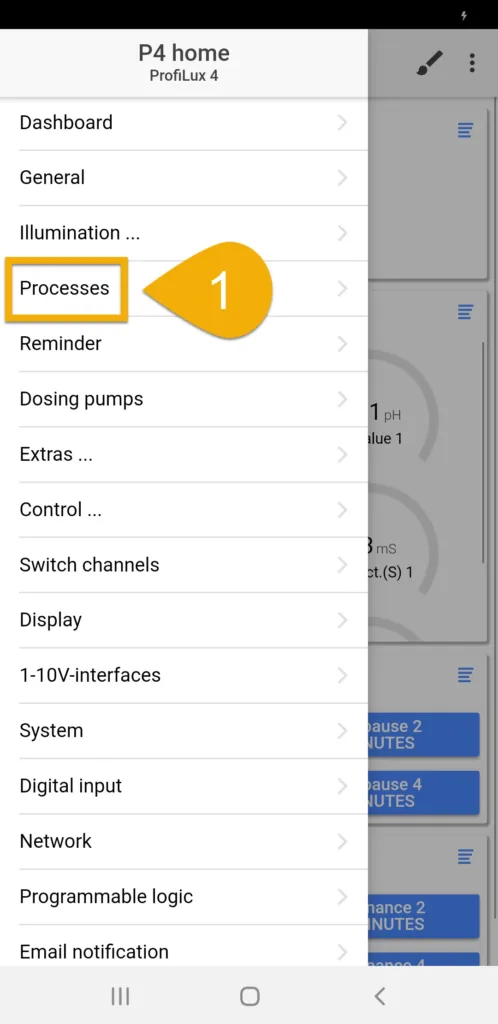
- Press the Menu icon, select Processes
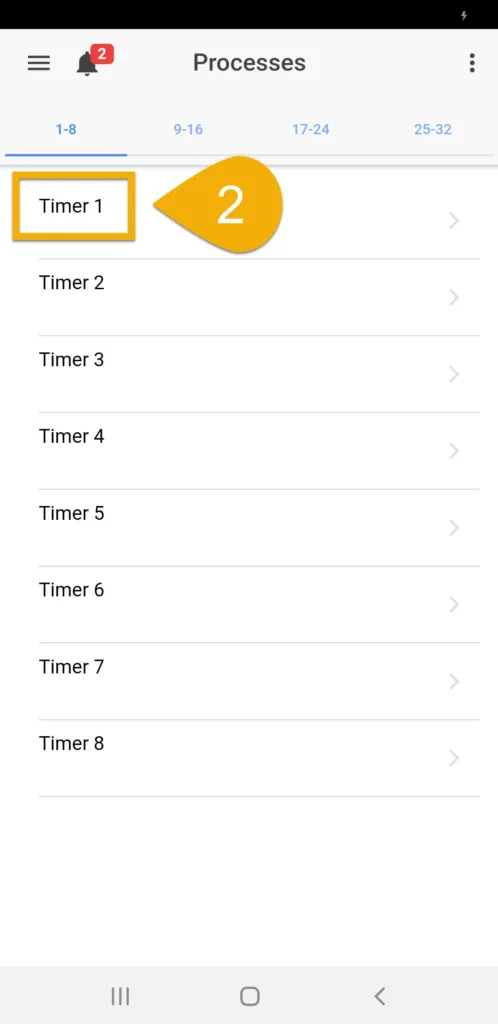
- Select an unused Timer function
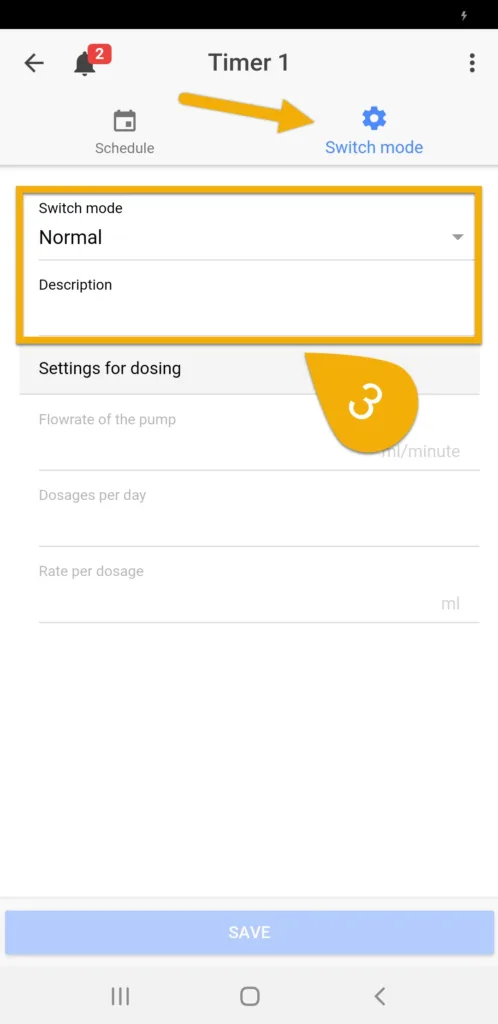
3. Press the Switch mode tab, select Normal, then type-in a description
By the default, the Normal switch mode allows you to run a timer for a minimum of 1 minute. If you would like to run a timer only for a few seconds, choose the Short switch mode. This allows you to run this timer anywhere between 1 – 300 seconds.
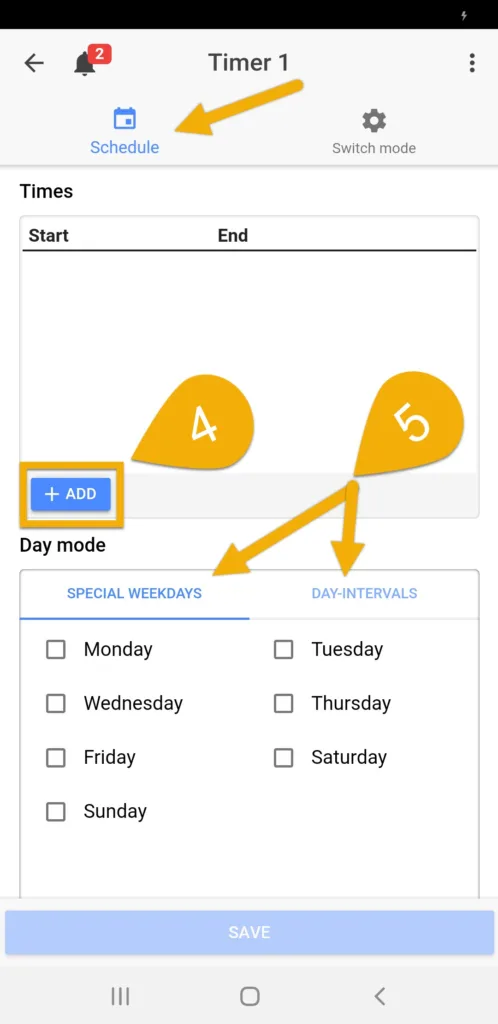
4. Press the Schedule tab, press ADD and specify the Starting and Ending time
If you want multiple ON / OFF times, press ADD again and specify the times.
5. Select a Day mode and specify how often to run this timer
6. Press SAVE
About Day mode
The Day mode you select will depend on how you wish to run the timer schedule
Special weekdays: Allows you to choose the days of the week to run this timer
Day intervals: Allows you to choose how often to run this timer in intervals.
For example, Repeat every 3 days = Timer will run every 3 days
Starting in — is a delay. If you want to delay the timer, specify by how many days.
Assign the Timer function
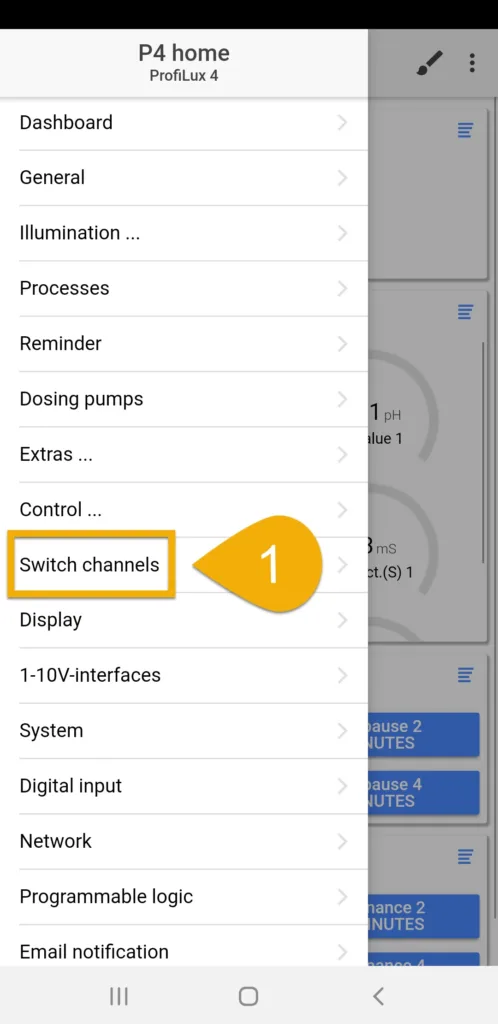
- Press the back-arrow, press the Menu icon, select Switch channels
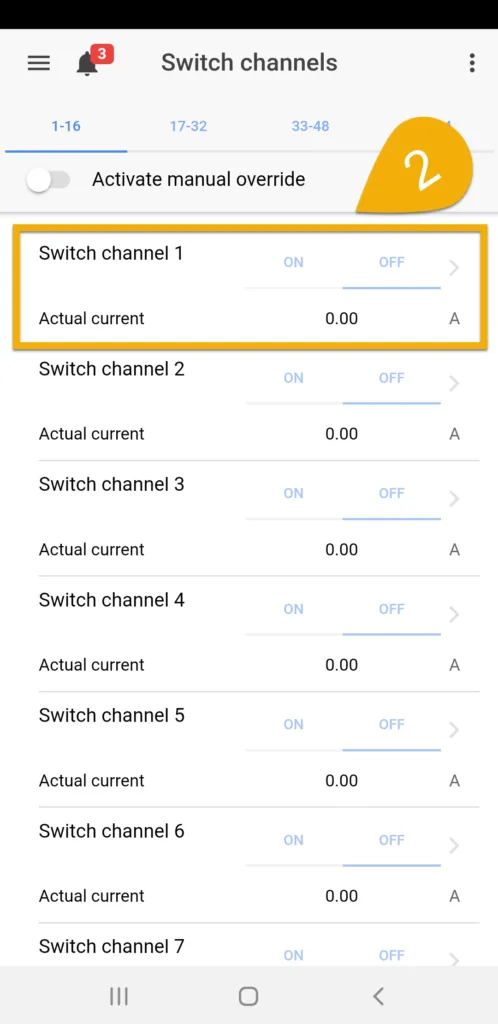
- Select the Powerbar outlet that you want reacting to the timer function
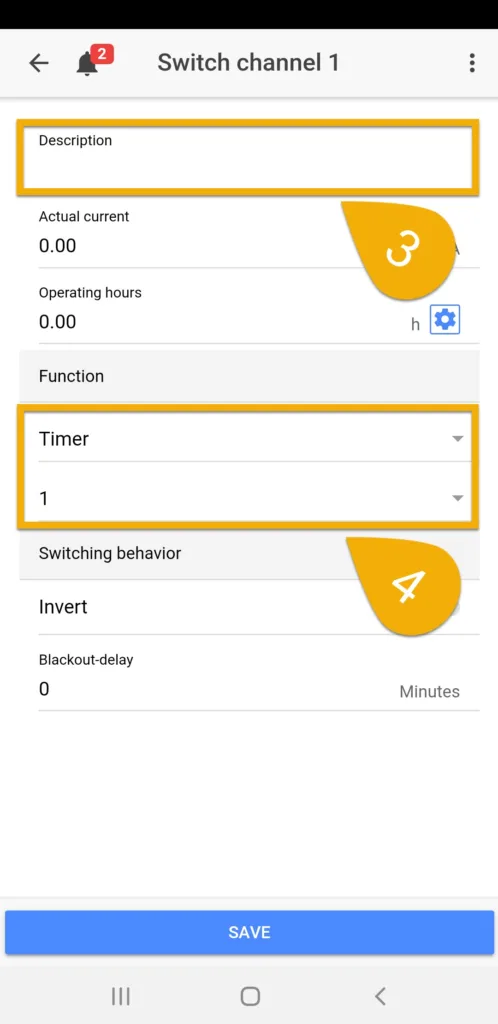
- Type-in a description
- Set the function to TIMER and select the TIMER number you used when you created the function, then press SAVE
For example, if you created the function on TIMER 1, set the function to TIMER 1. If TIMER 2 was used, set the function to TIMER 2.
Alternate method via ProfiLux touch keys
If you wish to bypass GHL Connect, you can also create a Timer schedule by following these steps:
Create the Timer function
- Press the up or down arrow key
- Select Clock
- Select Timer
- Select an unused timer to edit
- Select Normal for standard ON / OFF schedule
- Specify how many times per day this timer will activate
- Select if this timer will activate on certain Days of week or Interval o.days
Days of week: Allows you to specify specific days of the week to activate
Interval: Allows you to specify the day-intervals; 1 = Daily… 2 = Every 2 days - Specify Switch ON time and Switch OFF time
- Select YES to save changes
Assign the timer function
- Press the up or down arrow key
- Select System
- Select Sock.outl.func.
- Select the outlet that you want reacting to the Timer function
- Select Timer and select the Timer number where you created your schedule
- Set a Blackout delay, if necessary
- Select NO for Inv.sw.behavior
- Select YES to save changes