About calcium reactor control
The ProfiLux can control your calcium reactor based on the pH readings of your calcium reactor chamber. When you connect the reactor’s solenoid valve to an available powerbar socket, the ProfiLux will turn this socket ON or OFF based on the current pH value of the reactor. Anytime the pH climbs above the desired pH value, the ProfiLux will turn OFF the assigned socket (solenoid). When pH falls back down to the desired value or lower, this same socket will turn ON.
This will allow your reactor to provide a steady supply of calcium and alkalinity supplement.
Before you begin
- If you are not familiar yet with the operating concept of the ProfiLux Controller, we highly recommend to first read the Knowledgebase Article ” How the ProfiLux Controller works “. It gives you an understanding of the basics and the operational concept of the controller
- Make sure you have all the correct parts on hand. (See also list below)
The ProfiLux 4 / 4e and certain expansion cards have ports which can be switched between pH and Redox and vice versa. If you have a redox port which you are not using, you can convert it to a pH port by following the steps here.
You will need…
| (Item) | (Purpose) |
| Available Powerbar socket | For powering the solenoid valve |
| Dedicated pH port | For connecting your dedicated pH probe |
| Dedicated pH probe (PL-0071) | For connecting to your dedicated pH port |
Preliminary step:
Connect pH probe and calibrate
Before you proceed with the steps below, you must first connect the probe to the dedicated pH port. Take the pH probe, connect it to your pH port, then follow the calibration steps.
After calibration, you can install the probe inside your calcium reactor chamber.
Setup pH control settings
- Press the Menu icon, select Control, select Sensors
- Select the desired pH probe


3. Type-in a description; CaRx pH
4. Enable measurement recording and specify how often to collect data
This will allow the ProfiLux to record the pH levels in the calcium reactor which can later be viewed on a chart
5. Set the desired Nominal value
This is where you type-in the pH value you want to maintain
6. Set the desired Hysteresis, then press SAVE

About Hysteresis
The number you enter here will determine how much of a swing you are willing to allow in-between the nominal value. This determines when the pH control function is triggered.
By default, this value is set to +/- 0.3 pH. This value works for most individuals. If you want a tighter or wider range of control, type in a smaller or larger value. Be careful NOT to make the hysteresis too small because it will cause the solenoid to switch ON/OFF too quickly in-between reactions which may damage the solenoid and put heavier wear on the Powerbar outlet.
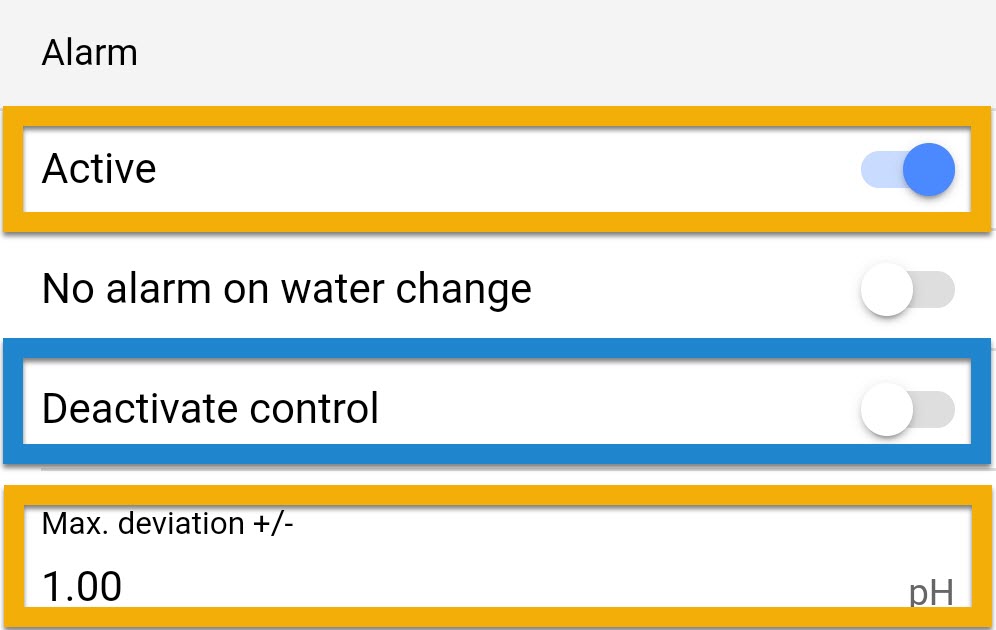
Optional: Trigger alarm for pH swings
If you wish to activate an alarm when the pH level rises or falls beyond a certain point, set the alarm to ACTIVE and set the maximum allowed deviation. If you want to turn OFF your solenoid when the pH reading goes outside the allowed deviation, ENABLE Deactivate control.
Assign pH control function to powerbar socket
- Press the back-arrow, press the Menu icon, press the back-arrow, and select Switch channels
- Select the outlet that has or will have the solenoid connected to it
- Type-in a description; Solenoid (CaRx)
- Set the function to pH value, select the probe to use, select Control downwards (Decrease), then press SAVE


