About Wi-Fi module updates and recovery
The Wi-Fi chip inside your GHL device (ProfiLux Mini, Light, 4, 4e and Mitras LX7), can be updated in several ways…
- Via web browser
- Via GHL Connect app
- Via USB (Wi-Fi update tool)
- Via Online Update Tool (NEW)
The steps for each option are provided below. This article will also include steps for recovering your Wi-Fi chip in case there was interruption during a previous firmware update attempt.
We recommended updating your Wi-Fi module firmware and web interface firmware from time-to-time to make sure your device stays up-to-date with the most recent changes made in GHL Connect and myGHL.
Want to restore factory settings on your Wi-Fi chip?
This article can help you with that too!
IMPORTANT: Interpreting the info provided by the Wi-Fi module
Before following any of the steps provided below, it is important to first understand the information being provided to you by the Wi-Fi module. This section will help you with that.
In the communication settings page (in GCC) of your GHL device, you will see the status information of the WLAN module…

Wi-Fi module is fully functional if…
You can see a firmware number in the Module Firmware box.
The Ready and File system OK boxes are checked
Your GHL device is connected to your network if…
The Connected as Client box is checked.
Your GHL device is connected to myGHL cloud if…
The Connected with myGHL box is checked
A device is connected to the hotspot of your GHL device if…
The Connected as Access Point box is checked
Update via Online Update Tool (NEW)
The web-based update tool is your direct link to the newest Wi-Fi module firmware. With this option, you don’t have to download anything extra, just click the link below and follow the directions.
The tool is compatible with Mac, PC, and Mobile devices. All you need is a web browser (Chrome or Edge) and the USB cable connected to your computer.
To update your Wi-Fi module firmware, simply click the link below and follow the instructions there:
https://api.myghl.com/wifi-update/
Update via Web Browser / App
This section will show you how to perform an update via a web browser and GHL Connect app.
NOTE: For this process, we recommend using either Firefox, Chrome or Internet Explorer web browsers. Browsers such as Edge and Safari are not recommended as there have been reports of problems with these.
Emergency Update via Web Browser
These steps are only necessary if the normal update process was interrupted. In this case, you would no longer be able to access your GHL device locally, over myGHL cloud, or hotspot connection.
If this is the problem you are experiencing, the steps below will help you recover your Wi-Fi chip.
In order to access the necessary files to recover your Wi-Fi chip, you will need to first download the Wi-Fi update tool.
NOTE: These steps also apply to smartphone and tablet users.
-
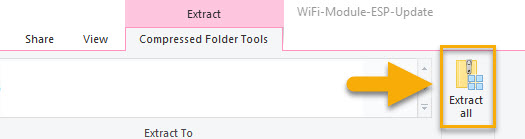
- Go to our downloads page and download the newest version of the Wi-Fi update tool. This will be labeled as WiFi-Module-ESP-Update in the Firmware section.


- Open the downloaded folder and unzip it to your desktop or “downloads” folder
- Go to our downloads page and download the newest version of the Wi-Fi update tool. This will be labeled as WiFi-Module-ESP-Update in the Firmware section.
— Emergency Update: Recovery via Web Browser
NOTE: For this process, we recommend using either Firefox, Chrome or Internet Explorer web browsers. Browsers such as Edge and Safari are not recommended as there have been reports of problems with these.
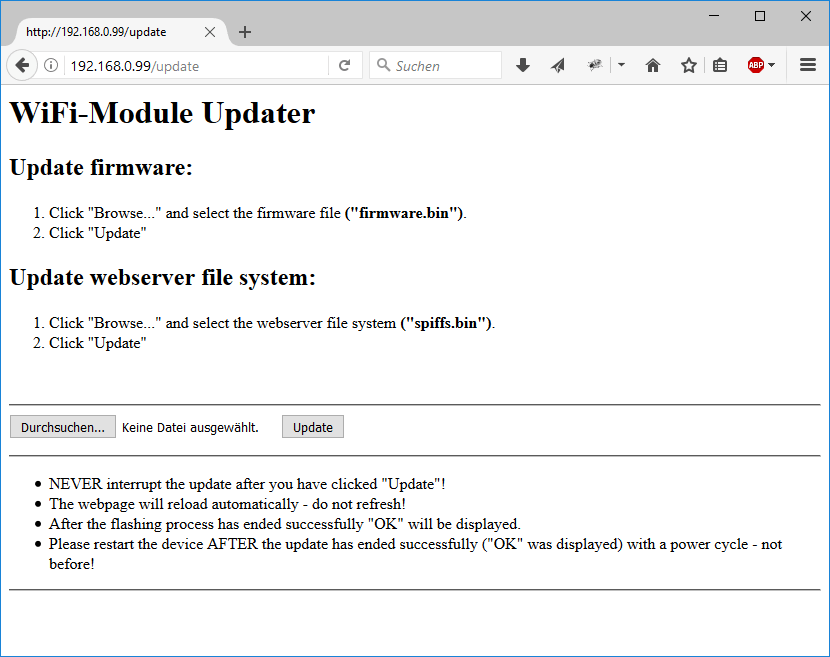
- Open up a web browser window and type-in the IP address of your GHL device followed by “/update”. The web interface’s emergency update page will now be displayed.
For example, if the IP address of your GHL device is 192.168.1.150, enter 192.168.1.150/update - Click Browse and navigate to the filesystem.bin file, then select it
- Click Update and the process will begin
- After the update is complete the Wi-Fi module will reboot itself, wait 1 minute before proceeding any further
- Repeat steps 1 and 2…this time navigate to the firmware.bin file and click Update
- After the update is complete the Wi-Fi module will reboot itself, wait 1 minute. The Wi-Fi chip on your device will now be recovered.
If you are having trouble, you can power cycle your device and try again. If the problem continues, follow the Update / Emergency Update via USB steps shown below.
Update / Emergency Update via USB
This section will show you how to update or restore the factory settings on the GHL Wi-Fi module using the Wi-Fi update tool.
NOTE: The Update tool is a PC program.
Before you proceed with the steps below, you must first do the following:
- Go to our downloads page and download the newest version of the Wi-Fi update tool. This will be labeled as WiFi-Module-ESP-Update in the Firmware section.
- Open the downloaded folder and unzip it to your desktop or “downloads” folder
- Open the WiFi-Firmware-Update-Tool folder, then open the same folder again and lastly open the WiFi-Firmware-Update-Tool

— Wi-Fi Update Tool: Connect USB Cable
- Take the USB cable that came with your GHL device and connect one-end to your device and other-end to your PC
Your PC will now make a sound to indicate that it has detected a USB device.
— Wi-Fi Update Tool: Perform Update
- Click the Refresh port list button and select the COM port number that belongs to your GHL device

If you are not sure which COM port belongs to your device, open Device Manager. You will see your device listed in the Ports (COM & LPT) section.
![]()
2. Click Identify connected GHL-Device. Your GHL device will now be displayed.
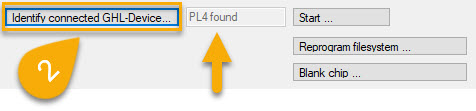
3. Select an option based on what you would like to do…

Start: This will update your Wi-Fi module firmware; firmware.bin
Reprogram filesystem: This will install the filesystem and update your web interface firmware; index.html.gz
Blank chip: This will erase all your Wi-Fi settings, including module firmware and filesystem.
If you choose the Blank chip option, you must reinstall the Wi-Fi module firmware (Start) and filesystem (Reprogram filesystem).
If you are following these steps because your previous Wi-Fi update attempt was interrupted or your Wi-Fi chip is unresponsive or you just want to revert the chip back to factory settings, do the following in this order…
NOTE: These steps will erase all your network and email settings. You will have to re-enter this information after recovering or restoring your Wi-Fi chip.
- Click Blank chip, wait for process to complete, wait 10-15 seconds, then power cycle your GHL device. Close the Updater Tool program, re-open, then proceed to the next step after device is fully booted up.
- Click Reprogram Filesystem, wait for process to complete, wait 10-15 seconds, then power cycle your GHL device. Close the Updater Tool program, re-open, then proceed to the next step after device is fully booted up.
- Click Start, wait for process to complete, wait 10-15 seconds, then power cycle your GHL device. When device is fully booted up, the default hotspot signal (GHL-DEV) will be visible by your PC, Mac, Smartphone and Table
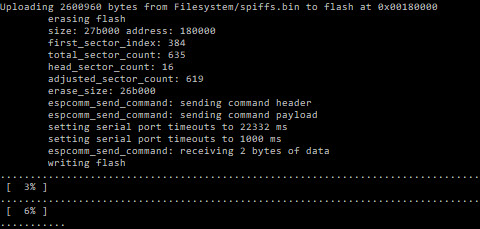
The update process will begin. A command window will open, then close by itself when the process is complete.
During the update, the display (if available) on your GHL-Device will show “Transparent mode”.
4. Once the update is complete (command windows closes by itself), wait 10-15 seconds, then power cycle (Power OFF, then ON) your GHL-Device.
Your device will now bootup with the newly updated firmware.
— Wi-Fi Update Tool: Troubleshooting
This section will provide you with troubleshooting steps in case you run into any issues with the Wi-Fi update tool.
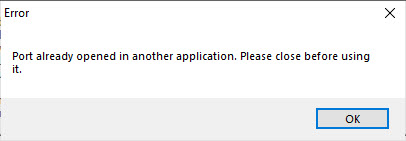
Error: Port already in-use
This message pops up if you are currently connected to your GHL device via USB on GHL Control Center.
SOLUTION: Disconnect from GCC and try again.
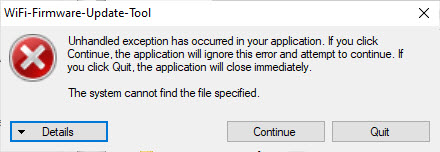
ERROR: Unhandled exception has occurred
This message pops up if you opened the Wi-Fi update tool without unzipping the folder.
SOLUTION: Unzip the downloaded Wi-Fi update tool folder and open the tool in the folder which was unzipped. The steps for this are mentioned above. See “Preliminary steps: Download, extract and open Wi-Fi update tool”
ERROR: GHL Device will not update
SOLUTION: Power cycle (power OFF, then ON) your device and repeat the steps as shown in “Wi-Fi update tool: Perform update”. If the problem continues, follow the steps as shown in the tip section, “Are you recovering your Wi-Fi chip…”
Mitras LX7 users: If you’re doing an update on a LX7 fixture and it is not working, temporarily set the fixture to Standalone mode, then try the update again. After the update, you can set it back to the original mode.
