
About this article
This article (part 2 of 3) will show you how to properly setup and configure the KH Director for automatic KH testing. In order for the KHD to provide accurate test results, these steps must be followed exactly as shown.
In order to get the best understanding of how the KH Director is setup and how it works, we highly recommend you read the KH Director manual.
Click here to download the manual.
Before you proceed with the steps below, you should first complete part 1 of the KHD setup. If you have not done so yet, click the link below:
PART 2: Connect tubes and calibrate pumps
In this section we will show you how to:
- Cut and install the included silicone tubing and flex-PVC reagent tube
- Install the water sample filter
- Calibrate Doser 2.1 pump heads which will be used by the KHD
- Set the KHD container fluid levels
For the initial setup (part 2) you will need:
| Item | Purpose |
| Measuring instrument such as a graduated cylinder or digital scale | For calibrating dosing pump heads |
| Waste water container | For collecting KHD waste water |
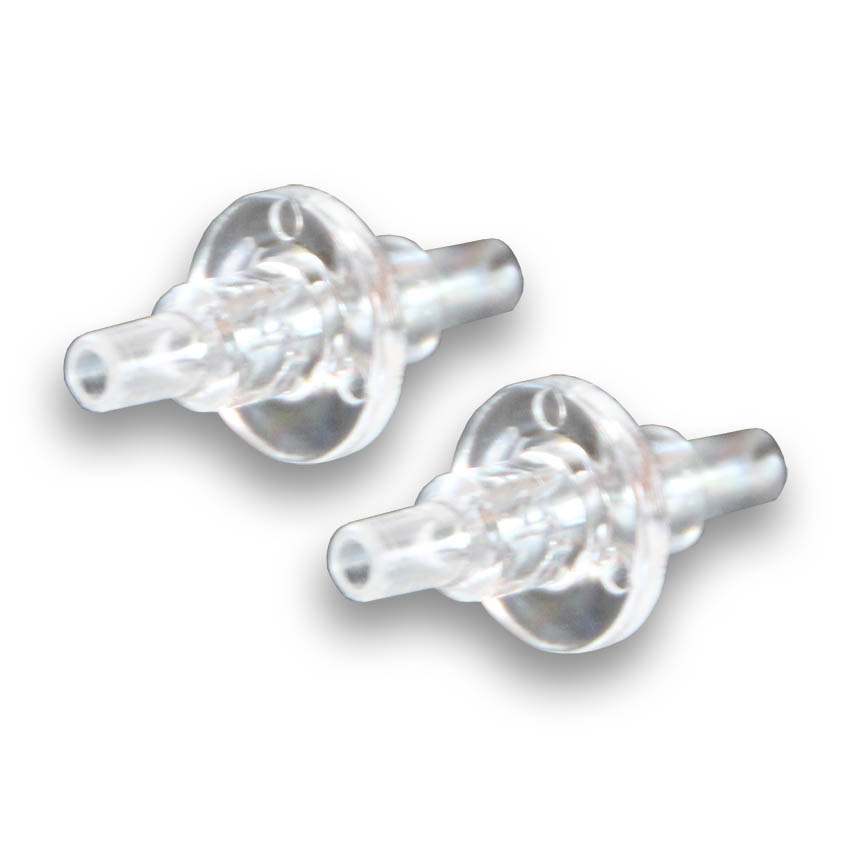
— Connect dosing tube nozzles
- Connect the clear dosing tube nozzles to the in / out tubes of each pump head. Push them up as far as possible on the pump tube.

— Cut KHD tubing to correct lengths
Now that the nozzles are installed, the next step will be to cut the included tubing to the correct lengths.
- Take the pack of silicone tube and flex-PVC tube and cut them to the lengths shown here.
Silicone tube will be used for the water sample and waste water lines.
Flex-PVC tube will be used for the reagent line.

The length of these tubes will depend on how you want to position your KHD and Doser.


— Connect tubing to dosing pump heads
Once the tubes have been cut to the proper lengths, you can connect them to the dosing pump heads.
Do not connect the other-end of the tubes to the KHD! You will do this later-on in the setup process.
- Take the cut piece of the water sample tube and connect it to the outlet side of the water sample pump head

2. Take the cut piece of the flex-PVC reagent tube and connect it to the outlet side of the reagent pump head

3. Take the waste water tube and connect it to the inlet side of the waste water pump head

At this time, the tubes should only be connected to the dosing pump.
— Connect water sample tube from pump to sump
- Cut a piece of silicone tube that is long enough to run from the pump head to your sump
- Take that tube and connect it to the other-end of the water sample pump head

— Install water sample filter
Now that your water sample tube is installed, it’s time to install the water sample filter.

- Take the filter and install it somewhere along the water sample tube as shown here
NOTE: As you install the filter, make sure you take note of the direction of flow that is marked on the filter itself. Make sure the tube is pushed all the way up the filter housing.

— Connect waste water tube from pump to waste bin
- Measure and cut the length of tube that you will need for the waste water pump
- Connect this tube to the other-end of the waste water pump head

— Connect reagent tube from pump to reagent bottle
- Measure and cut the remaining Flex-PVC reagent tube. This tube will run from the pump head to the reagent bottle
NOTE: For maximum testing accuracy, this tube should be no longer than 27.5″ (from pump head to bottle)
2. Connect this tube to the other-end of the reagent pump head

— Preparing for pump head calibration
Now that all the tubes are connected to both-ends of each dosing pump head, it is time to calibrate each dosing pump head.
To prepare the pumps for calibration, take the tubes that are connected to the left-side of each pump head and place them into a cup of water.
NOTE: This cup should be filled with enough water so you can prime the lines and do the calibration
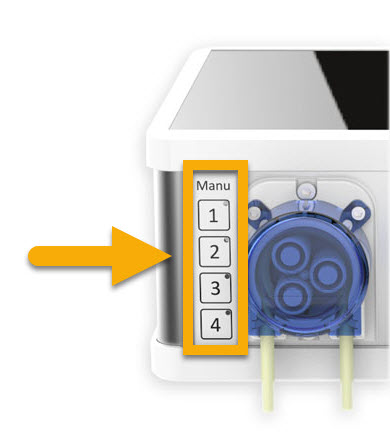
- Prime the lines by pressing and holding down the manual override buttons on the dosing pump. Keep holding down these buttons until both the IN and OUT lines for all pump heads are filled with fluid.

— Configure pump settings and calibrate pump heads
Water sample pump: Configure settings
- Open the GHL Connect app, press the Menu icon and select Dosing pumps
- Select the pump that will be used for the water sample
- Type-in a description for this pump; KHD water sample
- Switch OFF level monitoring (as shown)


Water sample pump: Calibration
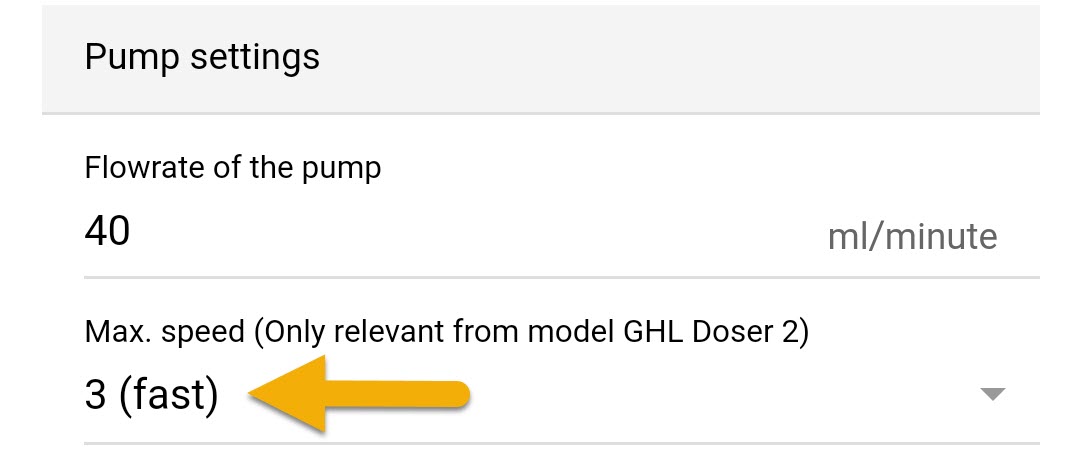
- In the Pump settings section, set the pump speed to (3), then press SAVE
You can now calibrate this pump head.
2. Press Calibrate pump, then press YES to confirm
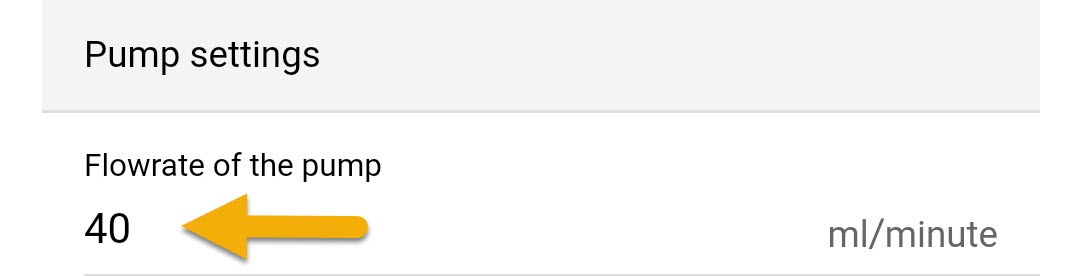
3. Take a look at how many ml the doser dispensed and type-in that amount into the Flow rate of the pump field.
Example: If your pump dispensed 40ml during calibration, type-in 40 (as shown below)
4. Press SAVE and the setup for this pump will be complete


Reagent pump: Configure settings
- Press the back-arrow and select the pump that will be used for the reagent fluid
- Type-in a description for this pump; KHD Reagent
- Select Container is EMPTIED
NOTE: This will tell your primary device to reduce the reagent bottle fluid count each time a KH test is performed
4. In the Container section, type-in the capacity of your KHD reagent bottle
Example: If you are using a 500ml bottle, type-in 500. If you have a 1000ml bottle, type-in 1000.
5. If you would like to trigger an alarm when the reagent fluid drops below a certain point, enter the minimum allowed level and enable alarm notification.
Example: If you type-in 100ml, your primary device will trigger an alarm when the reagent bottle contains 100ml or less liquid.


6. Press Refill container and type-in the amount of ml that are currently in the bottle
![]()
Reagent pump: Calibration
- In the Pump settings section, set the pump speed to (0), then press SAVE
You can now calibrate this pump head.
2. Press Calibrate pump, then press YES to confirm
3. Take a look at how many ml the doser dispensed and type-in that amount into the Flow rate of the pump field.
Example: If your pump dispensed 4ml during calibration, type-in 4 (as shown below)
4. Press SAVE and the setup for this pump will be complete


Waste water pump: Configure settings
- Press the back-arrow and select the pump that will be used for the waste water
- Type-in a description for this pump; KHD waste water
- Select an option depending on your particular setup…Switch off level monitoring or Container is FILLED
Choose Switch off level monitoring (as shown) and skip steps 4 and 5
![]()
Will you be using a waste water bin?
Select Container is FILLED (as shown in illustration below)
NOTE: This will tell your primary device that you will be filling the container with waste water.
4. In the Container section, type-in the capacity of your KHD waste water container
Example: If you have a 10,000ml (10L) container, type-in 10000.
5. If you would like to trigger an alarm when the waste water level reaches a certain point, type-in the maximum allowed level and enable alarm notification
Example: If you type-in 8000, your primary device will trigger an alarm when there is 8000ml or more of waste water in the container.


![]()
Waste water pump: Calibration
- In the Pump settings section, set the pump speed to (3), then press SAVE
You can now calibrate this pump head.
2. Press Calibrate pump, then press YES to confirm
3. Take a look at how many ml the doser dispensed and type-in that amount into the Flow rate of the pump field.
Example: If your pump dispensed 40ml during calibration, type-in 40 (as shown below)
4. Press SAVE and the setup for this pump will be complete
— Setup Alkalinity (KH) pump
Up to this point, you have successfully setup and calibrated all 3 pumps which will be used to run the KH Director. The next step will be to create a dosing schedule for your Alkalinity supplement.
If you already created a dosing schedule, you can skip this section.
Alkalinity supplement pump: Configure settings
- Press the back-arrow and select the pump that will be dosing Alkalinity
- Type-in a description for this pump; Alkalinity
- Select Container is EMPTIED
NOTE: This will tell your primary device to reduce the KH supplement fluid count each time a dose occurs
4. If you wish to have your dosages recorded, Enable Record dosages as shown below
5. In the Container section, type-in the capacity of your KH container
Example: If your KH container holds 1000ml (1L), type-in 1000.
6. If you would like to trigger an alarm, enter the minimum allowed level and enable alarm notification
Example: If you type-in 200ml, your primary device will trigger an alarm when the KH container level contains 200ml or less liquid.


7. Press Refill container and type-in the amount of ml that are currently in the container

Alkalinity supplement pump: Set pump speed
The speed you choose depends on the ml amount you want to dose each time.
- In the Pump settings section, select your desired pump speed
The speed you choose to run your GHL pump at will depend on the amount you wish to dose in a single cycle and the accuracy required. Here are some recommendations on choosing the correct speed:
Speed (0): Choose this if you want to do single doses smaller than 0.5ml
Speed (0) or (1): Choose this if you require 0.1ml dosing increments; 4.7ml or 15.3ml
Speed (2) or (3): Choose this if your single dose amounts will be 1ml or greater
2. Press SAVE to set the new pump speed
Alkalinity supplement pump: Calibration
1. Press CALIBRATE PUMP
![]()
2. Take a look at how many ml the doser dispensed and type-in that amount into the Flow rate of the pump field.
3. Press SAVE
Alkalinity supplement pump: Create dosing schedule
- Press the Dosing schedule tab
- Select a dosing mode
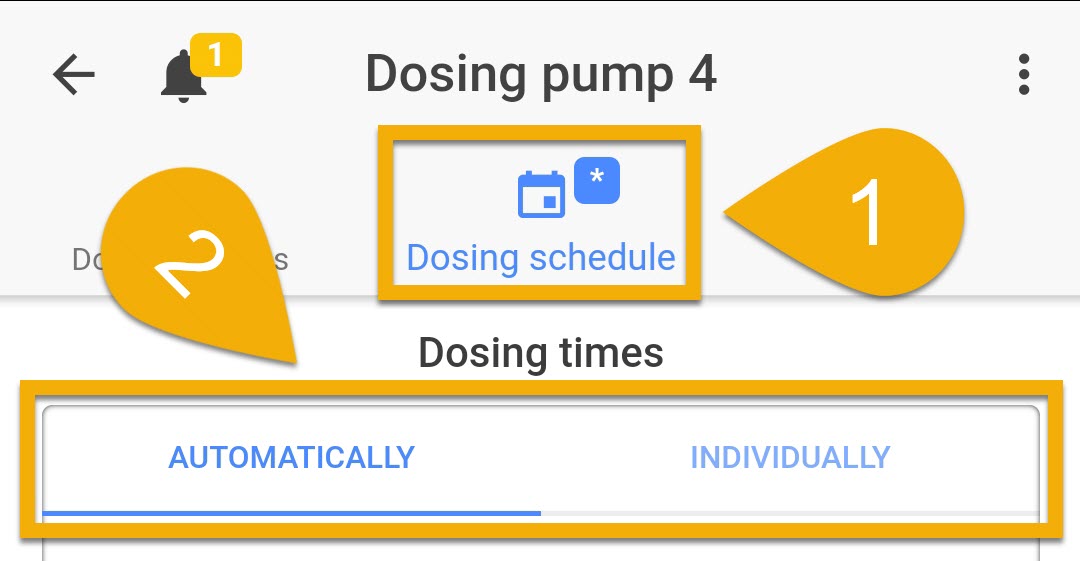
The dosing mode you select will depend on how you want to set your dosing schedule
Automatically: Allows you to specify the number of doses per day, amount per dose and time of the first dose.
For example, if you want to dose 50ml you can set the pump to 5 doses per day and 10ml per dose; 5 x 10ml = 50ml total dose per day. Each dose will be evenly split throughout a 24hr window.
Individually: Allows you to specify the exact time to dose and amount to dose at that time
3. Select a day mode, then press SAVE
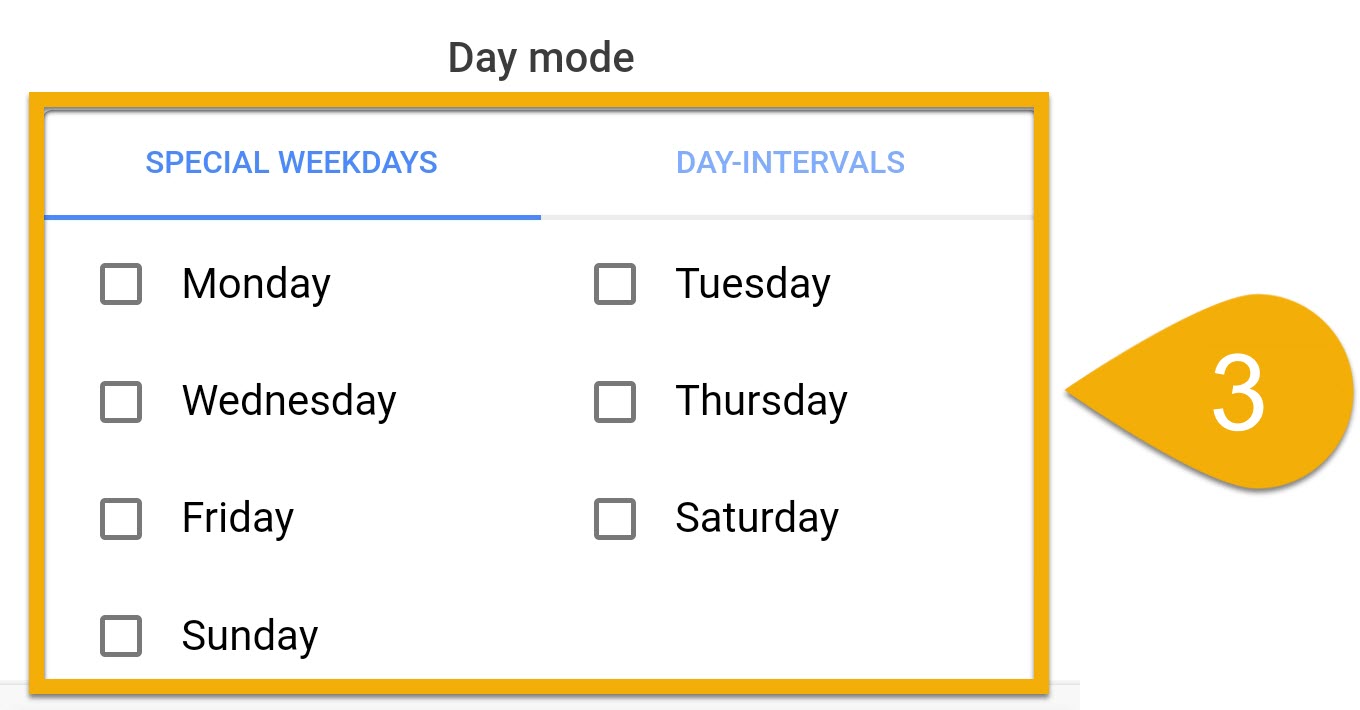
The day mode you select will depend on how often you want to dose
Special weekdays: Allows you to choose specific days of the week to run the dose schedule
Day-intervals: Allows you to specify how often to dose and set a dosing delay
For example, Repeat every 3 days = Dose schedule will run every 3 days
Starting in is a delay. If you want to delay the dose, specify by how many days
— Install and position remaining tubes
With all the pumps setup and calibrated, it is time to connect the remaining tubes.
- Empty all the dosing lines by pressing and holding down the manual override buttons on the doser
2. Take the water sample tube to the LEFT of the pump head and place it in your sump
NOTE: Make sure this tube is placed in an area that is free from micro bubbles and detritus
3. Take the water sample tube to the RIGHT of the pump head and connect it to the KHD port labeled Water Sample IN

4. Take the reagent tube to the LEFT of the pump head and insert it into the reagent bottle. Once done, press and hold down the manual override button until both the IN / OUT lines are primed with reagent fluid.
NOTE: There should be NO POCKETS of air in either the left or right side of the tube!
5. Take the reagent tube to the RIGHT of the pump head and connect it to the KHD port labeled Reagent IN

6. Take the waste water tube to the LEFT of the pump head and connect it to the KHD port labeled Waste water OUT
7. Take the waste water tube to the RIGHT of the pump head and connect it to your waste water container or drain

8. Using the remaining portion of silicone tube, take a piece and connect it to the VENT connector at the back of the KHD.
Run this tube into your waste water container or drain as shown below


HOW-TO VIDEO (Part 2)
KH Director Initial Setup (Part 3)
Now that you’ve completed part 2 of the setup, you can move onto part 3 which shows you how to connect and calibrate the KH Director pH probe. We will also show you how to assign the correct dosing pumps to the KHD and how to configure your KHD test settings.