About ProfiLux Expansion cards
ProfiLux Expansion Cards allow you to expand the capabilities of your ProfiLux (3 and higher) controller. With these cards you can add additional ports and connectors for probes, sensors, 1-10v devices and more
Safety precautions
When working with sensitive electronics, it is imperative to discharge yourself from any static before proceeding any further:
- Power OFF the ProfiLux or Expansion Box and disconnect all cables and sensors from the device
- Touch an unpainted metal or grounded surface to discharge yourself from static
- Avoid wearing any clothing that may carry a static charge
- Place the device on a grounded surface
What you’ll need
Before proceeding any further, make sure you have the following:
| Smooth anti-static surface to place ProfiLux controller or Expansion Box |
| T10 torx screw driver for opening device housing |
| Expansion Card of choice |
Open the ProfiLux / EXB2 housing
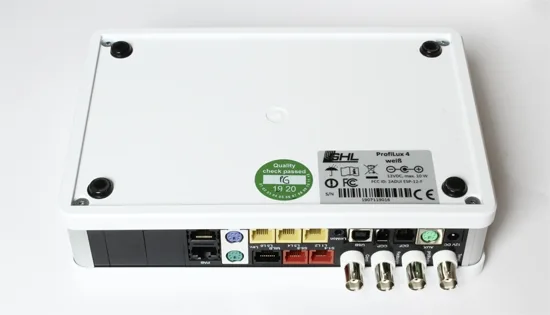
- Turn the ProfiLux controller or Expansion Box upside down
- Using the T10 Torx screwdriver, remove the 4 screws and place them on the side

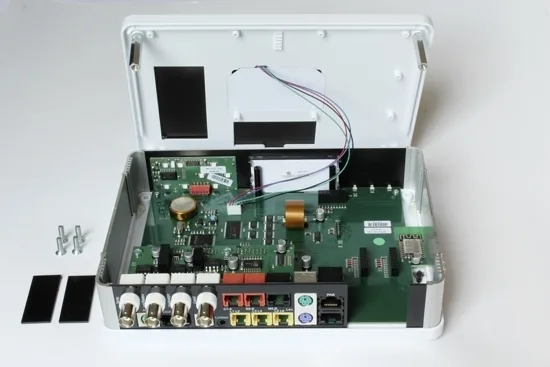
3. Place the device right-side up and carefully lift up the top cover
Inside the device there are thin cables which power the top cover’s GHL logo light. As you lift up this top cover, make sure you do so SLOWLY so you do not damage the cables. There is no need to disconnect this cable as long as you position it as shown in the illustration.

Install Expansion Card
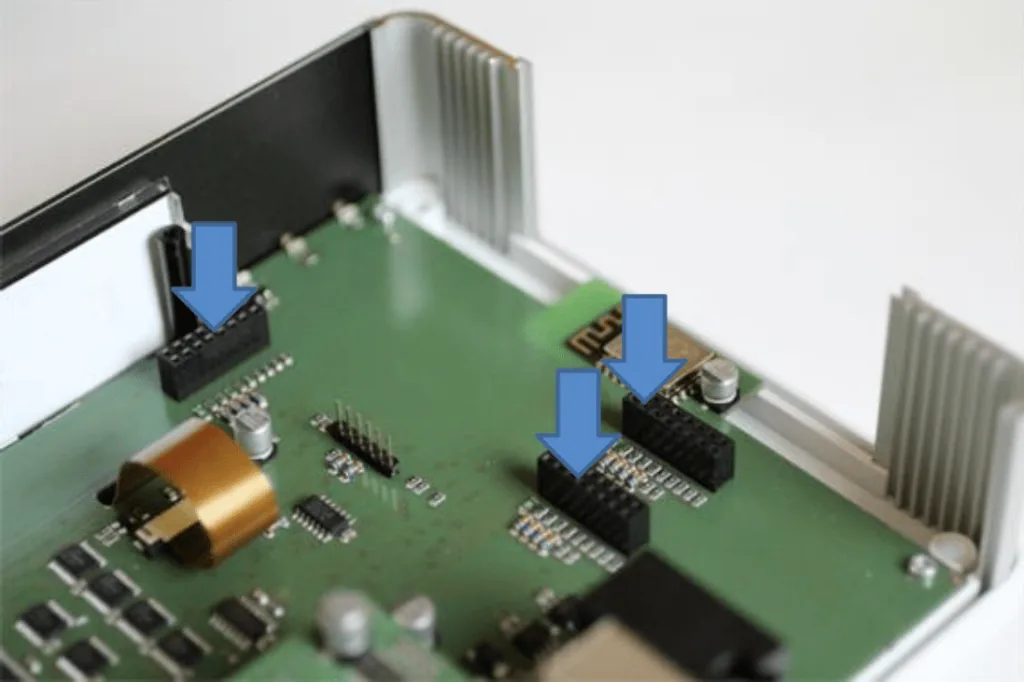
- Insert the Expansion card into one of these slots.
Remove the black cover plate if installing a card that will have cables connected to it.
NOTE: The third Expansion Card slot (closest to the P4 front display) is used for connecting the PLM-PWC card for wireless Mitras LX7 control.

- NEVER insert the card with excessive force
- Make sure ALL the pins from the card are fully inserted into the Expansion Card slot
Close the housing and reassemble
- Re-insert any remaining black cover plates
- Carefully re-seat the top cover onto the ProfiLux or Expansion Box
- Place the device upside down and re-insert the screws to close the housing
- Make sure the front and side panels and module plates fit perfectly into the grooves of the top and bottom cover.
- DO NOT use excessive force!
4. Re-connect all cables and sensors to your device and power it ON.
The newly installed card will automatically be detected by the ProfiLux.