
About Mitras LX7 and Wi-Fi connectivity
There are multiple ways to get the Mitras LX7 connected to your Wi-Fi network. The quickest option is to follow the Initial Setup steps shown here.
This article will show you the alternate way to connect the Mitras to your Wi-Fi network using the Automatic IP address method. Depending on the platform you plan to use for this process (GHL Connect app, web interface or GHL Control Center), the steps will be slightly different.
Choose the platform you will be using and follow the steps provided.
If you have more than 1 LX7 fixture running over your aquarium, you only need to get the MASTER LX7 connected to your Wi-Fi network. Since the master LX7 will be controlling slave LX7s, you would only need wireless access to the master to make any changes.
The Mitras can join your Wi-Fi network using either the Auto IP or Static IP method. Even though both options will get you connected, the method you choose will depend on your specific needs. Here is a brief description of each option…
Automatic IP (DHCP): This method allows your Wi-Fi router to automatically assign an available IP address to the Mitras LX7. With the Auto IP method, your router is free to change and assign a NEW IP address to the fixture at any time. This option is recommended for those who will be connecting to their fixture via myGHL cloud ONLY.
Static IP: Instead of having your router assign an IP address (Auto IP), this method allows you to set a specific IP address for the Mitras LX7. The IP address you assign will be locked-in and cannot be changed by the router. If you plan to connect to the Mitras MOSTLY over a local connection (when you are within the range of your Wi-Fi network), AND also myGHL cloud, we recommend setting a Static IP.
The how-to steps for that can be found here:
Static IP setup
If yes, we recommend you follow the steps shown in Option 2: Access the Mitras Web interface
Wi-Fi setup via GHL Connect app and Web Interface
The process for getting the Mitras connected to your Wi-Fi network is identical in BOTH the app and web interface.
FIRST, choose the platform you will be using and follow those steps to get connected…
— Option 1: Connect to LX7’s hotspot signal (App)
- Power ON the Mitras LED and wait 10-15 seconds for the device to fully bootup.
- Using your smartphone or tablet, search for nearby Wi-Fi networks and connect to the Mitras hotspot signal.
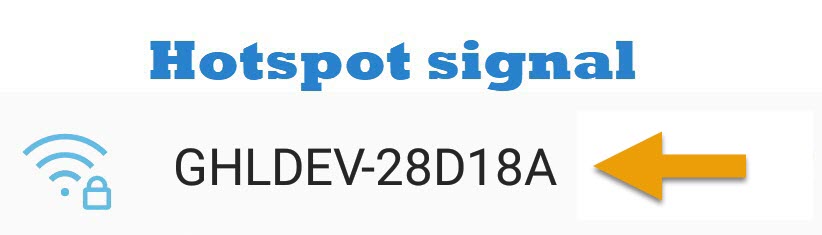
By default, this will be listed as GHLDEV with Starfish as the password. - Open the GHL Connect app and select your dedicated hotspot connection to connect to the Mitras
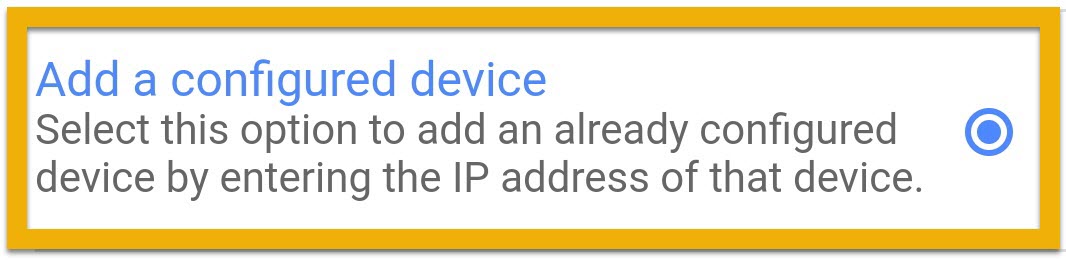
Press Add device, select your device, select Add a configured device, press NEXT (leave configure connection page as-is), type-in a name for this connection; Mitras hotspot
— Option 2: Access the Mitras Web interface
- Power ON the Mitras LED and wait 10-15 seconds for the device to fully bootup.
- Using your device (PC, Mac, iOS or android), search for nearby Wi-Fi networks and connect to the GHLDEV hotspot signal
- Open a web browser and type-in 192.168.4.1 into the address bar to access the web interface
- When prompted for the login info, enter the following:Username: Admin
Password: Starfish
The Mitras web interface will now load and take you to the Dashboard.
When you connect to the web interface for the first time, you will be greeted by the initial setup screen. Follow the provided steps to be taken to the Dashboard.
—- Connect Mitras LX7 to Wi-Fi network (App & Web interface)
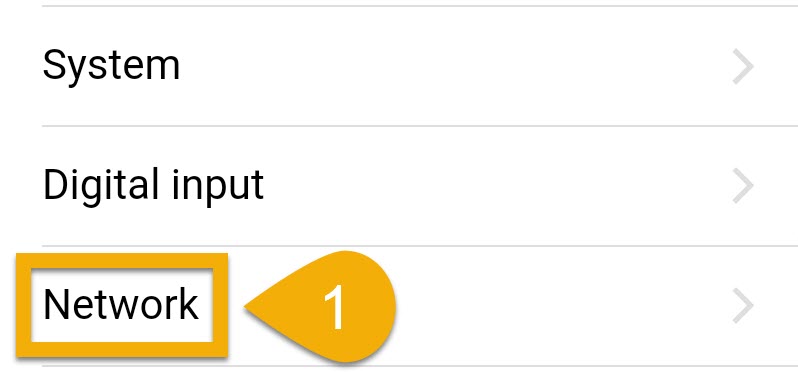
- Press the Menu icon (3-bars on top-left), select Network
2. Press the blue-gear icon to the right of Client mode
3. Turn ON Client mode
4. Fill-in the following information:
- SSID: Type-in the exact name of your Wi-Fi network here. This is a case-sensitive field. For example, if your network name is Household, type-in Household…typing-in household is NOT THE SAME AS Household
- Encryption: Set this to WPA WPA2 PSK; this option works for most Wi-Fi routers
- Wi-Fi key: Type-in the exact password to your Wi-Fi network. This is a case-sensitive field. Password123 is NOT THE SAME AS password123 or Password 123
5. Press APPLY


—- Setup Mitras hotspot settings (App & Web interface)
- Press the blue-gear icon to the right of Access Point mode
- Turn ON Access Point mode
- Fill-in the following information:
- SSID: Type-in the name you want to give to the LX7’s hotspot signal
- Encryption: Set this to WPA WPA2 PSK
- Wi-Fi key: Type-in the password you want to give to the LX7’s hotspot
We recommend choosing this option because it gives you one more way to connect to your Mitras in-addition to connecting to your Wi-Fi network.
For example, if your home internet goes down one-day and you want to connect to your fixture, you will not be able to do so because the Mitras would no longer be connected to your network.
Here is where the hotspot signal comes in handy…
Since the Mitras is emitting its own hotspot signal, you can use your PC, mac, smartphone or tablet to connect to this hotspot signal. Once you are connected to the hotspot, you will be able to connect directly to the device using the GHL Connect app, Web interface or GHL Control Center.
Later in this article, we will provide you with the steps for setting up a dedicated hotspot connection in the app and/or GCC.


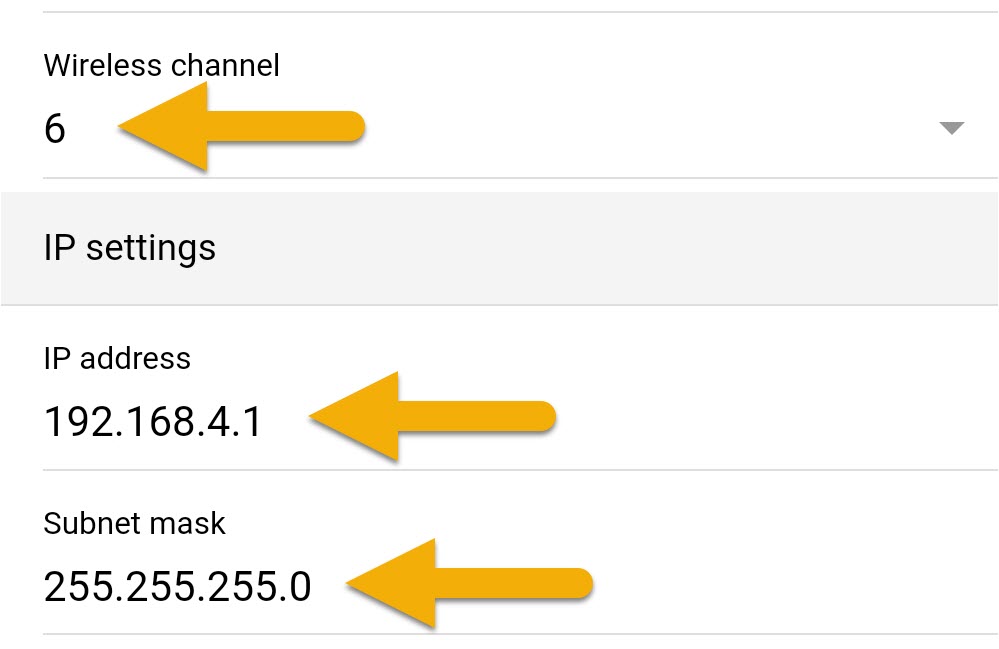
The information you see here is specific to your LX7’s hotspot. The IP address listed (192.168.4.1) is the default IP address of the LX7’s hotspot signal. In 99% of cases, the displayed IP address, subnet mask and wireless channel does not need to be changed. You should ONLY change the IP if you happen to have a router with the same IP address.
—- Apply Wi-Fi settings (App & Web interface)
Now that you’ve entered your network settings and desired hotspot settings into the Mitras, the next step will be to apply those settings.
- Press APPLY
- Press SAVE, then confirm by pressing YES
")
Wait 20 – 30 seconds for the Mitras to connect to your network. After this time has passed, the Mitras should be connected. When you search for nearby Wi-Fi networks, you will also see the customized name of your LX7’s hotspot network.
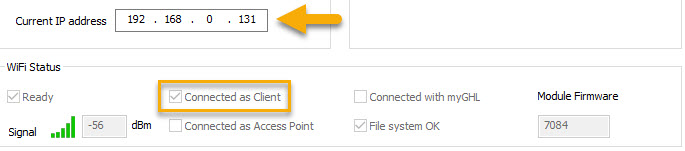
3. Reconnect to the Mitras via the hotspot signal and go to the Network settings page. Take note of the IP address that has been assigned to the Mitras by your network.
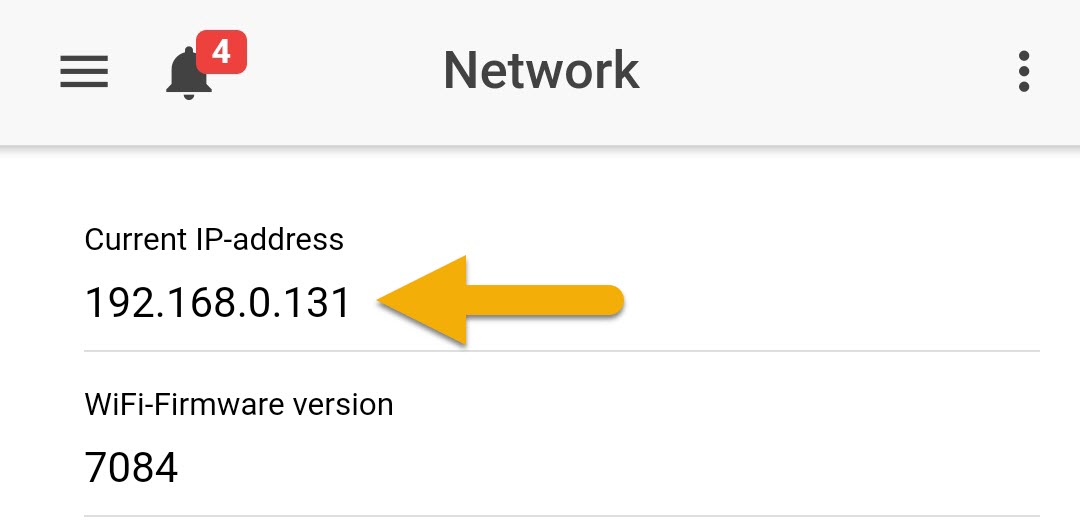
In the photo above, you can see this Mitras was assigned to the IP address 192.168.0.131
The next step will be to create a dedicated connection in the GHL Connect app or GCC using this assigned IP address…scroll to the bottom of the page and follow the steps for at least one connection option
- Wi-Fi: Connect via GHL Connect app
- Wi-Fi: Connect via GHL Control Center
Wi-Fi setup via GHL Control Center
This section will show you another way to get the Mitras connected to your Wi-Fi network using the AUTO IP method.
— You will need…
In order to proceed, you will need the following:
| (Item) | (Purpose) |
| Windows computer | For running GHL Control Center and connecting via USB |
| USB cable | For connecting the Mitras to your PC |
| Wi-Fi name / password | Allows the Mitras to connect to your Wi-Fi network |
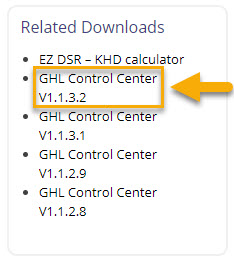
— Preliminary step: Download GHL Control Center
Before you proceed with the steps below, you must first download the newest version of GHL Control Center. This program will allow you to access your GHL device settings via a Windows computer.
To download GCC, visit our downloads page and install the program to your PC.
— Connect to Mitras via USB (GCC)
- Open GHL Control Center (GCC) and connect to your Mitras via USB
If you are not sure how to connect over USB, follow the steps shown here. Once you are connected, you may proceed with the steps below.
— Connect Mitras LX7 to Wi-Fi network (GCC)
- Click the (+) icon to the right of System and select Communication
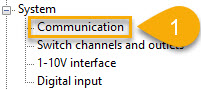
2. Select Client & Access Point mode

We recommend choosing this option because it gives you one more way to connect to your Mitras in-addition to connecting to your Wi-Fi network.
For example, if your home internet goes down one-day and you want to connect to your fixture, you will not be able to do so because the Mitras would no longer be connected to your network.
Here is where the hotspot signal comes in handy…
Since the Mitras is emitting its own hotspot signal, you can use your PC, mac, smartphone or tablet to connect to this hotspot signal. Once you are connected to the hotspot, you will be able to connect directly to the device using the GHL Connect app, Web interface or GHL Control Center.
Later in this article, we will provide you with the steps for setting up a dedicated hotspot connection in the app and/or GCC.
3. In the Settings for client mode column, fill-in the following information:
- SSID: Type-in the exact name of your Wi-Fi network here. This is a case-sensitive field. For example, if your network name is Household, type-in Household…typing-in household is NOT THE SAME AS Household
- Encryption: Set this to WPA WPA2 PSK; this option works for most Wi-Fi routers
- Wi-Fi key: Type-in the exact password to your Wi-Fi network. This is a case-sensitive field. Password123 is NOT THE SAME AS password123 or Password 123

4. Select Obtain IP address automatically (DHCP)

— Setup Mitras hotspot settings (GCC)
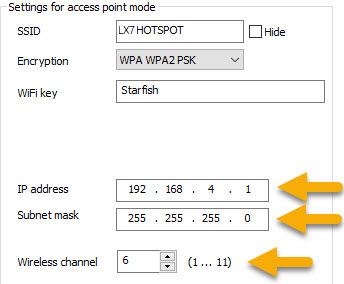
- In the Settings for access point mode column, fill-in the following information:
- SSID: Type-in the name you want to give to the LX7’s hotspot signal
- Encryption: Set this to WPA WPA2 PSK
- Wi-Fi key: Type-in the password you want to give to the LX7’s hotspot

The information you see here is specific to your LX7’s hotspot. The IP address listed (192.168.4.1) is the default IP address of the LX7’s hotspot signal. In 99% of cases, the displayed IP address, subnet mask and wireless channel does not need to be changed. You should ONLY change the IP if you happen to have a router with the same IP address.
— Apply Wi-Fi settings (GCC)
Now that you’ve entered your network settings and desired hotspot settings into the Mitras, the next step will be to apply those settings.
- Click Save changes, then Disconnect
Wait 20 – 30 seconds for the Mitras to connect to your network. After this time has passed, the Mitras should be connected. When you search for nearby Wi-Fi networks, you will also see the customized name of your LX7’s hotspot network.
2. Reconnect to the Mitras via USB and go to the Communication settings page. Take note of the IP address that has been assigned to the Mitras by your network.
In the photo above, you can see this Mitras was assigned to the IP address 192.168.0.131
The next step will be to create a dedicated connection in the GHL Connect app or GCC using this assigned IP address…
— HOW-TO VIDEO: Wi-Fi setup via GCC (Auto IP)
Wi-Fi: Connect via GHL Connect app
This section will show you how to create a dedicated in the GHL Connect app so you can access the Mitras through your Wi-Fi network.
- Open the GHL Connect app
- In the My Devices page, press ADD DEVICE

- Select your GHL device, then press NEXT
- Select Add a configured device, then press NEXT
5. In the Host/IP field, type-in the assigned IP address of your Mitras, then press NEXT
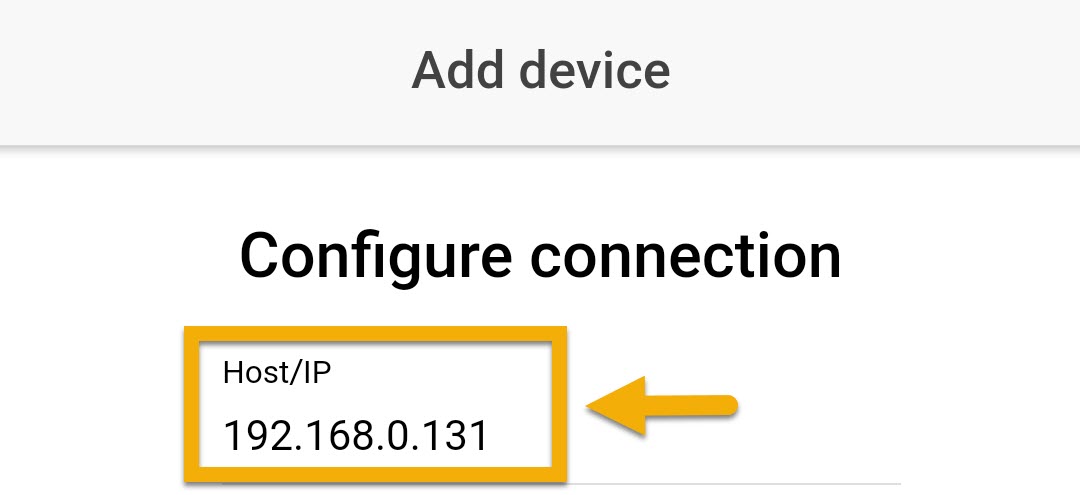
NOTE: This will be the IP address that was assigned to the LX7 by your network.
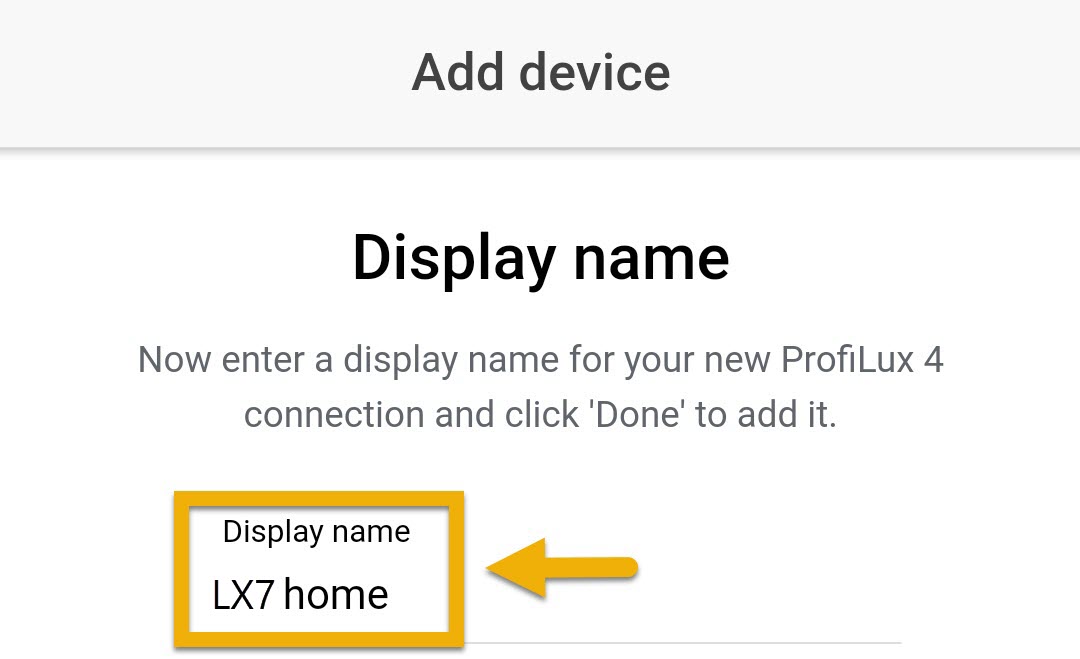
6. Type-in the name you wish to give to this dedicated connection, then press NEXT
7. Select your newly made connection to connect to your Mitras.
NOTE: Make sure your smartphone or tablet is connected to the same Wi-Fi network.
Wi-Fi: Connect via GHL Control Center
This section will show you how to create a dedicated in GHL Control Center so you can access the Mitras through your Wi-Fi network.
- Click Administrate (top-left)
- Click NEW
- Select the Mitras LX7

4. Set the Type of connection to Network (TCP/IP)
5. Give this connection a name; Mitras Wi-Fi
6. In the Host-Name field, type-in the IP address of your Mitras
This will be the IP address which was assigned to your LX7 by your router.
7. Click Save, then click Close

8. Select your newly made connection by either clicking Connect or by double-clicking the respective icon.
If you would like to connect and control your Mitras from anywhere in the world, we recommend adding your device to the cloud.
The steps for that can be found here.