About this Article
This article will show you how to restore factory settings on your GHL primary device. A primary device can be a ProfiLux controller, GHL Doser Standalone or Mitras LX LED luminaire.
Factory Reset GHL Device Hardware
Follow these steps to restore factory settings on your GHL device.
NOTE: GHL Doser 2.1 Standalone and ProfiLux 3 owners, restoring factory settings will also delete the Wi-Fi settings you entered.
NOTE: If you have any of the following devices, the steps provided here will only factory reset the device itself. The Wi-Fi chip will NOT be affected. If you wish to factory reset that too, follow the steps provided further down in this article.
- ProfiLux 4 / 4e / IL / Mini / Light
- Doser 2.2 / 2.2 Maxi / IL
- Mitras LX 7 / 7 IL
In order to proceed with a factory reset, you will need the following:
| Item | Purpose |
| Windows computer | For connecting to your GHL device |
| USB cable (optional) | For connecting the GHL device to your PC |
| GHL Control Center Installed | For restoring factory settings on your device |
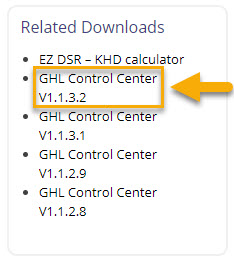
Before you proceed with the steps below, you must first download the newest version of GHL Control Center. This program will allow you to access your GHL device settings via a Windows computer.
To download GCC, visit our downloads page and install the program to your PC.
1. Open GHL Control Center (GCC) and connect to your GHL device
If you are not sure how to connect, follow the steps shown here to connect via USB. Once you are connected, you may proceed with the steps below.
2. Click the Extras tab, then select Default settings

3. Click OK to restore factory settings

The Wi-Fi chip on your device operates separately from the hardware. When you restore factory settings on this device, the Wi-Fi settings will remain as-is. If you would like to restore the factory settings on your Wi-Fi chip, see “Factory reset Wi-Fi chip“.
Factory Reset Wi-Fi Chip via Online Update Tool (NEW)
The web-based update tool is your direct link to the newest Wi-Fi module firmware. With this option, you don’t have to download anything extra, just click the link below and follow the directions.
The tool is compatible with Mac, PC, and Mobile devices. All you need is a web browser (Chrome or Edge) and the USB cable connected to your computer.
- ProfiLux 4 / 4e / IL / Mini / Light
- Doser 2.2 SA / 2.2 Maxi SA / SA IL
- Mitras LX 7 / 7 IL
To update your Wi-Fi module firmware, simply click the link below and follow the instructions there:
https://api.myghl.com/wifi-update/
Factory Reset Wi-Fi Chip
If you have a ProfiLux controller (4 / 4e / Mini / Light / IL) or Mitras LX7 LED, you can also restore the Wi-Fi chip back to factory settings by following the steps shown here.
Instead of following the steps below, you can also clear all the input fields of the network settings yourself and save them.
In order to proceed with a Wi-Fi chip factory reset, you will need the following:
| Item | Purpose |
| Windows computer | For connecting to your GHL device via USB |
| USB cable | For connecting the GHL device to your PC |
| WiFi updater tool downloaded and extracted | For restoring Wi-Fi chip factory settings on your device |
Before you proceed with the steps below, you must first do the following:
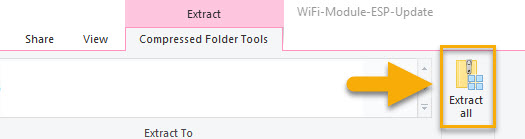
- Go to our downloads page and download the newest version of the Wi-Fi update tool. This will be labeled as WiFi-Module-ESP-Update in the Firmware section.


- Open the downloaded folder and unzip it to your desktop or “downloads” folder
- Open the WiFi-Firmware-Update-Tool folder, then open the same folder again and lastly open the WiFi-Firmware-Update-Tool

- Take the USB cable that came with your GHL device and connect one-end to your device and other-end to your PC
Your PC will now make a sound to indicate that it has detected a USB device.
1. Click the Refresh port button and select the COM port number that belongs to your GHL device
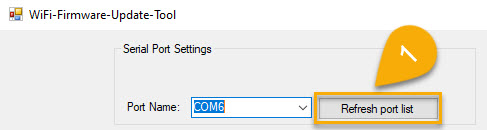
If you are not sure which COM port belongs to your device, open Device Manager. You will see your device listed in the Ports (COM & LPT) section.
![]()
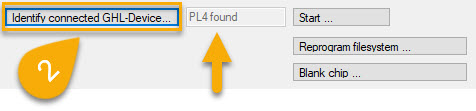
2. Click Identify connected GHL-Device. Your GHL device will now be displayed.
3. Click Blank chip, wait for process to complete, wait 10-15 seconds, then power cycle your GHL device. Proceed to the next step when device is fully booted up.
4. Click Start, wait for process to complete, wait 10-15 seconds, then power cycle your GHL device. Proceed to the next step when device is fully booted up.
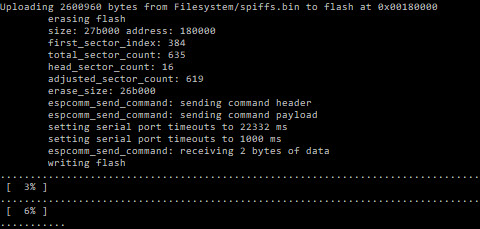
5. Click Reprogram Filesystem, wait for process to complete, wait 10-15 seconds, then power cycle your GHL device. When device is fully booted up, the default hotspot signal (GHL-DEV) will be visible by your PC, Mac, Smartphone and Tablet

The update process will begin. A command window will open, then close by itself when the process is complete.
During the update, the display (if available) on your GHL-Device will show “Transparent mode”.
Click here to check out the troubleshooting section.