About Vortech pump control
With the proper GHL accessory, you can use the ProfiLux controller (model 3 and higher) to wirelessly control one or more Vortech pump (models mp10, 40 and 60 QD). With the ProfiLux as the master device, it will wirelessly control your Vortech pumps when they are assigned and set to slave mode.
In terms of flow control, you can freely program each pump to run its own separate schedule or run in-sync or anti-sync with each other. If you’d like, you can also have these pumps react to maintenance modes or feed modes.
Due to EcoTech’s decision to restrict 3rd party control, Vortech pumps running on Mobius firmware will not be controllable via the GHL Vortech controller. This change prevents Vortech firmware from being rolled back and 3rd party control is no longer supported on current model Vortech pumps.
The GHL Vortech controller can only control Vortech pumps running on pre-Mobius firmware.
Before you begin
- If you are not familiar yet with the operating concept of the ProfiLux Controller, we highly recommend to first read the Knowledgebase Article “How the ProfiLux Controller works“. It gives you an understanding of the basics and the operational concept of the controller
- Make sure you have all the correct parts on-hand (See also list below)
You will need…
| Accessory | Purpose |
| GHL Vortech controller (PL-0757) | Allows the ProfiLux to wirelessly control one or more Vortech pumps |
| GHL PAB-cable | Allows you to connect the Vortech controller to your P4 system |
Preliminary step: Assign your PAB-device
Before you proceed with the steps below, you must first assign the Vortech controller accessory to the ProfiLux. If you are not sure how to do this, click here for the step-by-step instructions.
If you have a Vortech pump made after June 1, 2020, your pump and its current driver firmware will not be compatible with the GHL Vortech controller. You will need to downgrade the firmware on your pump driver BEFORE proceeding any further.
This also applies to those who updated to the Mobius ready firmware. A downgrade will be necessary.
Clear the driver memory of your Vortech pump
Do this for the new pumps you want to use.
- Press and hold the MODE and SET buttons together until the control dial blinks Red / White / Blue
- Hold the MODE button until the dial blinks Red / Purple
- Hold the SET button until the pump resets
Enter setup mode for Vortech pumps
Do this for the new pumps you want to use.
- Press and hold the MODE and SET buttons together until the control dial blinks Red / White / Blue
- Press the SET button until the dial blinks Blue / Yellow
Assign Vortech pumps to ProfiLux
Do this for the new pumps you want to use.
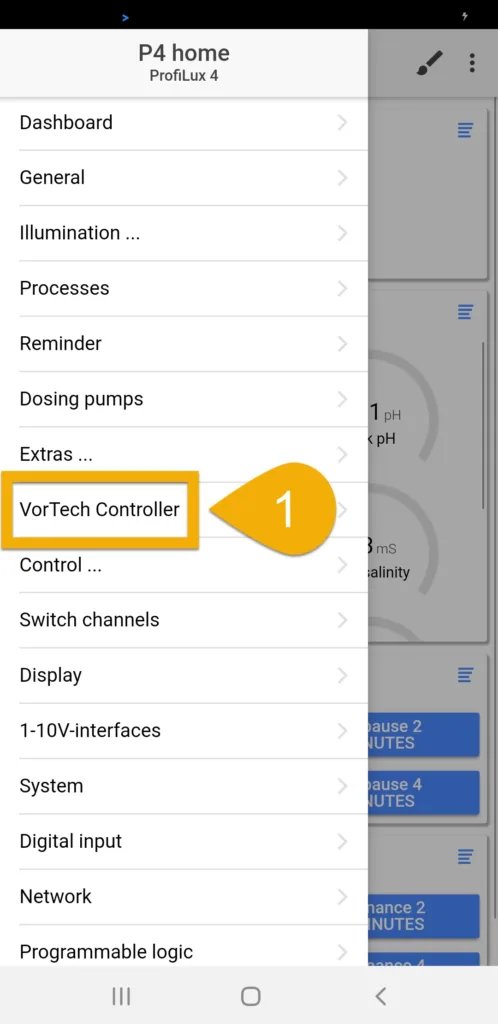
- Press the Menu icon and select Vortech Controller
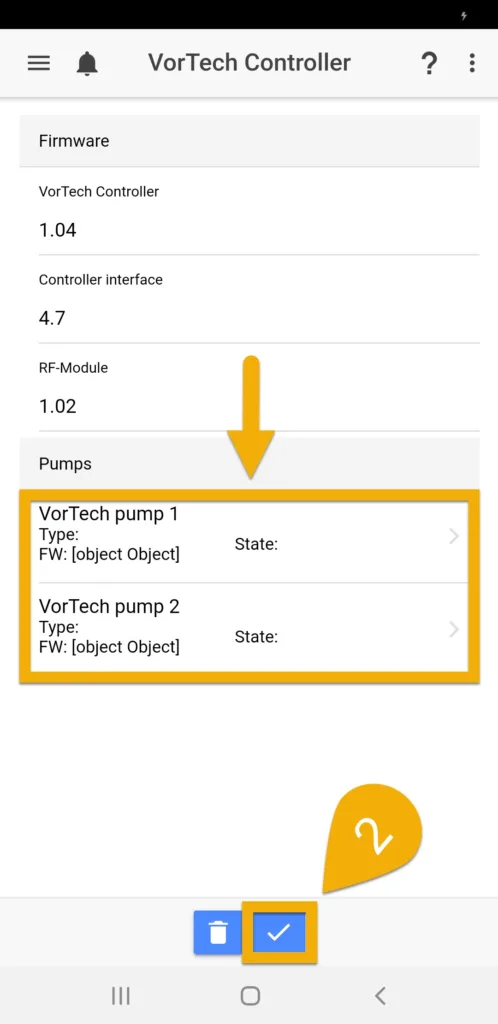
- The Vortech controller will now display the pumps it is detecting, press the (√)
icon to assign the pump(s). Your Vortech driver dials will now turn green. This means they are now paired to the ProfiLux.
No Vortech pumps found?
If your Vortech controller does not find the Vortech pump(s), repeat the steps in Assign Vortech pumps to ProfiLux.
Setup Vortech pump flow settings and behavior
- Select a pump to open its settings page
- Scroll to the bottom and specify if this pump will react to Maintenance modes, AWC events, Feed pauses, or Thunderstorm effects
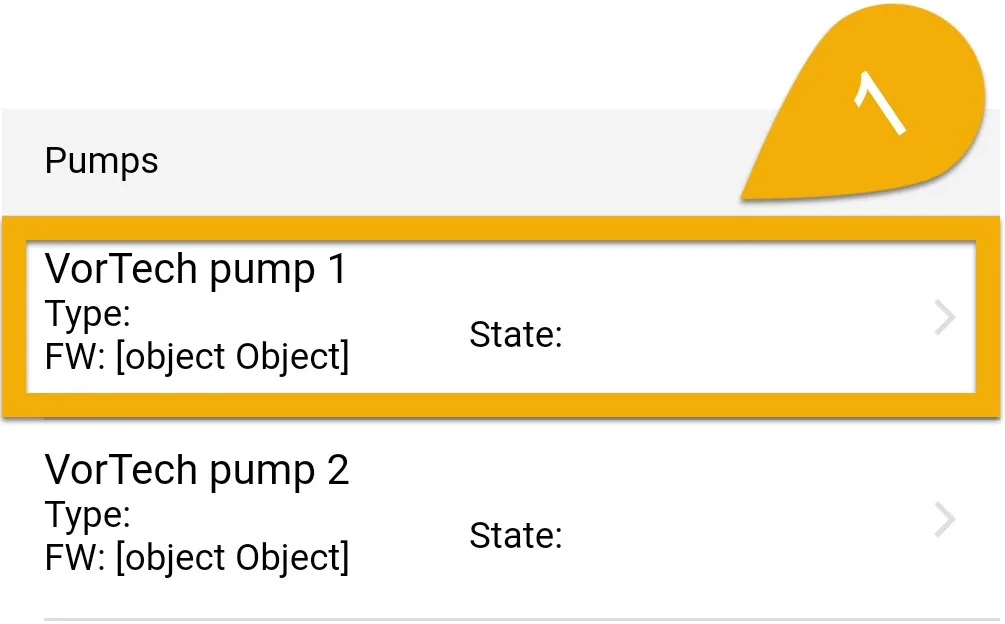
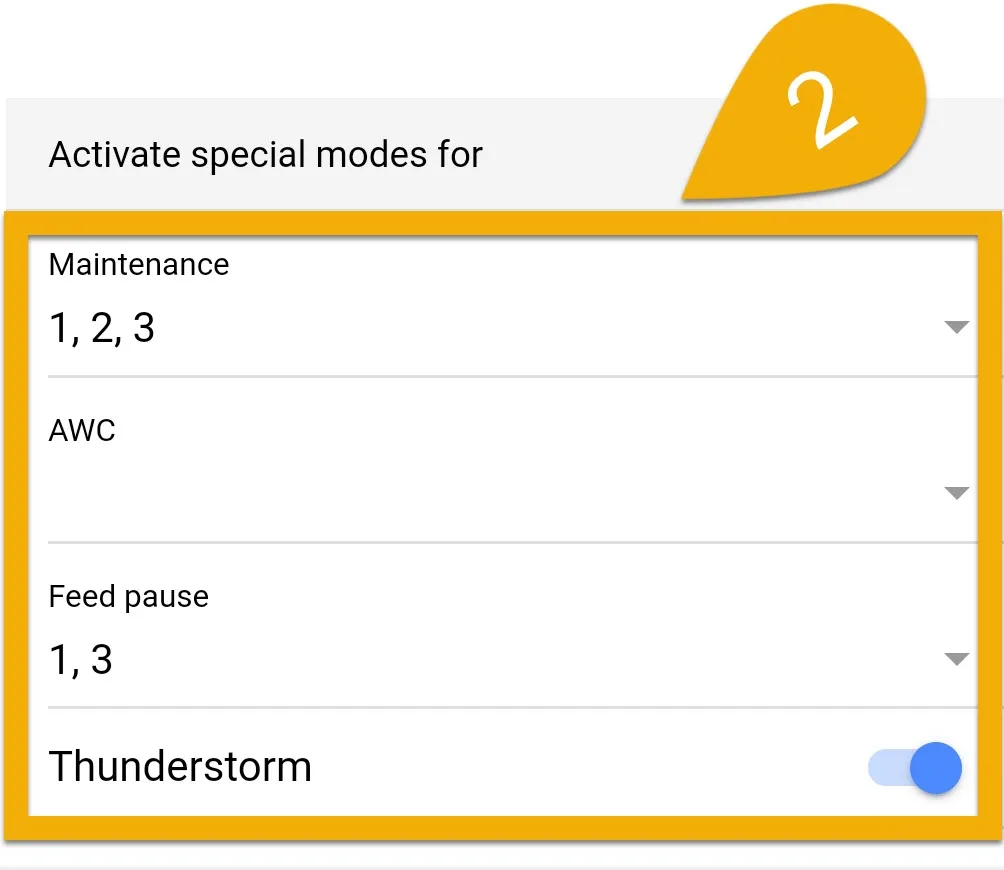
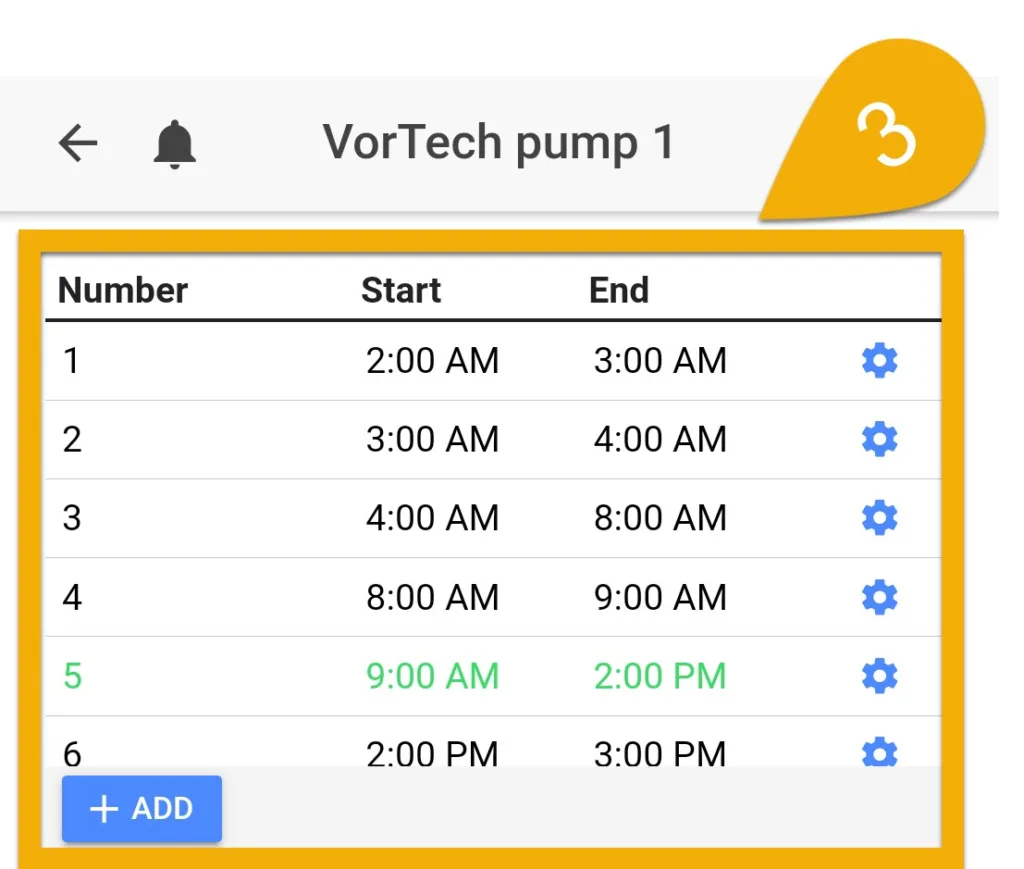
3. At the top of the screen, you can either customize the existing flow settings or you can start from scratch. If you scroll down this table, you will also see the option to specify how the pump will react during a maintenance mode, AWC, Feed pause event or thunderstorm effect
Pressing the blue-gear icon will open the control settings.
If you wish to use the built-in ProfiLux Stream pump settings, select a time-point and select ProfiLux controlled mode, then specify the pump channel to assign this pump to. After doing this, you must assign the pump to a Stream group. For steps on how to do this, click here.
4. Press SAVE
If you have multiple Vortech pumps, press the back-arrow and repeat steps 1 – 3
