
About ProfiLux firmware updates
Firmware updates allow your ProfiLux controller to benefit from the newest available features and improvements. With the use of GHL Control Center and USB connection, you can update the firmware of your device by closely following the steps shown below.
What you will need
In order to do this kind of update, you will need the following:
| Item | Purpose |
| Windows computer | For connecting to your GHL device via USB on GCC |
| USB cable | For connecting to your GHL device via USB |
| GHL Control Center installed | For performing the firmware update |
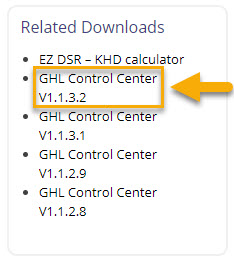
Before you proceed with the steps below, you must first download the newest version of GHL Control Center. This will allow you to have access to the newest firmware version for your GHL device.
To download GCC, visit our downloads page and install the program to your PC.
Performing the firmware update
1. Open GHL Control Center (GCC) and connect to your GHL device via USB
If you are not sure how to connect, follow the steps shown here to connect via USB. Once you are connected, you may proceed with the steps below.
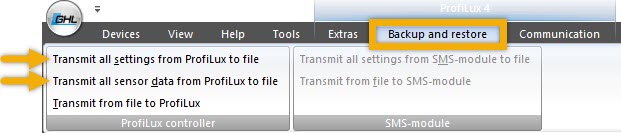
Before proceeding with a firmware update, we highly recommend you backup your device settings and sensor data. Doing so will ensure that you have a backup of your original settings if you need them. Depending on how large of a firmware jump you are doing, it is possible you may need to use your backup file to restore your original controller settings and probe calibration data.
To backup your controller settings and probe calibration data, click the Backup and restore tab.
- Select Transmit all settings from ProfiLux to file to create a backup file of your settings.
- Select Transmit all sensor data from ProfiLux to file to create a backup file of your probe calibration data.
If you are using virtual sensors (ProfiLux 3 and higher), make sure you write down the control settings for these sensors as they will not be included as part of the backup settings file. Depending on the extent of the changes in the firmware update, if the ProfiLux is reverted to factory settings, at least you’ll have your virtual sensor info ready to re-enter.
Don’t remember how to create virtual sensors?
Click here
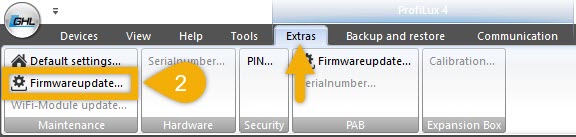
2. Click the Extras tab, then select Firmware update
3. Click “I understood settings…“, then click Continue
4. Click NEXT, the ProfiLux will now go into bootloader mode (GHL Logo light on top of device will turn OFF)


5. Click Device manager and check the COM number of the “USBVCOM” driver

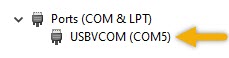
6. Type-in the COM port number that is shown on your Device Manager for this “USBVCOM” driver, then click NEXT
For example, since the illustration above shows that this driver is on COM 5, we entered COM 5 here…

7. GHL Control Center will automatically select the newest firmware version for your ProfiLux device, click NEXT to begin the firmware update
If you would like to choose a different firmware version, click the folder icon here:

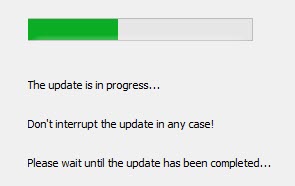
During this process, there will be a pop-up displayed. This pop-up message will go away on its own within a few seconds. If it does not, you can press OK.
8. When you see this screen, click NEXT
9. Click Finish to close this window


10. Power cycle (Power OFF / ON) your device to complete the update. On bootup, your ProfiLux will now display the newly updated firmware version.
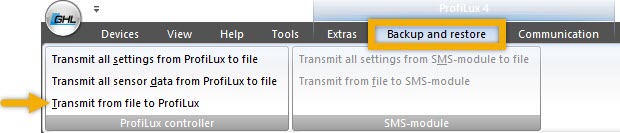
If the firmware update reverted your controller to factory settings, you can restore your original settings by reconnecting to the controller, clicking the Backup and restore tab and selecting Transmit from file to ProfiLux. Navigate to the location of your backed up files and select it to upload it to the ProfiLux.
You can also restore your settings via GHL Connect by following the steps shown here.