
About This Article
This article will show you how to setup a Mitras Lightbar 3. The steps provided here will walk you through the connection process as well as the programming process.
The Mitras LB3 can be used as a standalone lighting option w/out controller or with the following ProfiLux Controller products:
- ProfiLux Light Wi-Fi
- ProfiLux Mini Wi-Fi
- ProfiLux 4 / 4e
- ProfiLux IL
What You Will Need…
Before you get started with the Mitras LB3 setup, make sure you have the following:
Setup with a ProfiLux controller

| Item | Purpose |
| ProfiLux Controller | For controlling the Mitras LB3 |
| Mitras LB3 | For lighting the aquarium |
| Adequately sized Mitras LB-PSU | For powering 1 or more Mitras LB3 |
| Mitras-LB-Splitter | For connecting to one or more LB3 and controlling via ProfiLux |
| Mitras-LB-RJ45 cable | For connecting to splitter and ProfiLux |
Setup without a controller

| Item | Purpose |
| Mitras LB3 | For lighting the aquarium |
| Adequately sized Mitras LB-PSU | For powering 1 or more Mitras LB3 |
| Mitras-LB-Splitter (Optional) | For connecting to one or more LB3 |
| Generic timer | For scheduling the ON/OFF times of the Mitras LB3 |
Mitras Lightbars can be powered by different sized power supplies. The size power supply YOU will need depends on your specific application and how many LB3 you wish to run off of a single PSU. If you plan to add additional LB3 and wish to run them off the same PSU, you must make sure you have a PSU that can support the total wattage of current and future LB3.
Here are a few scenarios to help you make sure you have the correct size PSU:
- 2x Mitras LB3 100 (Max 75.6 watts)
- Total wattage: 151.2 watts
- Power supply needed: At least 200 watts
- 2x Mitras LB3 200 (Max 75.6 watts) – but plan to ADD a 3rd Lightbar in the future
- Total wattage: 226.8 watts (including future 3rd Lightbar)
- Power supply needed: At least 300 watts
If you are seeing this behavior, this is an indication from the LB that there is insufficient power or an overloaded power supply. Please resolve this by utilizing a properly sized PSU. This behavior applies to all Lightbar models.
Find a Suitable Mounting Option
The Mitras LB3 provides you with various mounting options. You can either choose one of the 4 options or DIY your own mounting solution.


At the top of the LB3, you’ll see the groove running along the middle of the lightbar. If you put a few M4 screws in here, it will allow you to implement your own hanging solution.
Connect Mitras LB3 Cables
With your Lightbar(s) mounted, you’re now ready to connect the cables. Refer to the illustrations below to help you connect everything correctly.
Connection to ProfiLux

Connection to ProfiLux (4+ LB3)

Connection without a Controller

DO NOT power ON the LB3 until you connect all the cables.
Setup ProfiLux for Mitras LB Control
Before you can create your light schedule, you must first tell the ProfiLux it has a Mitras Lightbar connected to it so it can be controlled properly.
1. Connect to your ProfiLux controller
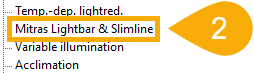
2. Press the (+) to the right of Illumination and select Mitras Lightbar & Slimline
3. Select Mitras LB 3 and set the Max power output

4. Click the System link to navigate to the System settings page

5. Set COM 1 to Mitras Lightbar

6. Click Save changes
If you wish to do this, connect the RJ45 cable to the MiLB port on the EXB2, then set it like this:

- Connect to your ProfiLux controller
- Press the Menu icon, select Illumination, then select Mitras Lightbar & Slimline
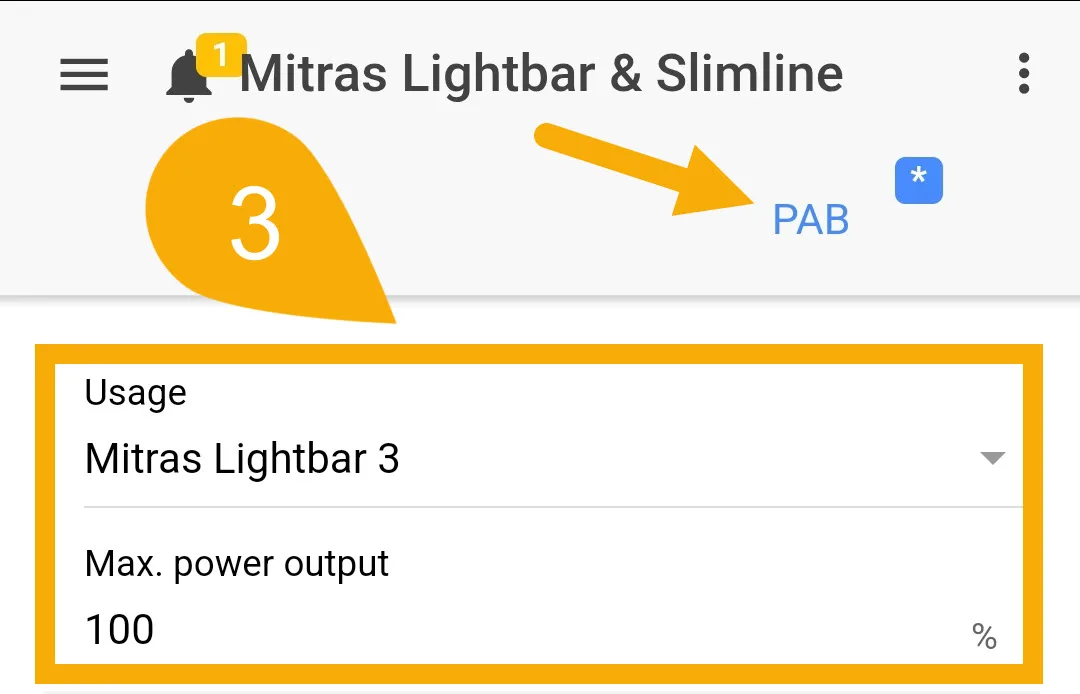
- In the Usage section, select Mitras Lightbar 3 and set the Max power output
NOTE: Max power output determines the overall brightness of the Lightbar - Press Select the communication… to navigate to the System settings page
- Set the Communication interface to Mitras Lightbar
- Save settings


If you wish to do this, connect the RJ45 cable to the MiLB port on the EXB2, then tap the PAB tab and set it like this:
Lightbars cannot be programmed independently.
When programming the LB3, please note that all LB3 are controlled and programmed as a group. For example, if one has a group of LB3 consisting of different variant LB3, the intensity, simulation features, and light schedule affect all as a single group.
Create Light Schedule
- Connect to your ProfiLux.
- Press Menu -> Illumination -> Multichannel Setup.
- Press the Settings tab and tap Configure new lamp(s).
- Follow the on-screen wizard to get you setup


During the setup wizard, you will be asked to assign an illumination channel for each channel in your Lightbar group. Pay close attention to this important step because you DO NOT want to assign LB3 channels to illumination channels which are already in-use by other equipment (other lights, UV, Refugium light, etc.).
If you have certain illumination channels already in-use, make sure you assign the LB channels to illumination channels which are NOT IN-USE.
Setting Overall Brightness of LB3
After creating your schedule or at any time, you can freely adjust the overal brightness of your LB3 group. To do so, follow the instructions below.
- Press the (+) to the right of Illumination and select Mitras Lightbar & Slimline.
- Set the Max power output to your desired brightness.

- Save settings.
If you wish to do this, make the adjustment in the Settings for Mitras Lightbar Interface in PAB devices section.
- Press Menu -> Illumination -> Mitras Lightbar & Slimline.
- Set the desired power output for your LB3.
- Save settings.


If you wish to do this, press the PAB tab and make the adjustment there.
OPTIONAL: Using the Acclimation Feature
Depending on what kind of lighting you had prior to adding the Mitras Lightbar, you may want to consider using the acclimation feature to steadily ease your corals into the new spectrum. If you wish to do that, follow the instructions below:
- Press the (+) to the right of Illumination and select Acclimation.
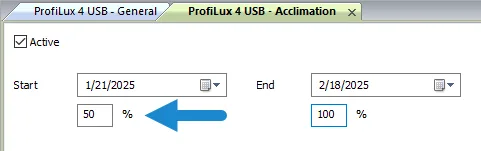
- Select Active, set the starting and ending dates for the acclimation period, then set the starting and ending brightness.
- Save settings.

Here’s an example of how this setting affects the overall brightness of the LB3 during the acclimation period:
- If your LB3 overall brightness is set to 70%

- And your starting Acclimation brightness is set to 50%
- This means that at the start of the acclimation period, the overall brightness will be 50% of the overall brightness. In other words, the overall brightness will be 35% at the beginning.
- From that point on, the overall brightness will steadily increase as you get closer to the acclimation end-date where it will run at 100% of the normal brightness (70%).
- Press Menu -> Illumination -> Acclimation
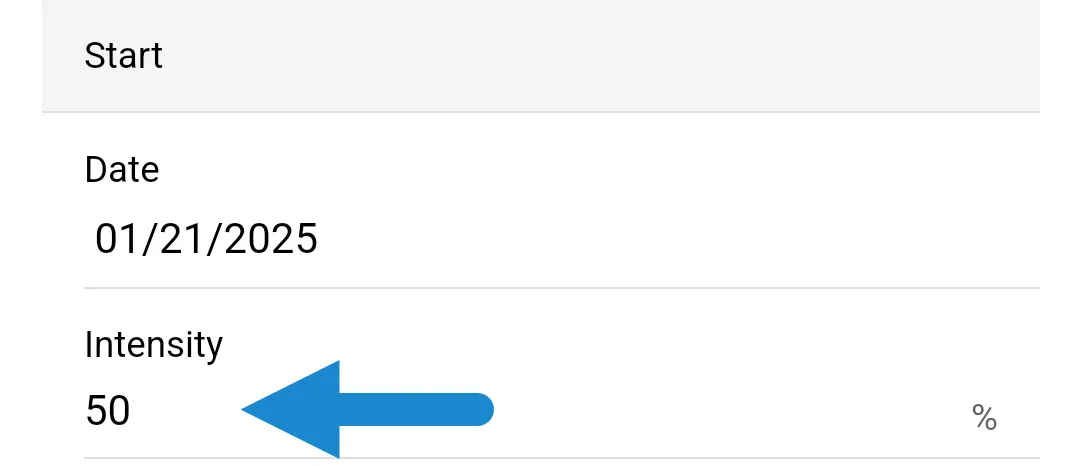
- Select Active, set the starting and ending dates for the acclimation period, then set the starting and ending brightness.
- Save settings.


Here’s an example of how this setting affects the overall brightness of the LB3 during the acclimation period:
- If your LB3 overall brightness is set to 70%

- And your starting Acclimation brightness is set to 50%
- This means that at the start of the acclimation period, the overall brightness will be 50% of the overall brightness. In other words, the overall brightness will be 35% at the beginning.
- From that point on, the overall brightness will steadily increase as you get closer to the acclimation end-date where it will run at 100% of the normal brightness (70%).
OPTIONAL: Setup Light Scenes Feature
The Light Scenes feature comes in handy when you want to temporarily view your aquarium under only blues or whites.
Set up this feature if you think you’ll want to do any of the following:
- Temporarily turn ON only blue or white LEDS outside of your normal light schedule.
- Temporarily turn ON or OFF certain LED channels during or outside of your normal light schedule.
- Temporarily turn OFF all lights during your normal light schedule.
- Press the (+) to the right of Illumination and select Light Scenarios.
- Set the duration of the Light Scene.
NOTE: This affects ALL Light Scenarios. - Set the fade duration of the Light Scene.
NOTE: This affects ALL Light Scenarios.
NOTE: Fade duration determines how long it takes for it to transition from the current light setting to the Light Scene setting. - Type-in a description for the Light Scene you want to setup (Example: Photo Blue)
- Select the LED channels you want to react to this scene and set the brightness for each one.
- Save settings.
If you wish to test this Light Scene, tap the Number button for the corresponding Light Scene you want to activate.


- Press Menu -> Illumination -> Light Scenarios
- Choose an unused Light Scene
- Give this Light Scene a name (Example: Photo Blue)
- Set the duration of this scene and fade duration
NOTE: This affects ALL Light Scenarios.
NOTE: Fade duration determines how long it takes for it to transition from the current light setting to the Light Scene setting. - Select the LED channels which you want to react to this scene and set the brightness for each one
- Save settings
If you wish to test this Light Scene, tap the START button.


