About Emergency Update process
This article will show you how to recover your Standalone GHL Doser in case the device becomes unresponsive due to an interruption during a firmware update.
What you will need…
In order to do this kind of update, you will need the following:
| Item | Purpose |
| Windows computer w/ newest version of GCC installed | Allows you to access and use the tool for the emergency update |
| USB cable | For transmitting the firmware via USB |
| 3 / 32 Allen wrench | For opening the GHL Doser |
| Clean anti-static surface | To protect the doser from any static and/or scratches |
In order to access the newest firmware version for your device, you will need to download the newest version of GHL Control Center (GCC). You can find the latest version in our downloads page.
Open the GHL Doser
- Disconnect all cables that are connected to your Doser, including power cable
- Take the device and place it upside down onto a static-free surface
- Remove the 4 screws from the bottom of the device using the 3/32 Allen wrench
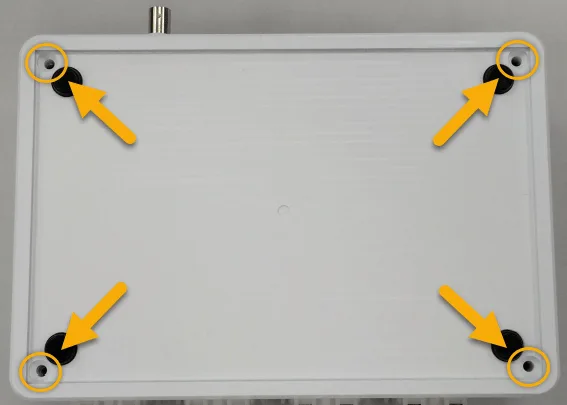
4. Carefully place the device in the upright position and lift the top cover up
Please note there are thin cables connecting the top cover’s LED logo light to the doser’s main board. DO NOT pull the cover off too quickly.
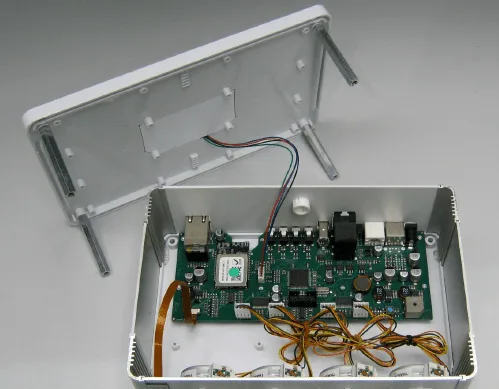
5. Connect the USB cable to an available port on your PC and to the USB port on the Standalone Doser
6. Power ON the device
Right-click on the Windows logo (lower-left corner of screen) and select Device Manager.
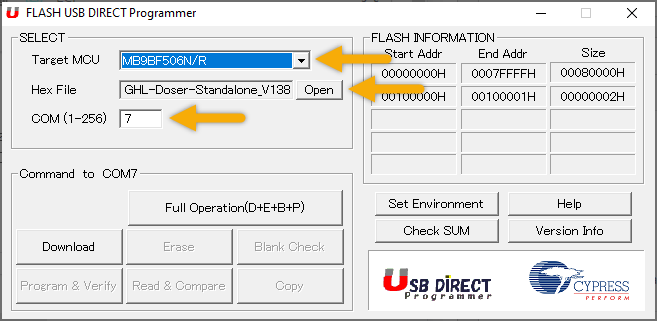
You will need to know the COM port number for the next step.
If you do not see the USBVCOM driver listed on your computer, the driver must be manually installed. Steps for manually installing this driver can be found here.
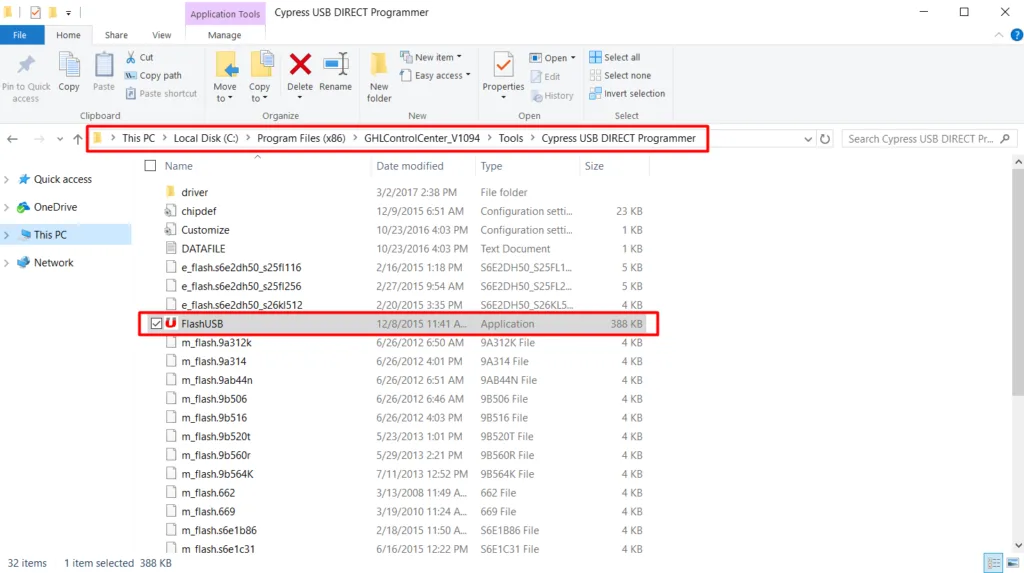
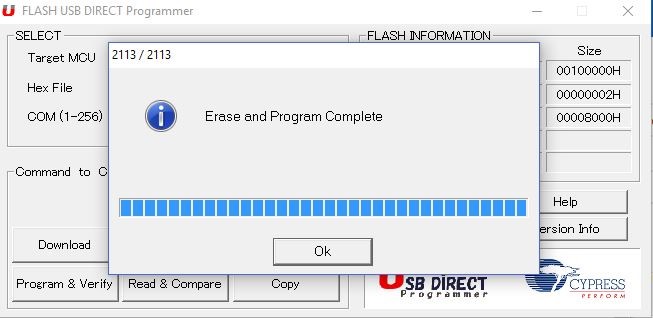
The firmware file for the Doser SA can be found in the program directory of GHL Control Center. When you click OPEN, select “This PC”, then C:\ProgramFiles\GHLControlCenter_V1xxx\Firmware\GHLDoserStandalone
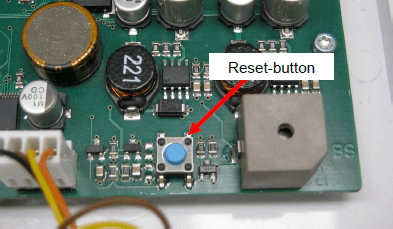
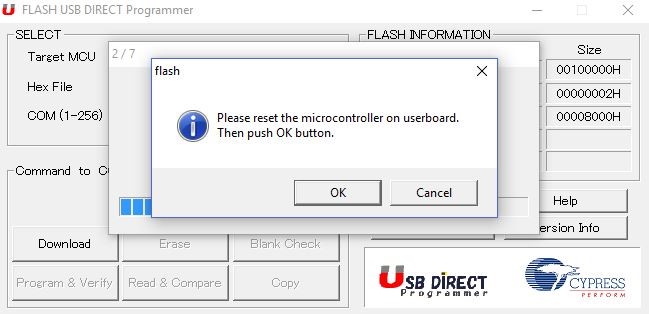
If you get an error after clicking Full Operation, that means either the wrong COM port number was selected or the GHL Doser SA did not go into download mode. In this case, check your settings and click on “Full Operation” again, then press the reset button on the Doser for at least 5 seconds, then click “OK”.
Reassemble the Doser
- Disconnect the Doser from the power supply and USB
- Carefully put the top-cover back onto the Doser making sure that no cables get caught between the cover enclosure points
- Reconnect all cables and power ON the device

