
About heater control
The ProfiLux can be used to control your heater through the use of a temperature probe and powerbar socket. When the temperature probe detects a drop in temperature, the ProfiLux will switch ON the powerbar socket that belongs to the heater. Once the desired temperature is reached, the assigned socket will turn OFF.
Before you begin
- If you are not familiar yet with the operating concept of the ProfiLux Controller, we highly recommend to first read the Knowledgebase Article “How the ProfiLux Controller works“. It gives you an understanding of the basics and the operational concept of the controller
- Make sure you have all the correct parts on-hand. (See also list below)
You will need…
| At least one heater |
| Available powerbar socket |
Temperature probe calibration not required
GHL Temperature probes are factory calibrated and do not require further adjustment. If you strongly feel the need to adjust the probe readings, you can do so by pressing ADJUSTMENT TEMPERATURE. Only do so IF you have another probe you trust more.
Create the heater function
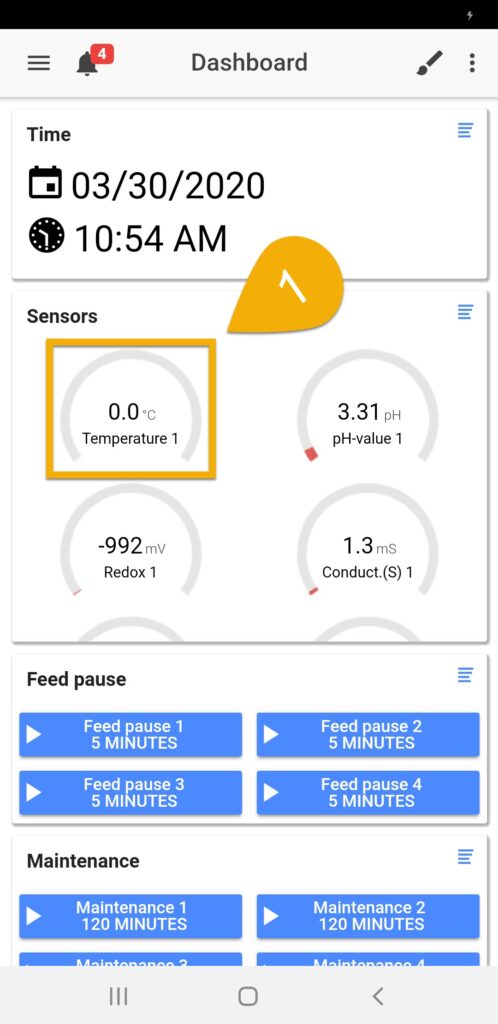
- Connect to the ProfiLux, then select a Temperature probe
- Select the desired temperature unit, Fahrenheit or Celsius
- Type-in a description for this probe; Tank temperature
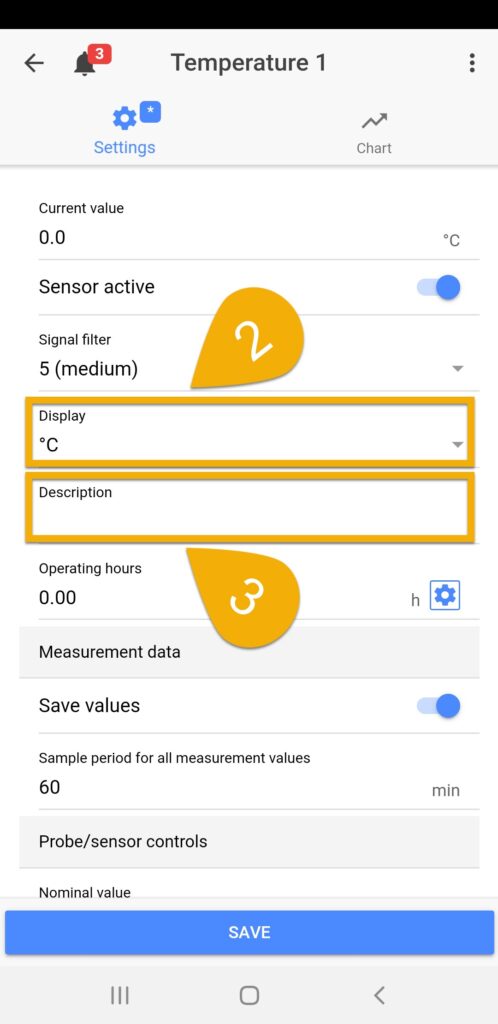
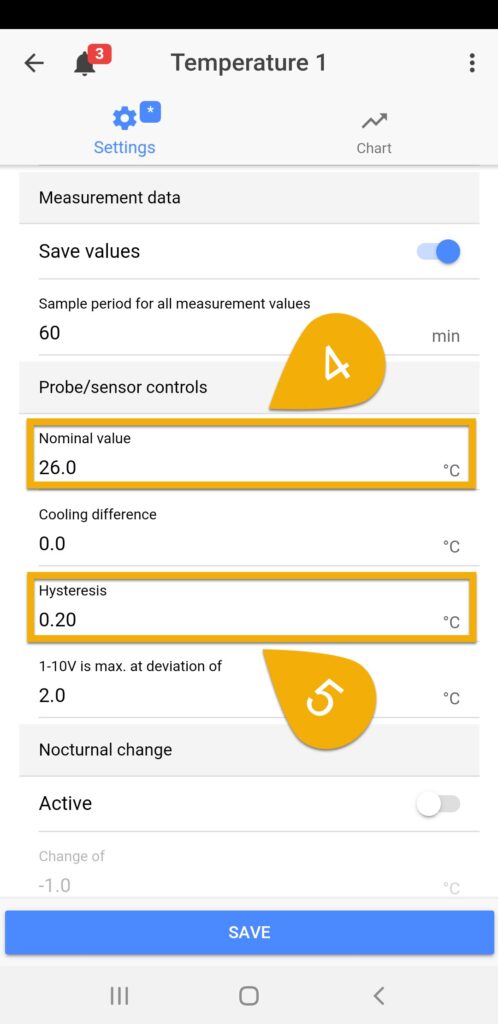
4. Set desired Nominal value
This is where you type-in your desired temperature. For example, if you would like to keep your tank temperature close to 77°F or 25°C
5. Set the desired Hysteresis, then press SAVE
The number you enter here will determine how much of a swing you are willing to allow in-between the nominal value. This determines when heating / cooling functions are triggered.
By default, this value is set to 0.36°F or 0.20°C. This value works for most individuals. If you want a tighter or wider range of control, type-in a smaller or larger value.
Example
If Nominal value is 25°C (77°F) with a Hysteresis of 0.20°C (0.36°F), the heater will turn ON when the temperature is 24.9°C (76.8°F) and lower.
Optional: Trigger alarm notification for temperature swings
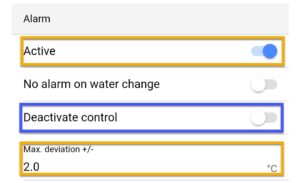
If you wish to activate an alarm when temperature rises or falls beyond a certain temperature, set the alarm to ACTIVE and set the maximum allowed deviation. If you want to turn OFF your heater when the temp reading goes outside the allowed deviation, ENABLE Deactivate control.
Assign the heater function
- Press the back-arrow, press Menu icon
- Select Switch channels
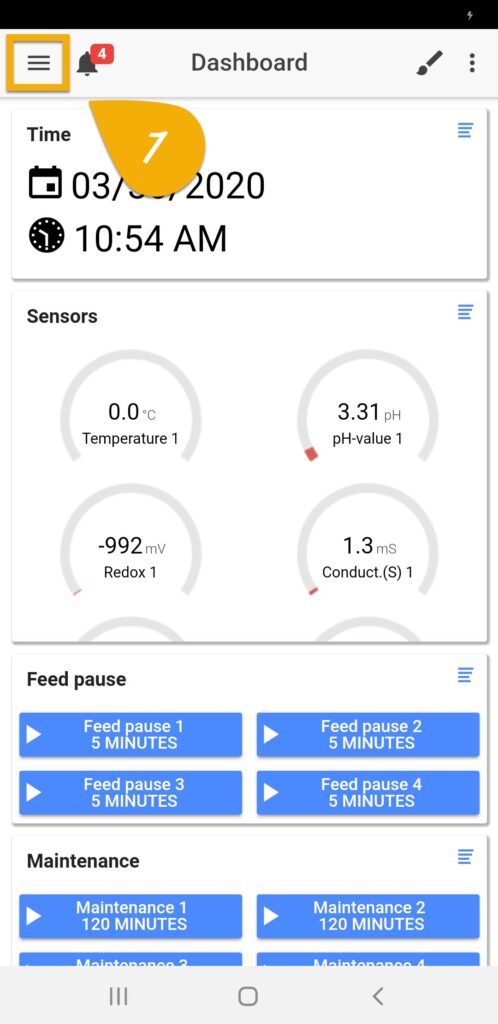
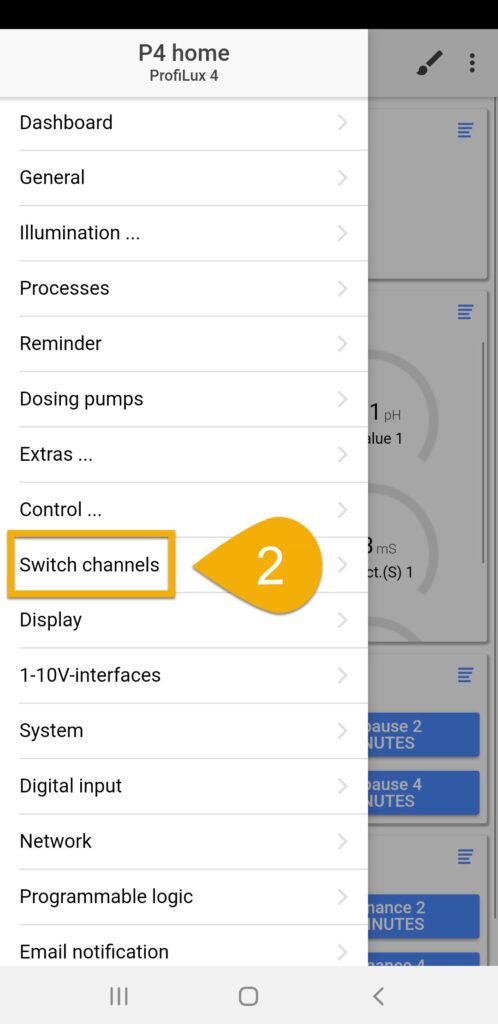
3. Select the outlet that has or will have the heater connected to it
4. Type-in a description; Heater
5. Set the function to TEMPERATURE and HEATER, then press SAVE
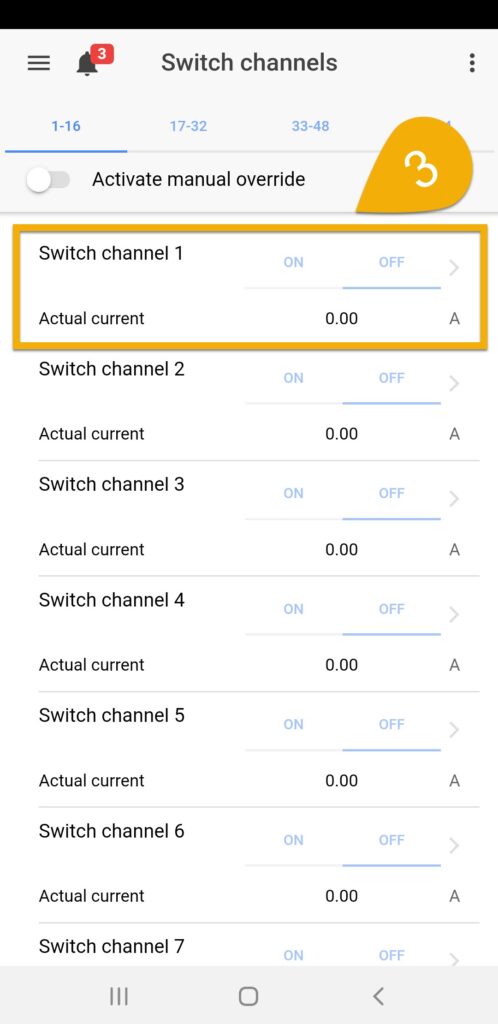
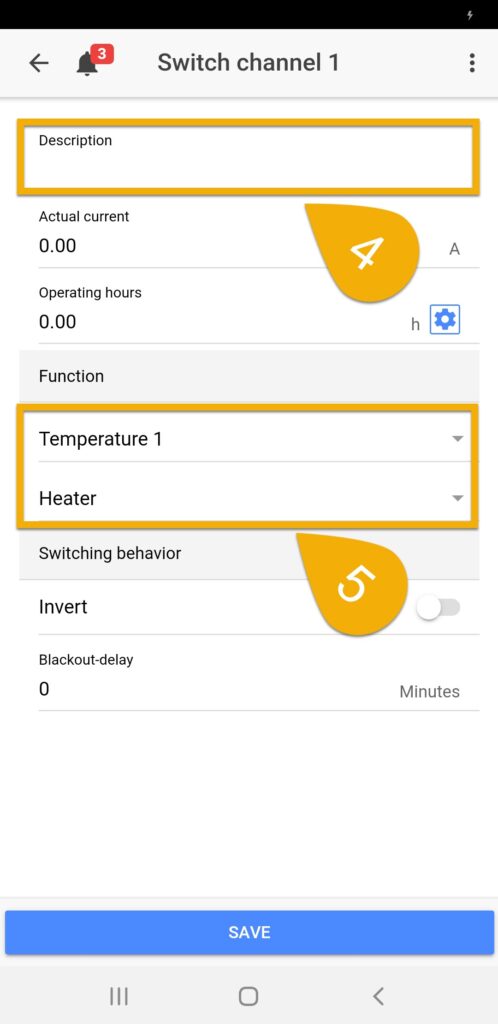
Have more than one heater?
If you have more than one heater, you can apply the same temperature control function to multiple heaters. Simply select the powerbar outlet that has the other heater connected and assign it the SAME function as you did earlier.
For example, with 2 heaters plugged into separate outlets, both outlets would have the same TEMPERATURE HEATER function assigned.
HOW-TO VIDEO
Alternate method via ProfiLux touch keys
If you wish to bypass GHL Connect, you can setup heating control by following these steps:
Create the temperature control function
- Press the up or down arrow key
- Select Sensor settings
- Select your Temperature probe
- Select Nominal value and specify your desired temperature
- Select YES to save changes
- Repeat steps 1 – 3, then select Hysteresis
- Set the desired hysteresis, then press YES to save changes
- Repeat steps 1 – 3, then select Alarm and select YES to enable alarm notification
- Specify the max allowed deviation and if control should be disabled during an alarm
- Specify if alarm should be disabled during Auto Water Change, then press YES to save changes
- Repeat steps 1 – 3, then select Display and select the desired unit; Fahrenheit or Celsius
- Select YES to save changes
Assign the temperature control function
- Press the up or down arrow key
- Select System
- Select Sock.outl.func.
- Select the outlet that you want reacting to the temperature control function
- Select Temperature and then select Heater
- Set a Blackout delay, if necessary
- Select NO for Inv.sw.behavior
- Select YES to save changes

